Ford Mustang (1999-2004) Service Manual: 1-2 Accumulator
Removal
1. Compress the 1-2 accumulator cover and remove the accumulator piston retaining ring.
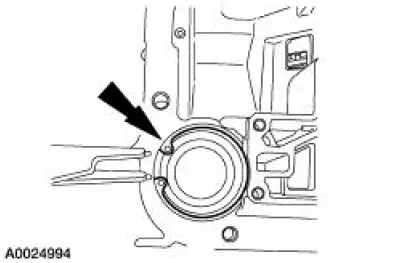
2. NOTE: Note the location of the 1-2 accumulator springs for reference during assembly.
Remove the 1-2 accumulator.
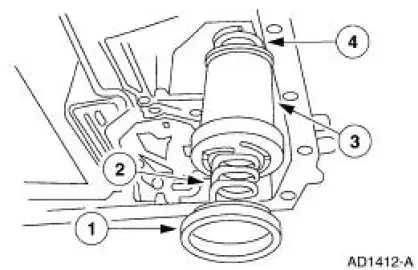
1. Remove the 1-2 accumulator cover.
2. Remove the lower 1-2 accumulator spring.
3. Remove the accumulator piston.
4. Remove the upper 1-2 accumulator spring.
Installation
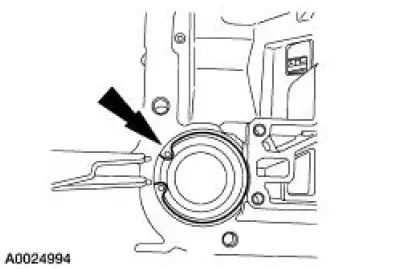
1. Install the 1-2 accumulator.
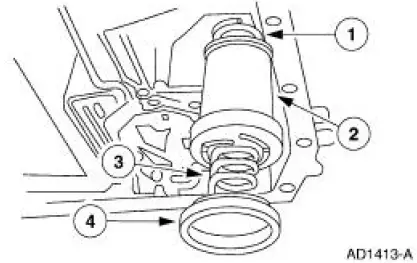
1. Install the 1-2 accumulator upper spring.
2. Install the accumulator piston.
3. Install the 1-2 accumulator lower spring.
4. Install the cover and seal assembly.
2. Compress the accumulator and install the accumulator piston retaining ring.
 Overdrive Servo
Special Tool(s)
Remover/Installer, Servo
Piston
307-251 (T92P-70023-A)
Removal
1. Remove the main control valve body. For additional information, refer
to Main Control Valve
Body ...
 2-3 Accumulator
Removal
1. Remove the main control valve body. For additional information, refer to
Main Control Valve
Body in this section.
2. Remove the 2-3 accumulator piston retainer.
3. Remove the accumulato ...
Other materials:
Evaporative Emission Canister Purge Valve
Removal and Installation
1. WARNING: The evaporative emission system contains fuel vapor
and condensed
fuel vapor. Although not in large quantities, it still presents the
danger of explosion or
fire. Disconnect the battery ground cable from the bat ...
Installation
Using special tool 205-054
NOTE: This is the preferred method for installing the pinion bearing
cups. If necessary, proceed to
Using special tools 205-153, 205-054, and 205-D055 in this procedure for an
alternate method.
1. Position the special tools and th ...
Supercharger Belt Tensioner
Removal and Installation
1. Remove the supercharger drive belt cover.
2. Rotate the supercharger belt tensioner clockwise and remove the
supercharger belt.
3. Remove the bolts and the supercharger belt tensioner.
4. To install, reverse the removal proced ...
