Ford Mustang (1999-2004) Service Manual: Cable and Bracket
Removal
1. Raise the vehicle on a hoist. For additional information, refer to Section.
2. Remove the cable shift from the shifter lever and bracket and discard the clip.

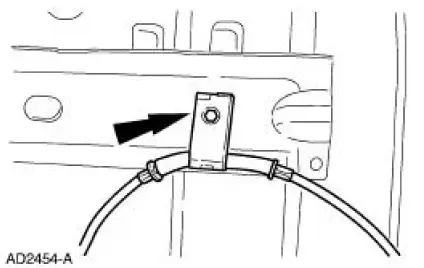
3. Remove the bolt from the cable.
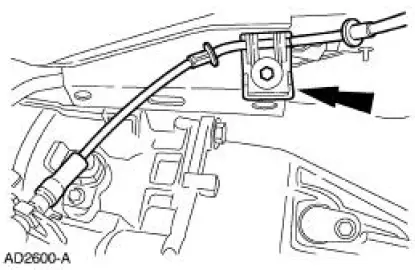
4. Remove the bolt from the cable.
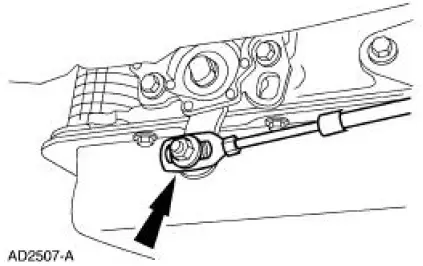
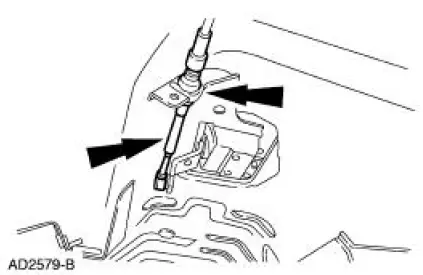
5. Disconnect the transmission range selector lever cable from the TR sensor lever.
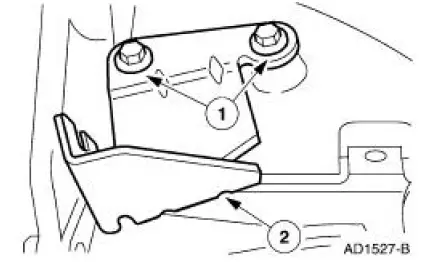
6. Remove the transmission shift cable bracket (7B229) from the transmission.
1. Remove the bolts.
2. Remove the bracket.
Installation
1. NOTE: It is necessary to install a new plastic clip prior to installation.
To install, reverse the removal procedure.
 Brake Shift Interlock Actuator
Removal
1. Remove the shifter top control panel.
2. Disconnect the electrical connectors.
3. Remove the shifter bezel.
4. Remove the bulb from the bezel.
5. Disconnect the electrical connect ...
 Selector Lever
Removal
1. Remove the shifter top control panel.
2. Disconnect the electrical connectors.
3. Remove the shifter bezel.
4. Remove the bulb from the bezel.
5. Disconnect the TCS connector.
6 ...
Other materials:
Engine Cooling (Diagnosis and Testing)
Special Tool(s)
Pressure Tester
014-R1072 or equivalent
73III Automotive Meter
105-R0057 or equivalent
Worldwide Diagnostic System
(WDS)
418-F224,
New Generation STAR (NGS)
Tester
418-F052, or equivalent scan ...
Front Subframe - 4.6L (4V) Engine
Special Tool(s)
3-Bar Engine Support Kit
303-F072
Lifting Bracket, Engine
303-D088 (D93P-6001-A2)
Removal and Installation
All vehicles
1. Remove the steering gear. For additional information, refer to Section .
2. Remove the low ...
Trim Panel - Upper Quarter
Special Tool(s)
Safety Belt Bolt Bit
501-010 (T77L-2100-A)
Removal and Installation
1. Remove the rear seat cushion.
2. Using the special tool, remove the rear safety belt anchor bolt.
3. Remove the screw and the coat hook.
4. Open the ...
