Ford Mustang (1999-2004) Service Manual: Child Safety Seat Belt - Tether Anchor
Removal and Installation
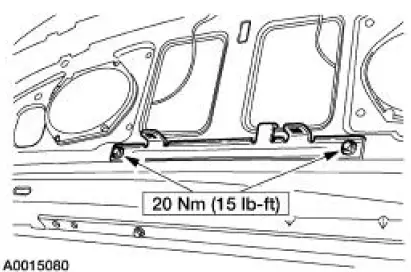
Hard top only
1. Remove the package tray. For additional information, refer to Section.
2. Remove the bolts and the tether anchor bracket.
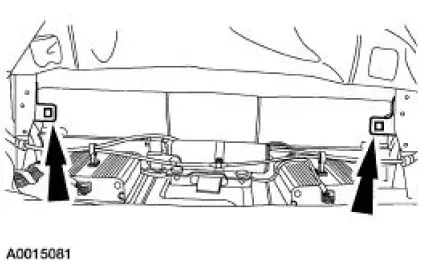
Convertible only
3. NOTE: Rework the sheet metal to its original condition and structural integrity.
The convertible model tether anchors are part of the sheet metal.
- These are accessed through the trunk by removing the trunk front trim.
Hard top only
4. NOTE: Rework the sheet metal to its original condition and structural integrity.
To install, reverse the removal procedure.
Hard top and convertible
5. Check the restraint system for correct operation.
 Retractor - Rear Seat Safety Belt, Convertible
Special Tool(s)
Torx Bit, Safety Belt Bolt
501-010 (T77L-2100-A)
Removal
1. Remove the rear seat cushion.
2. Remove the luggage compartment front lining board (45444).
3. Release the ...
 Safety Belt Buckle - Front Seat
Removal
Driver and passenger seat
1. Remove the front seat. For additional information, refer to Section.
2. Remove the nut and the safety belt buckle.
Driver seat only
3. Disconnect the safety bel ...
Other materials:
Bearing Whine
Bearing whine is a high-pitched sound similar to a whistle. It is usually
caused by worn/damaged
pinion bearings, which are operating at driveshaft speed. Bearing noise occurs
at all driving speeds.
This distinguishes it from gear whine which usually comes ...
Accelerator Cable - 3.8L
Removal and Installation
1. Push the accelerator cable nylon bushing out of the accelerator pedal and
shaft arm.
2. Remove the bolts retaining the accelerator cable to the dash panel.
3. Disconnect the accelerator cable from the throttle body by rotating ...
Wipers and Washers
General Specifications
Torque Specifications
Wipers and Washers
The wiper and washer system consists of the following components:
windshield wiper mounting arm and pivot shaft
pivot arms
windshield wiper blades
windshield washer reservoir
...
