Ford Mustang (1999-2004) Service Manual: Transmission Fluid Cooler Tubes
Removal
1. Disconnect the battery cables.
2. Raise and support the vehicle. For additional information, refer to Section.
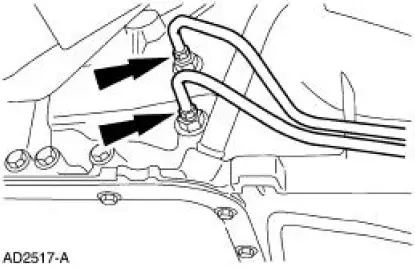
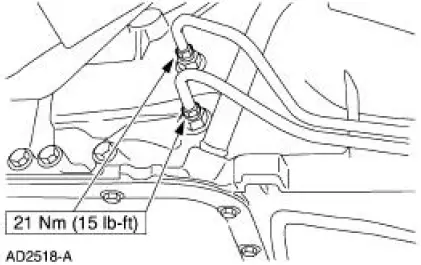
3. Remove the nuts.
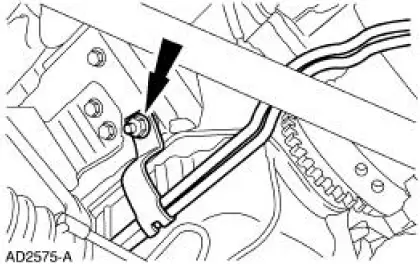
4. Remove the fluid cooler tube bracket at the engine.
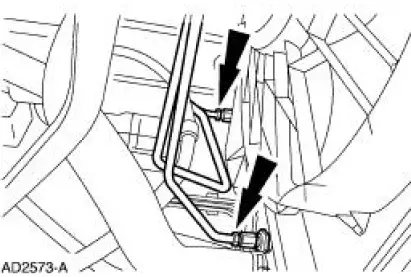
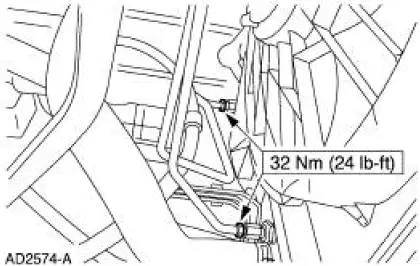
5. NOTE: Use a backup wrench to hold the case fitting secure.
Remove the fluid cooler tubes at the transmission.
Installation
1. NOTE: Use a backup wrench to hold the case fitting secure.
Install the fluid cooler tubes at the transmission.
2. Install the fluid cooler tube bracket at the engine.
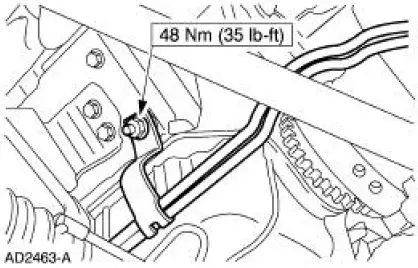
3. Install the nuts.
4. Lower the vehicle.
5. Connect the battery cables.
6. Fill the transmission with fluid and verify proper operation.
- Use Motorcraft MERCON V Automatic Transmission Fluid XT-5-QM or equivalent meeting MERCON V specification.
 Transmission Cooling
Inspection and Verification
WARNING: Never remove the radiator cap under any conditions while the engine
is
operating. Failure to follow these instructions could result in personal injury
and/or dam ...
 Automatic Transaxle/Transmission External Controls
Torque Specifications
...
Other materials:
Piston - Selection
NOTE: The cylinder bore must be within the specifications for
taper and out-of-round before fitting a
piston.
1. Select a piston size based on the cylinder bore.
2. NOTE: For precision fit, new pistons are divided into three
categories within each size ...
Installation
LH mount
1. Position the engine mount and install the bolt and studbolts.
2. Attach the ground cables and install the nuts.
RH mount
3. Position the engine mount and install the bolts and studbolt.
4. Attach the wiring harness and install the nut.
Both ...
Installation
1. CAUTION: Lubricate the filler pipe check valve area and the
tank-to-filler pipe
grommet with Serfactant prior to assembly or damage to the filler pipe check
valve will
occur.
NOTE: A new grommet must be used for the installation procedure due to
its dest ...
