Ford Mustang (1999-2004) Service Manual: Battery Cables
Removal
WARNING: Batteries normally produce explosive gases which can cause personal injury.
Therefore, do not allow flames, sparks or lighted substances to come near the battery. When charging or working near a battery, always shield your face and protect your eyes. Always provide ventilation. Failure to follow these instructions may result in personal injury.
WARNING: Keep out of the reach of children. Batteries contain sulfuric acid. Avoid contact with skin, eyes, or clothing. Also, shield your eyes when working near the battery to protect against possible splashing of the acid solution. In case of acid contact with skin or eyes, flush immediately with water for a minimum of 15 minutes and get prompt medical attention. If acid is swallowed, call a physician immediately. Failure to follow these instructions may result in personal injury.
All vehicles
1. Remove the battery. For additional information, refer to Battery in this section.
2. If equipped, unplug the engine heater intermediate connection.
3. Remove the battery ground cable harness bolt from the radiator support and release the cable harness locators.
4. Disconnect the battery cable harness electrical connectors.
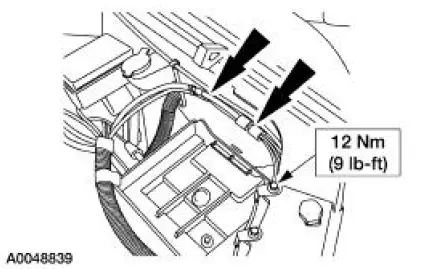
5. CAUTION: The square terminal from the battery must be installed first, followed by the round terminal from the generator. Reversing this sequence may cause circuit failure or arcing.
Remove the battery junction box nut and position the positive battery cable and generator B+ cable aside.
Vehicles with 3.8L and 4.6L 2V engines
6. Remove the cable harness front support bracket by removing the nut, and position the bracket aside.
Vehicles with 4.6L 4V engines
7. Remove the nut and position the left upper battery cable bracket aside.
All vehicles
8. Raise and support the vehicle. For additional information, refer to Section.
9. NOTE: 4.6L 4V shown; 3.8L and 4.6L 2V similar.
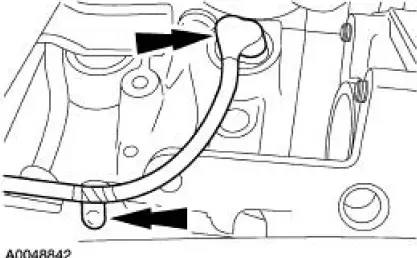
If equipped, remove the block heater plug from the block heater and the harness locators from the oil pan clips.
10. NOTE: 4.6L 4V shown; 3.8L and 4.6L 2V similar.
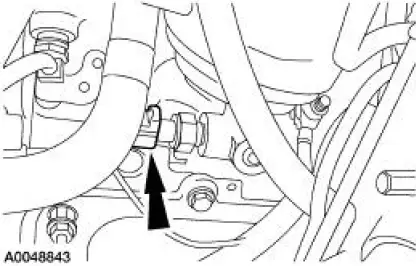
Disconnect the oil pressure sender unit electrical connector.
11. CAUTION: Failure to tighten the negative cable ground nut may cause ground circuit failure or arcing.
NOTE: 4.6L 2V shown; 3.8L and 4.6L 4V similar.
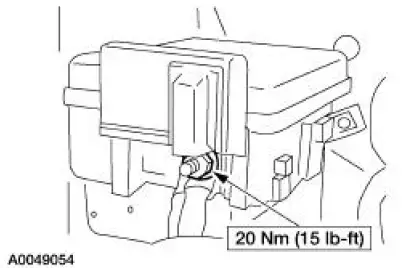
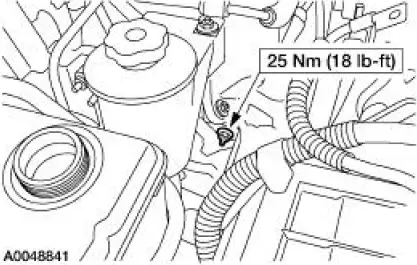
Remove the battery ground cable nut at the engine block.
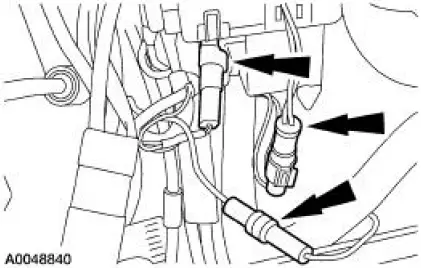
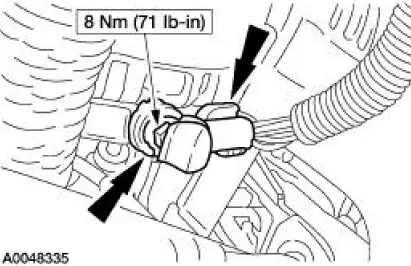
12. Remove the nut and disconnect the generator electrical connections.
- Position the cover aside.
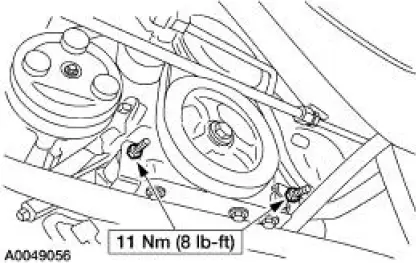
13. NOTE: 4.6L 2V shown; 3.8L and 4.6L 4V similar.
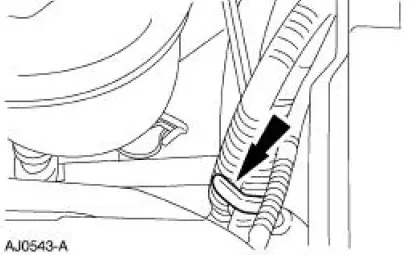
Remove the front lower cable harness bracket nuts.
14. Pull the harness assembly downward until it clears the engine/radiator area.
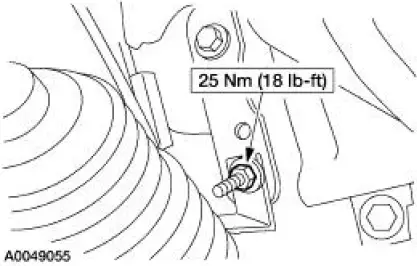
15. NOTE: 4.6L 2V shown; 3.8L and 4.6L 4V similar.
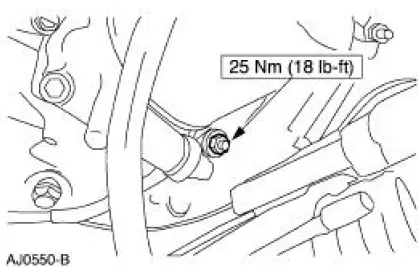
Remove the right engine mount cable harness bracket nut.
16. Remove the cover from the starter solenoid connections.
17. Remove the nuts and disconnect the starter solenoid electrical connections.

18. Pull the harness forward until it clears the motor mount, then remove the entire battery cable harness from the vehicle.
Installation
1. NOTE: When the battery is disconnected and reconnected, some abnormal drive symptoms may occur while the vehicle relearns its adaptive strategy. The vehicle needs to be driven to relearn the strategy.
To install, reverse the removal procedure.
 Battery Tray
Removal and Installation
WARNING: Batteries normally produce explosive gases which can
cause personal injury.
Therefore, do not allow flames, sparks or lighted substances to come
near the b ...
 Generator and Regulator
General Specifications
Torque Specifications
Generator
The charging system consists of the:
generator (GEN)
internal voltage regulator
The generator has an internal voltage regulato ...
Other materials:
Wheel Studs
Removal
1. Remove the wheel hub (1104). For additional information, refer to Wheel
Hub and Bearing in
this section.
2. Using a press, remove the wheel stud (1107) from the wheel hub.
Installation
1. Using a press, install a new wheel stud.
2. Install the w ...
Rear Drive Axle/Differential - Ford 8.8-Inch IRS
General Specifications
Torque Specifications
a: Use Stud and Bearing Mount EOAZ-19554-BA or equivalent meeting Ford
specification WSKM2G349-
A1.
b: With pinion flange yoke seal. ...
Rear seats
Rear Seat Entry and Exit
Use the seatback release to fold the
back of the front seat forward for
rear seat access. This release handle
is located on the upper back of the
front seat. The seatback locks
automatically when returned to the
normal position.
Use ...
