Ford Mustang (1999-2004) Service Manual: Transmission Fluid Cooler Tubes
Removal
1. Disconnect the battery cables.
2. Raise and support the vehicle. For additional information, refer to Section.
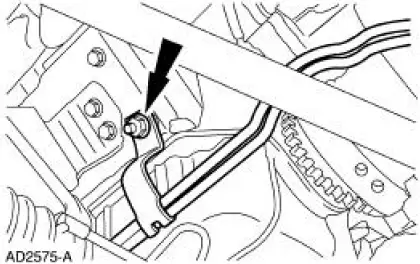
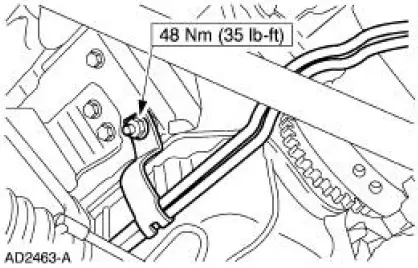
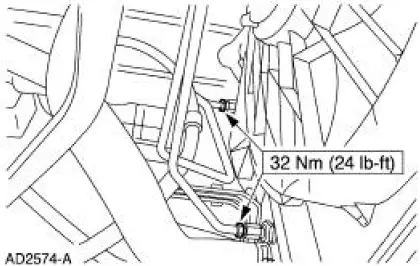
3. Remove the nuts.
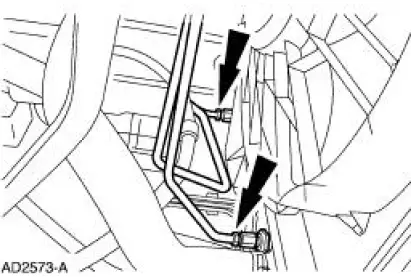
4. Remove the fluid cooler tube bracket at the engine.
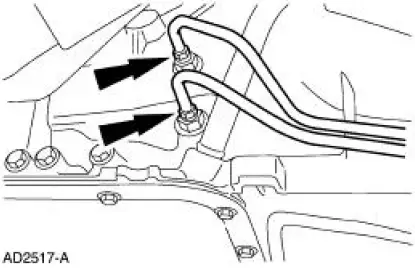
5. NOTE: Use a backup wrench to hold the case fitting secure.
Remove the fluid cooler tubes at the transmission.
Installation
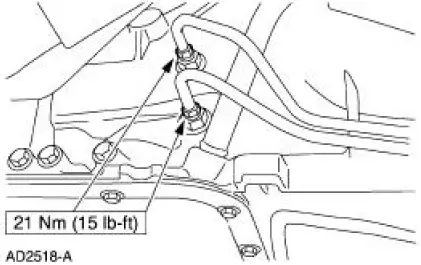
1. NOTE: Use a backup wrench to hold the case fitting secure.
Install the fluid cooler tubes at the transmission.
2. Install the fluid cooler tube bracket at the engine.
3. Install the nuts.
4. Lower the vehicle.
5. Connect the battery cables.
6. Fill the transmission with fluid and verify proper operation.
- Use Motorcraft MERCON V Automatic Transmission Fluid XT-5-QM or equivalent meeting MERCON V specification.
 Transmission Cooling
Inspection and Verification
WARNING: Never remove the radiator cap under any conditions while the engine
is
operating. Failure to follow these instructions could result in personal injury
and/or dam ...
 Automatic Transaxle/Transmission External Controls
Torque Specifications
...
Other materials:
Pinpoint Test M: DTC B1891 - Air Bag Tone Warning Indicator Circuit
Shorted to Battery or
Ignition
Normal Operation
The restraints control module (RCM) monitors its connection to the
generic electronic module (GEM) at
pin 10. This connection is used to signal a chime if the air bag
indicator is inoperative and another SRS
fault exists. If the RC ...
Lamp Switch - Brake Pedal Position (BPP)
Removal
1. Disconnect the battery ground cable.
2. Remove the brake pedal position (BPP) switch.
1. Remove the clip.
2. Remove the retainer.
3. Disconnect the electrical connector.
4. Remove the BPP switch.
Installation
1. NOTE: When the b ...
Removal
CAUTION: Since the engine is not free-wheeling, if the crankshaft or
the camshafts are
moved in any manner during removal and installation, the crankshaft and the
camshafts must
be re-synchronized.
1. Remove the engine front cover. For additional informatio ...
