Ford Mustang (1999-2004) Service Manual: Accessory Drive Belt - 4.6L (2V) and (4V)
Removal and Installation
Mach I
1. Remove the air intake scoop. For additional information, refer to Section.
Cobra
2. Remove the supercharger drive belt cover.
3. Rotate the supercharger belt tensioner clockwise and remove the supercharger belt.
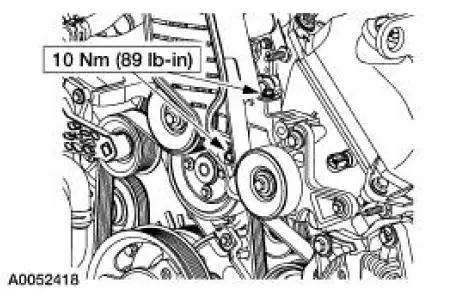
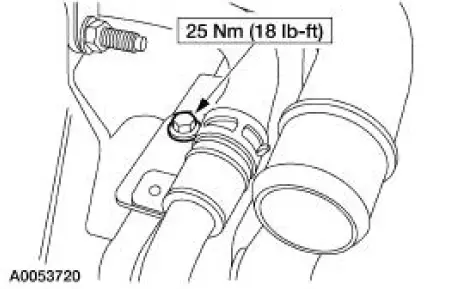
4. Remove the coolant hose mounting bolt.
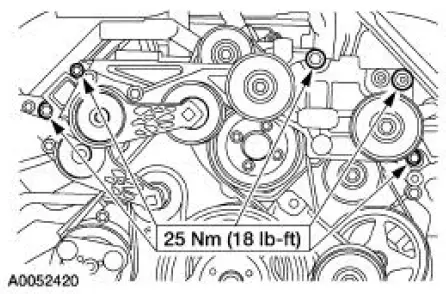
5. Remove the belt idler support bracket assembly.
6. Remove auxiliary crankshaft pulley. For additional information, refer to Section.
All engines
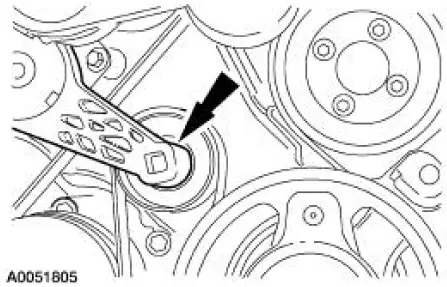
7. Rotate the belt tensioner and remove the accessory drive belt.
8. NOTE: Make sure the accessory drive belt is correctly installed on each pulley.
To install, reverse the removal procedure.
- Refer to Accessory Drive and Accessory Drive-Cobra for accessory drive belt routing.
 Accessory Drive Belt - 3.8L
Removal and Installation
1. Rotate the drive belt tensioner counterclockwise and remove the drive
belt.
2. NOTE: Make sure the drive belt is correctly installed on each
pulley.
To install, reverse ...
 Supercharger Belt
Removal and Installation
1. Remove the supercharger drive belt cover.
2. Rotate the supercharger belt tensioner clockwise and remove the
supercharger belt.
3. To install, reverse the removal proc ...
Other materials:
Troubleshooting
Your SYNC system is easy to use. However, should questions arise, see
the tables below.
Use the website at any time to check your phone’s compatibility,
register your account and set preferences as well as access a
customer representative via an online chat ...
Axle
Special Tool(s)
2-Jaw Puller
205-D072 (D97L-4221-A) or
equivalent
Adapter for 205-S127
205-105 (T76P-4020-A3)
Bearing Preload Tool
205-395 (T93P-4220-A)
Plate, Bearing/Oil Seal
205-090 (T75L-1165-B)
Gauge, ...
NVH Condition and Symptom Categories
A good diagnostic process is a logical sequence of steps that lead to the
identification of a causal
system. Use the condition and symptom categories as follows:
Identify the operating condition that the vehicle is exhibiting.
Match the operating condition ...
