Ford Mustang (2005-2014) Owners Manual: Instrument lighting dimmer
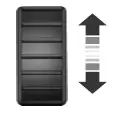
• Move the control up or down to
adjust the intensity of the panel
lighting.
• Move the control to the full
upright position, past detent,
to turn on the interior lamps.
• Move the control down, past
detent, to turn off the interior
lights.
Note: The panel dimmer control works only in nighttime illumination mode. It has no effect in daytime illumination mode. Also, selectable features, such as gauge color and halo color, will not be available in daytime illumination mode.
Note: If the battery is disconnected, discharged, or a new battery is installed, the dimmer switch requires re-calibration. Rotate the dimmer switch from the full dim position to the full dome On position to reset.
This will ensure that your displays are visible under all lighting conditions.
 Autolamps
WARNING: In severe weather conditions, it may be necessary to
switch your headlamps on manually.
Note: If the vehicle is equipped with autolamps, it will have the
windshield wiper rainlamp feature. Wh ...
 Headlamp exit delay
You can set the delay time to keep the headlamps on for up to three
minutes after the ignition is turned off.
Follow the steps below to change the delay time (Steps 1 through 6
must be done within 10 ...
Other materials:
Front passenger sensing system
WARNING: Even with Advanced Restraints Systems, children 12
and under should be properly restrained in a rear seating
position. Failure to follow this could seriously increase the risk of injury
or death.
WARNING: Sitting improperly out of position or with the ...
Deactivation
WARNING: Always wear safety glasses when repairing an air bag
supplemental restraint
system (SRS) vehicle and when handling an air bag module. This will
reduce the risk of injury
in the event of an accidental deployment.
WARNING: Carry a live air ...
Clearing all MyKeys
You can clear all MyKeys within the same key cycle as you created the
MyKey. If you switch your ignition off, however, you will need to use an
admin key to clear your MyKeys.
Note: When you clear your MyKeys, you remove all restrictions and
return all MyKeys ...
