Ford Mustang (1999-2004) Service Manual: Instrument Panel - Center Finish Panel
Removal and Installation
All vehicles
1. Disconnect the battery ground cable. For additional information, refer to Section.
Vehicles with automatic transmission
2. Place the selector lever in the 1 position.
Vehicles with manual transmission
3. Remove the gearshift lever handle.
All vehicles
4. Remove the floor console finish panel.
- Disconnect the electrical connector.
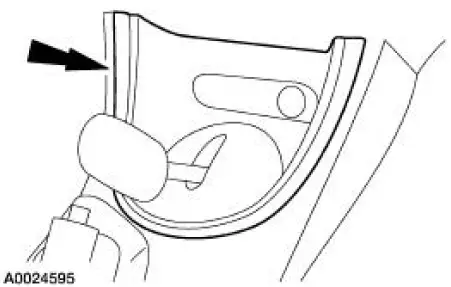
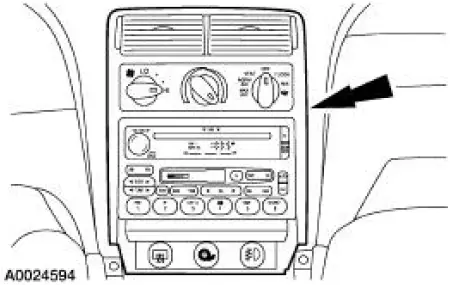
5. Remove the instrument panel center finish panel.
- Disconnect the electrical connector.
6. To install, reverse the removal procedure.
 Installation
CAUTION: Electronic modules are sensitive to static electrical
charges. If exposed to
these charges, damage may result.
1. NOTE: Two technicians are necessary to carry out this step.
Install ...
 Floor Console
Removal and Installation
All vehicles
1. Disconnect the battery ground cable. For additional information,
refer to Section .
2. Apply the parking brake.
Vehicles with automatic transmissio ...
Other materials:
Arm - Lower
Removal
CAUTION: Suspension fasteners are critical parts because they affect
performance of vital
components and systems and their failure can result in major service expense. A
new part with
the same part number or an equivalent part must be installed, if i ...
Cruise Control
PRINCIPLES OF OPERATION
Cruise control lets you maintain a set speed without keeping your foot
on the accelerator pedal.
USING CRUISE CONTROL
WARNING: Do not use cruise control in heavy traffic, on
winding roads or when the road surface is slippery. This coul ...
Pinpoint Test B: LFC 21/DTC B1921 - RCM Bracket Ground Resistance High
Normal Operation
WARNING: The tightening torque of the restraints control module
(RCM) retaining bolts is
critical for proper air bag supplemental restraint system (SRS)
operation. Refer to Restraints
Control Module (RCM) in this section for correc ...
