Ford Mustang (1999-2004) Service Manual: Piston - Pin Connecting Rod, Floating Pin
Material
| Item | Specification |
| SAE 5W-20 Premium Synthetic Blend Engine Oil XO-5W20-QSP | WSS-M2C153- H |
Disassembly
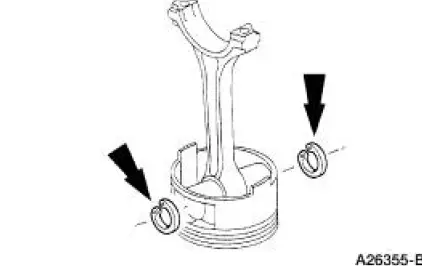
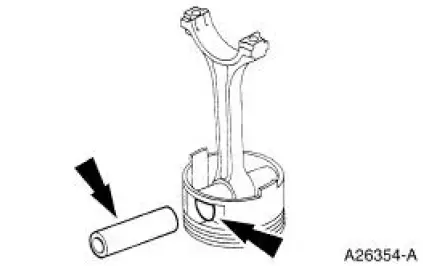
1. Remove the clips.
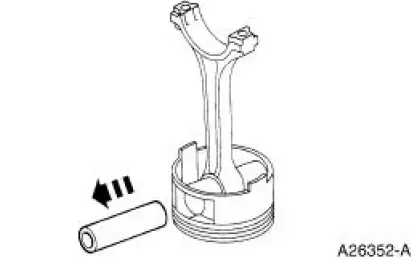
2. Remove the piston pin from the piston and connecting rod assembly.
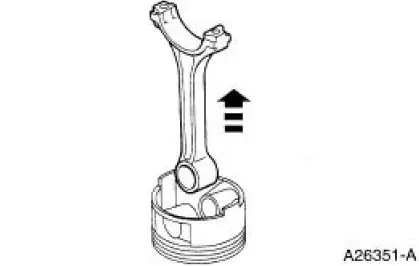
3. Remove the connecting rod from the piston.
4. Clean and inspect the piston and connecting rod. For additional information, refer to Section.
Assembly
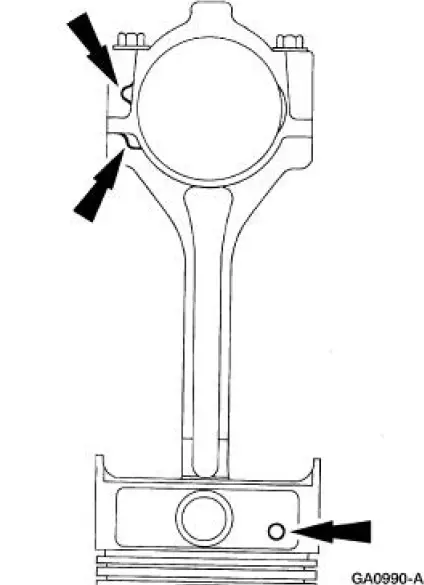
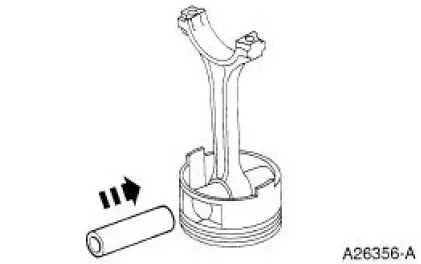
1. NOTE: Connecting rod must be installed into piston with identification markings toward front.
Position the connecting rod in the piston.
2. Lubricate the piston pin and pin bore with clean engine oil.
3. Install the piston pin in the piston and connecting rod assembly.
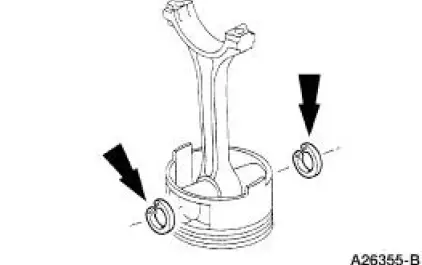
4. Install the piston pin retaining clips in the piston.
 Assembly
1. Install the valve stem seals.
2. Install the valves and the valve springs.
3. CAUTION: Make sure the tool is seated correctly on the valve spring.
Apply a small
amount of air at a time. This wil ...
 Engine (Assembly)
Special Tool(s)
Guides, Connecting Rod
303-442 (T93P-6136-A)
Installer, Crankshaft Vibration
Damper
303-102 (T74P-6316-B)
Installer, Front Cover Oil Seal
...
Other materials:
Differential Case and Ring Gear
Special Tool(s)
2-Jaw Puller
205-D072 (D97L-4221-A) or
equivalent
Installer, Differential Side
Bearing
205-009 (T57L-4221-A1)
Step Plate
205-D016 (D80L-630-5) or
equivalent
...
Changing a bulb
Lamp Assembly Condensation
Exterior lamps are vented to accommodate normal changes in pressure.
Condensation can be a natural by-product of this design. When moist air
enters the lamp assembly through the vents, there is a possibility that
condensation can oc ...
Torque Converter Turbine to Pump Stator Interference
Check
1. NOTE: Front pump support may remain in front pump support and gear
during this test.
Position the torque converter with the pump drive up.
2. Install the front pump support to engage the mating splines of the front
pump support shaft on
the torque convert ...
