
Ford Mustang (1999-2004) Service Manual: Plenum Chamber
Removal
1. Remove the instrument panel. For additional information, refer to Section.
2. Remove the audio unit. For additional information, refer to Section.
3. If equipped, remove the CD player. For additional information, refer to Section.
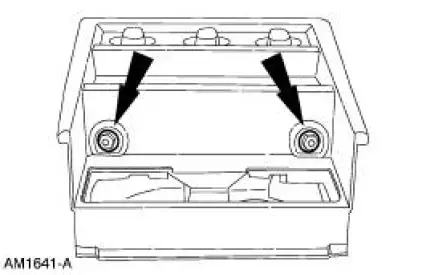
4. Remove the instrument panel center finish panel screws.
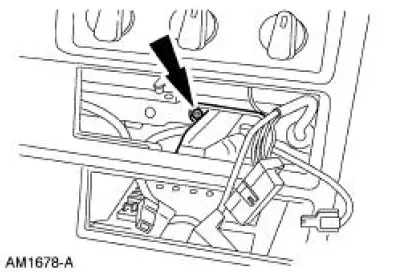
5. Remove the instrument panel center finish panel screw.
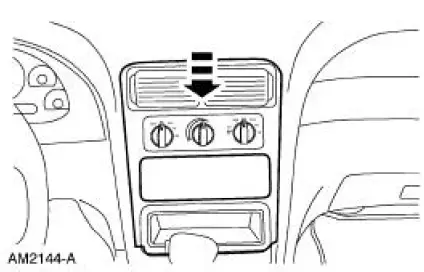
6. Unsnap and remove the instrument panel center finish panel.
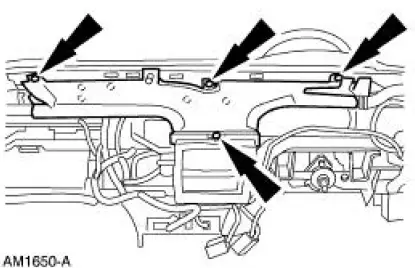
7. Remove the screws and remove the defroster duct.
8. Remove the screw.
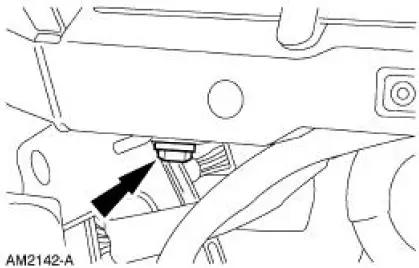
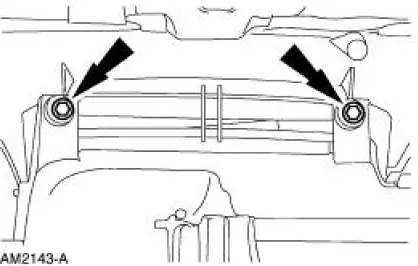
9. Remove the screws and remove the plenum chamber.
Installation
1. To install, reverse the removal procedure.
 Register - LH
Removal
1. Remove the instrument panel steering column cover bolts.
2. Unsnap and remove the instrument panel steering column cover.
3. Remove the bolts and the steering column reinforcement.
4. ...
 Door - Air Inlet Duct
Removal
1. Remove the evaporator core housing. For additional information, refer to
Section.
2. Disconnect the vacuum line.
3. Remove the screws and remove the duct.
Installation
1. To install, ...
Other materials:
Hydraulic System
Fluid Pump
The transmission uses a gerotor-type design front pump support and gear. The
pump provides the
volume of fluid needed to charge the torque converter, main control assembly,
cooling system and
lube system. Pump pressure is regu ...
Installation
1. Overlay the new rear window glass assembly over the old rear
window glass assembly and
transpose the markings with a grease pencil.
2. Center the V-notch on the new rear window glass assembly to the
center mark on the top of the
number four bow ...
Fuel Injectors
Removal
WARNING: Do not smoke or carry lighted tobacco or open flame of any
type when
working on or near any fuel related components. Highly flammable mixtures are
always present
and may be ignited. Failure to follow these instructions may result in personal ...
