
Ford Mustang (1999-2004) Service Manual: Switch - Deactivator
Removal
1. Disconnect the battery ground cable.
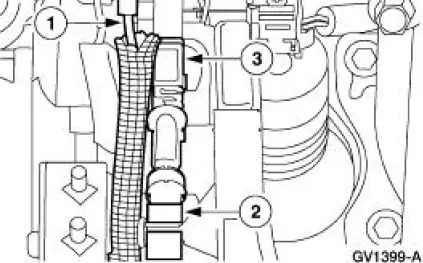
2. Remove the deactivator switch.
1. Disconnect the deactivator switch electrical connector.
2. Detach the lower deactivator switch hook.
3. Detach the upper deactivator pivot.
Installation
1. NOTE: When the battery is disconnected and reconnected, some abnormal drive symptoms may occur while the vehicle relearns its adaptive strategy. The vehicle may need to be driven 16 km (10 mi) or more to relearn the strategy.
To install, reverse the removal procedure.
- Adjust the deactivator switch, refer to Switch Adjustment-Deactivator
 Actuator - Speed Control Servo
1. CAUTION: Electronic modules are sensitive to static electrical
charges. If exposed
to these charges, damage may result.
Disconnect the battery ground cable.
2. Remove the LH wheel and tire; re ...
 Switch - Speed Control Actuator
Removal
1. Remove the steering wheel; refer to Section.
2. Remove the steering wheel rear cover.
1. Remove the screws.
2. Remove the steering wheel rear cover.
3. Remove the ribbon harne ...
Other materials:
Towing the vehicle on four whe
Emergency Towing
If your vehicle becomes inoperable (without access to wheel dollies,
car-hauling trailer, or flatbed transport vehicle), it can be flat-towed
(all wheels on the ground, regardless of the powertrain and transmission
configuration) under the fol ...
Digital Transmission Range (TR) Sensor
Special Tool(s)
Alignment Gauge, TR Sensor
307-351 (T97L-70010-A)
Removal
1. Disconnect the battery ground cable. For additional information, refer
to Section.
2. Raise and support the vehicle. For additional information, refer to
Sectio ...
Pinpoint Tests
CAUTION: Before removing and installing the GEM or its connectors,
disconnect the battery. Failure to follow this caution will
result in the GEM storing many erroneous DTCs and
may result in the GEM exhibiting erratic operation after installation.
CAUTI ...
