Ford Mustang (1999-2004) Service Manual: Wheel Studs
Special Tool(s)
|
|
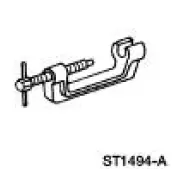
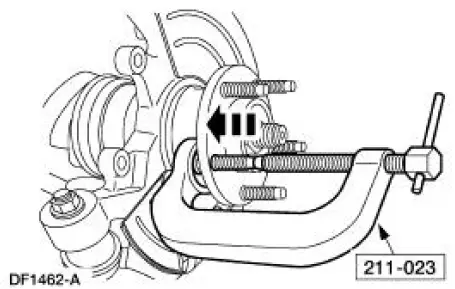
C-Frame and Clamp Assembly 211-023 (T74P-3044-A1) |
Removal
CAUTION: Suspension fasteners are critical parts because they affect performance of vital components and systems and their failure can result in major service expense. A new part with the same part number must be installed if installation becomes necessary. If substitution is necessary, the part must be of the same finish and property class. Torque values must be used as specified during reassembly to make sure of correct retention of these parts.
1. Raise the vehicle on a hoist.
2. Remove the wheel and tire assembly.
3. Remove the rear brake disc.
4. Using the special tool, remove and discard the wheel stud.
Installation
CAUTION: Do not use air tools to install the wheel stud. The serrations in the hub flange can be stripped.
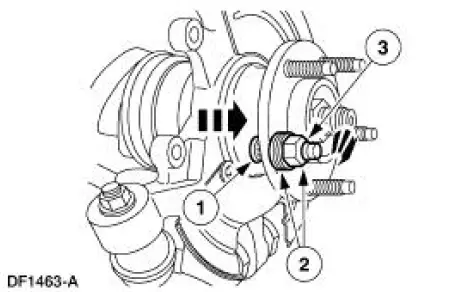
1. Install the wheel stud.
1. Position a new wheel stud in the hub flange making sure the serrations on the stud line up with the serrations in the flange.
2. Position washers and a reversed wheel nut on the wheel stud.
3. Tighten the wheel nut until the wheel stud seats on the back of the hub flange.
2. Remove the wheel nut and washers. Discard the nut.
3. Install the rear brake disc.
4. Install the wheel and tire assembly.
5. Lower the vehicle.
 Installation
1. Install the bearing.
1. Position the knuckle on the press.
2. Using the appropriate step plate adapter, press the bearing into the
knuckle until the
bearing clears the snap ring groove and b ...
 Upper Arm
...
Other materials:
Installation
1. CAUTION: Do not allow grease, oil, brake fluid or other
contaminants to contact the
pad lining material. Do not install contaminated pads.
NOTE: Install all hardware supplied with pad kits.
Install the pads.
1. Install the new pad slippers. ...
Drive Pinion
Special Tool(s)
Adapter for 205-S127
205-105 (T76P-4020-A3)
Adapter for 205-S127
205-109 (T76P-4020-A9)
Adapter for 205-S127
205-110 (T76P-4020-A10)
Adapter for 205-S127
205-111 (T76P-4020-A11)
Adapter for 20 ...
Valve Cover LH
Material
Item
Specification
Silicone Gasket and Sealant
F7AZ-19554-EA or equivalent
WSE-M4G323-A4
Removal and Installation
1. Position the oil level tube (6754) out of the way.
2. Disconnect the breather tube.
3. Separate the engine wir ...
