Ford Mustang (1999-2004) Service Manual: Actuator Cable - Speed Control
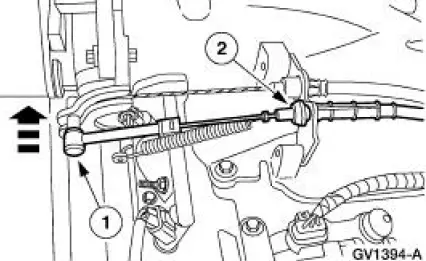
1. Remove the speed control actuator cable end from the throttle body.
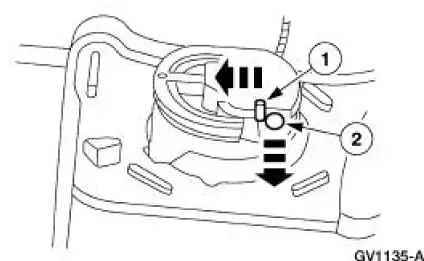
1. Lift the speed control cable from the throttle nailhead.
2. Release the speed control cable from the throttle bracket.
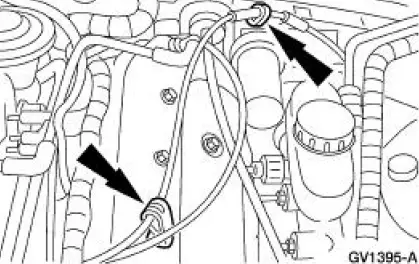
2. Remove the speed control cable from the retaining clips.
3. Remove the LH front wheel and tire assembly. For additional information, refer to Section.
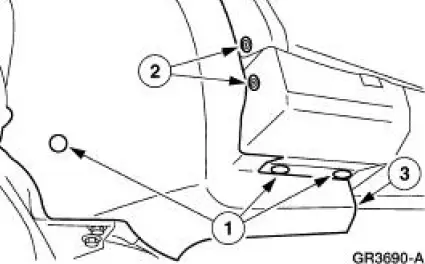
4. Position aside the LH front splash shield.
1. Remove the pin-type retainers.
2. Remove the screws.
3. Position aside the LH front splash shield.
5. Depress the locking tab and rotate the speed control actuator cable cap to remove.
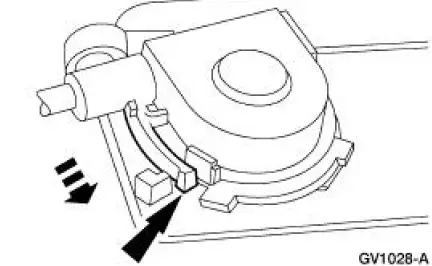
6. Disconnect the speed control actuator cable from the speed control servo pulley.
1. Gently push in the retaining spring.
2. Disconnect the speed control cable slug from the speed control servo pulley.
Installation
1. To install, reverse the removal procedure.
 Pinpoint Tests
PINPOINT TEST A: THE SPEED CONTROL IS INOPERATIVE
Test Step
Result / Action to Take
A1 CHECK THE SPEED CONTROL SERVO VOLTAGE AND
GROUND
YesGO to A3 .
No
GO to A2 .
Ke ...
 Actuator Cable - Speed Control-Cobra
1. Remove the speed control actuator cable end from the throttle body.
1. Lift the speed control cable from the throttle nailhead.
2. Release the speed control cable from the throttle bracket.
...
Other materials:
Rear Drive Axle and Differential
The axle housing assembly consists of a cast center section with two
steel tube assemblies and
a stamped differential housing cover (4033). The differential housing cover
uses silicone sealant
as a gasket.
The hypoid-design gearset consis ...
Compressor to Condenser Discharge Line - 4.6L
Material
Item
Specification
PAG Refrigerant Compressor
Oil (R-134a Systems)
F7AZ-19589-DA (Motorcraft YN-
12-C)
WSH-M1C231-
B
Removal and Installation
NOTE: Installation of a new suction accumulator is not required when
repairing the ...
Removal
1. Disconnect the battery ground cable. For additional information, refer to
Section.
2. Remove the transmission.
3. Remove the air intake scoop. For additional information, refer to Section.
4. Remove the air cleaner outlet tube. For additional informatio ...
