Ford Mustang (1999-2004) Service Manual: Hinge Adjustment
NOTE: The door should be adjusted for even and parallel fit with the body opening and surrounding panels as well as making sure that the anti-chuck pin is not binding on convertible models.
1. Remove the A-pillar lower trim panel.
2. Position the electrical connectors aside.
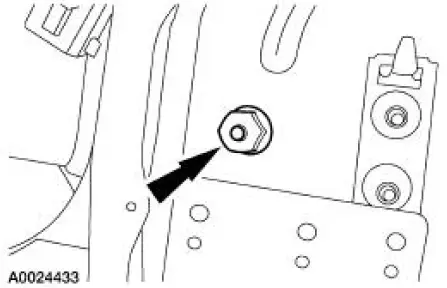
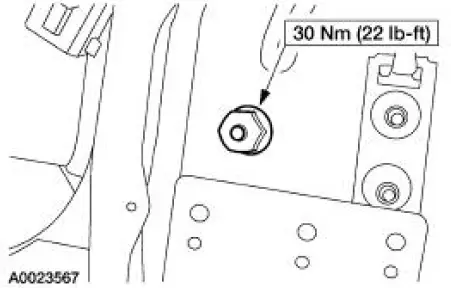
3. Loosen the lower front door hinge-to-body nut enough to permit movement.
4. Remove the fender. For additional information, refer to Section.
5. Mark the position of the upper and lower front door hinges to the body to use as reference points.
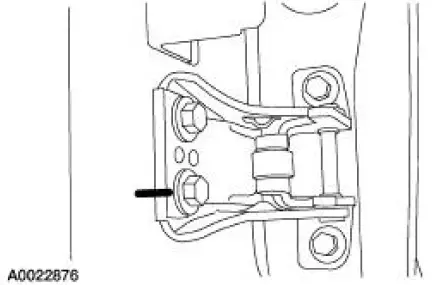
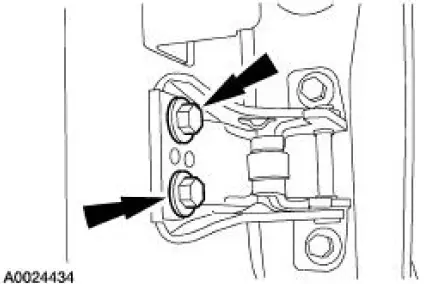
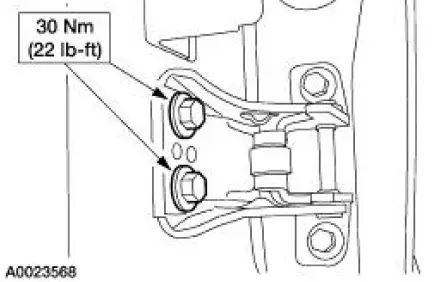
6. Loosen the four upper and lower front door hinge-to-body bolts enough to permit movement.
7. Adjust the front door to specification.
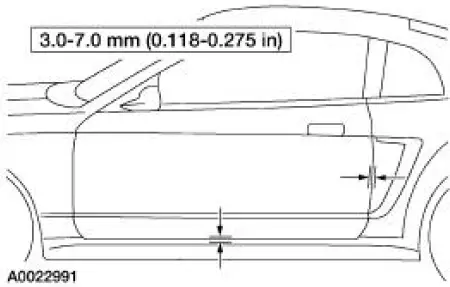
8. NOTE: After adjusting the door hinge, verify that the door can be closed easily and fits tightly.
Tighten the front door hinge to body bolts.
9. Tighten the front door hinge to body nut.
10. Install the electrical connectors.
11. Install the A-pillar lower trim panel.
12. Install the fender. For additional information, refer to Section.
 Body Closures
General Specifications
Torque Specifications
Body Closures
The body closures consist of the following components:
door checks
front door
front door latch strikers
front door hinges ...
 Door Alignment
NOTE: The door should be adjusted for even and parallel fit with the
body opening and surrounding
panels as well as making sure that the anti-chuck pin is not binding on
convertible models.
...
Other materials:
Headlamp Adjustment
Headlamp Aiming
1. The headlamp aiming procedure depends on the type of beam pattern the
headlamp is
equipped with. Vehicles may come equipped with visual optical right (VOR),
visual optical left
(VOL), or SAE only (includes sealed beam type) headlamps. ...
Child restraint and safety belt maintenance
Inspect the vehicle safety belts and child safety seat systems periodically
to
make sure they work properly and are not damaged. Inspect the vehicle
and child seat safety belts to make sure there are no nicks, tears or cuts.
Replace if necessary. All vehicle ...
Cable and Bracket
Removal
1. Raise the vehicle on a hoist. For additional information, refer to
Section.
2. Remove the cable shift from the shifter lever and bracket and discard
the clip.
3. Remove the bolt from the cable.
4. Remove the bolt from the cable.
5. ...
