Ford Mustang (1999-2004) Service Manual: Accessory Drive Belt Tensioner - 4.6L (2V) and (4V)
Removal and Installation
Mach I
1. Remove the air intake scoop. For additional information, refer to Section.
Cobra
2. Remove the supercharger drive belt cover.
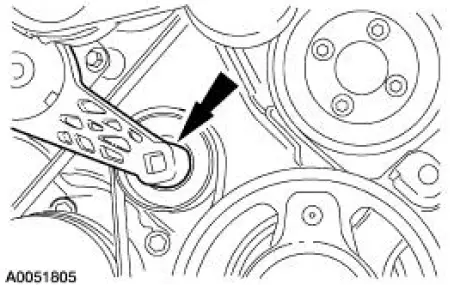
3. Rotate the supercharger belt tensioner clockwise and remove the supercharger belt.
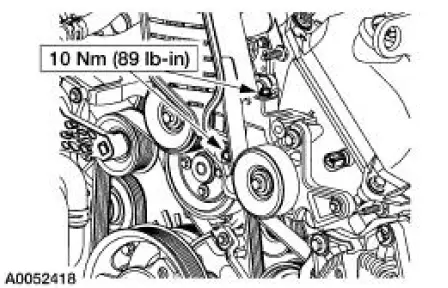
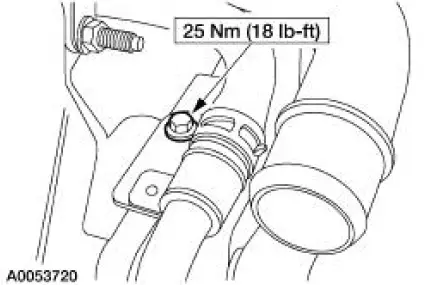
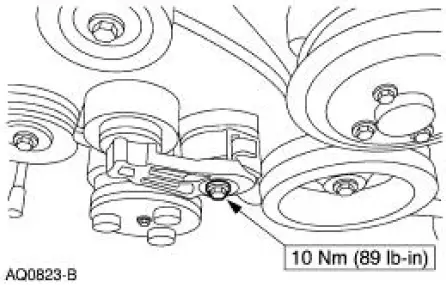
4. Remove the cooling hose and tube assembly mounting bolt.
5. Remove the belt idler support bracket assembly.
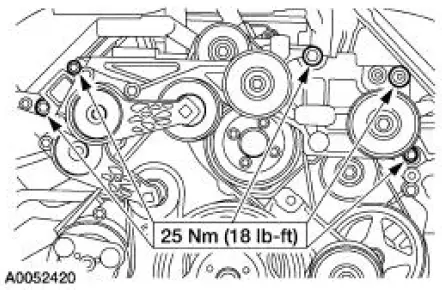
6. Remove the accessory drive belt. For additional information, refer to Accessory Drive Belt- 4.6L (2V) and (4V) in this section.
7. Remove the accessory drive belt tensioner.

All engines
8. Remove the accessory drive belt. For additional information, refer to Accessory Drive Belt Tensioner-4.6L (2V) and (4V) in this section.
9. Remove the belt tensioner.
- Remove the bolt and the tensioner.
10. To install, reverse the removal procedure. Refer to Accessory Drive and Accessory Drive- Cobra for accessory drive belt routing.
 Accessory Drive Belt Tensioner - 3.8L
Removal and Installation
1. Remove the drive belt. For additional information, refer to Accessory
Drive Belt-3.8L in this
section.
2. Remove the belt tensioner.
Remove the bolt.
3. To install, ...
 Supercharger Belt Tensioner
Removal and Installation
1. Remove the supercharger drive belt cover.
2. Rotate the supercharger belt tensioner clockwise and remove the
supercharger belt.
3. Remove the bolts and the supercharger ...
Other materials:
Gearshift Lever and Boot
Material
Removal and Installation
1. Remove the gearshift lever knob.
2. Remove the console panel gearshift plate. Lift the gearshift lever boot
over the gearshift lever.
3. Remove the bolts and the shift lever.
4. Remove the screws and the inner shif ...
Accelerator Cable Bracket - 3.8L
Removal and Installation
1. Disconnect the speed control cable from the throttle body and the bracket.
For additional
information, refer to Section.
2. Disconnect the accelerator cable from the throttle body by rotating the
throttle body full open
and align ...
Glass, Frames and Mechanisms (Diagnosis and Testing)
Refer to Wiring Diagrams Cell 100 , Power Windows for schematic and
connector information.
Refer to Wiring Diagrams Cell 56 , Rear Window Defrost for schematic and
connector information.
Special Tool(s)
Worldwide Diagnostic System
(WDS)
4 ...
