Ford Mustang (1999-2004) Service Manual: Actuator - Door Lock
Removal
1. Remove the door trim panel (23942). For additional information, refer to Section.
2. Remove the door latch (21812). For additional information, refer to Latch-Door .
3. Remove the door ajar switch.
- Release the locking tab.
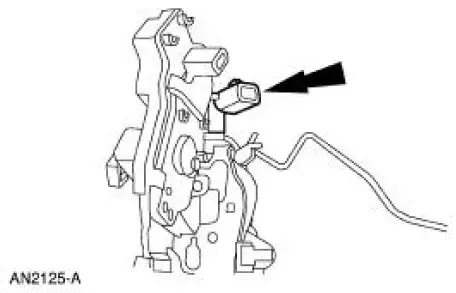
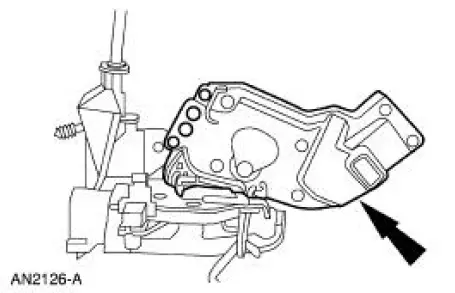
4. Remove the adjunct actuator.
Installation
1. To install, reverse the removal procedure.
Switch -Door Ajar Switch
Removal
1. Remove the door trim panel (23942). For additional information, refer to Section.
2. Remove the door latch (21812). For additional information, refer to Latch-Door .
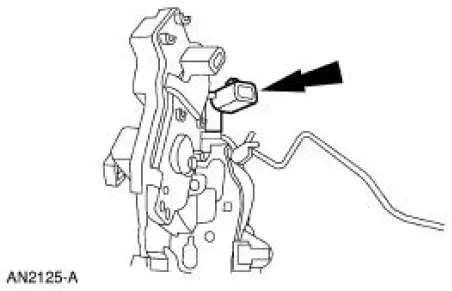
3. Remove the door ajar switch.
- Release the locking tab.
Installation
1. To install, reverse the removal procedure.
 Lock Cylinder - Luggage Compartment Lid
Removal
1. NOTE: Individual lock cylinders are repaired by discarding the
inoperative cylinder and building
a new lock cylinder using the appropriate lock repair package. The lock
repair pac ...
 Switch - Door Lock
Removal
1. CAUTION: Place a rag between the window regulator switch
plate and the door trim
panel to avoid damaging the door trim panel.
Position the window regulator switch plate (14524) asi ...
Other materials:
Lead Terminal Repair
Special Tool(s)
Heat Gun
107-R0300 or equivalent
Material
Item
Specification
Rear Window Defroster Repair
D8AZ-19562-AA
WSB-M4J58-B
1. NOTE: The rear window glass must be at room temperature at the time of the
repair.
Clea ...
Forward Clutch Cylinder
Special Tool(s)
Dial Indicator Gauge with
Holding Fixture
100-002 (TOOL-4201-C) or
equivalent
Compressor, Clutch Spring
307-096 (T81P-70235-A)
Protector, Transmission
Forward Clutch Outer Fluid
Seal
307-423
M ...
Changing the vehicle battery
WARNING: Batteries normally produce explosive gases which
can cause personal injury. Therefore, do not allow flames, sparks
or lighted substances to come near the battery. When working near the
battery, always shield your face and protect your eyes. Always pro ...
