
Ford Mustang (1999-2004) Service Manual: Bypass Tube - Mach I
Material
| Item | Specification |
| Motorcraft Premium Gold Engine Coolant VC-7-A (in Oregon VC-7-B) (yellow color) | WSS-M97B51- A1 |
Removal and Installation
1. Remove the air intake scoop and bracket. For additional information, refer to Section.
2. Drain the engine coolant. For additional information, refer to Cooling System Draining, Filling and Bleeding in this section.
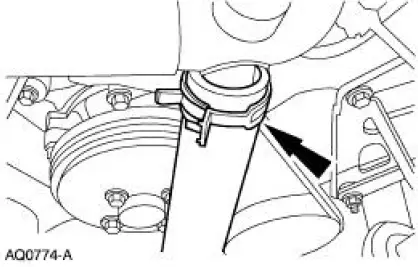
3. Disconnect the upper radiator hose from the bypass tube.
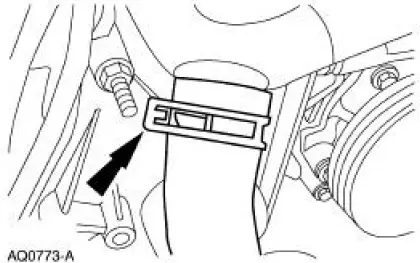
4. Disconnect the lower radiator hose.
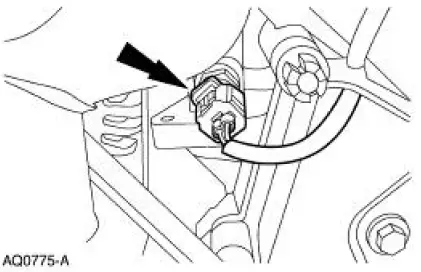
5. Disconnect the engine temperature control (ECT) sensor electrical connector.
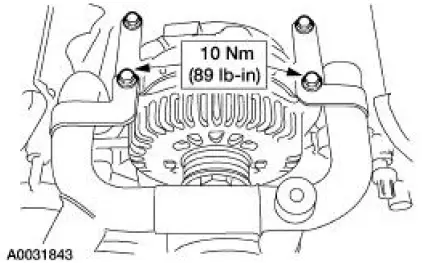
6. Remove the bolts and the bypass tube.
7. NOTE: Do not cut the O-ring seal during tube installation into cylinder heads or engine coolant leakage may occur.
NOTE: Wipe the O-ring sealing surface on the cylinder heads with a soft cloth, if necessary and lubricate the O-ring seal. Use premium engine coolant.
To install, reverse the removal procedure
8. Fill the cooling system. For additional information, refer to Cooling System Draining, Filling and Bleeding in this section.
 Bypass Tube - Cobra
Material
Item
Specification
Motorcraft Premium Gold
Engine Coolant
VC-7-A (in Oregon VC-7-B)
(yellow color)
WSS-M97B51-
A1
Removal and Installation
1. Drain the engine coola ...
 Water Pump - 3.8L
Material
Item
Specification
Motorcraft Premium Gold
Engine Coolant
VC-7-A (in Oregon VC-7-B)
(yellow color)
WSS-M97B51-
A1
Removal and Installation
1. Drain the engine coola ...
Other materials:
Overdrive Servo
Special Tool(s)
Remover/Installer, Servo
Piston
307-251 (T92P-70023-A)
Removal
1. Remove the main control valve body. For additional information, refer
to Main Control Valve
Body in this section.
2. NOTE: If the tool is not available, e ...
Door Speaker - Upper
Removal and Installation
1. Remove the front door trim panels (239420). For additional
information, refer to Section
2. Remove the upper speaker access cover.
3. Remove the upper speaker housing.
1. Remove the screw.
2. Remove the upper spea ...
Checking MyKey system status
You can find information about your programmed MyKeys by using the
information display.
MYKEY DISTANCE
Tracks the distance when drivers use a MyKey. The only way to delete
the accumulated distance is by using an admin key to clear your MyKey.
If the distance ...
