Ford Mustang (1999-2004) Service Manual: Water Pump - 3.8L
Material
| Item | Specification |
| Motorcraft Premium Gold Engine Coolant VC-7-A (in Oregon VC-7-B) (yellow color) | WSS-M97B51- A1 |
Removal and Installation
1. Drain the engine coolant. For additional information, refer to Cooling System Draining, Filling and Bleeding in this section.
2. Loosen the coolant pump pulley bolts.
3. Remove the power steering (PS) pump pulley. For additional information, refer to Section.
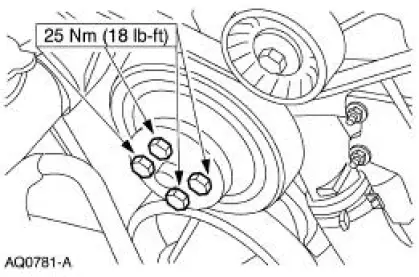
4. Remove the bolts and the coolant pump pulley.
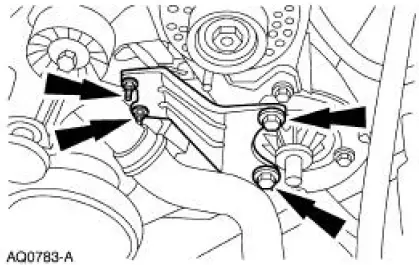
5. Remove the PS bracket.
- Remove the bolts.
- Remove the nuts.
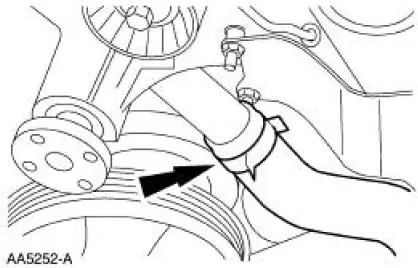
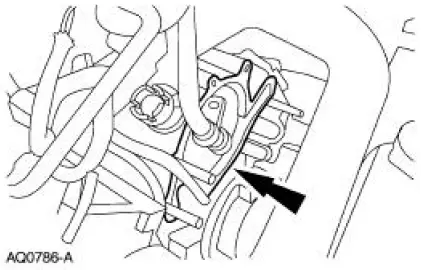
6. Disconnect the lower radiator hose from the coolant pump.
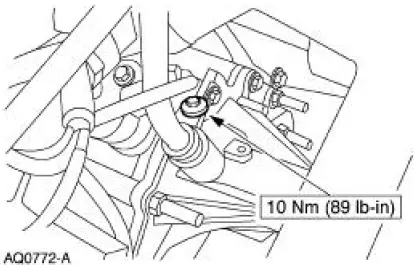
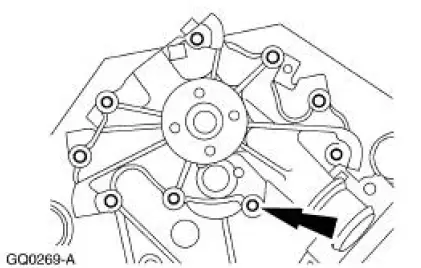
7. Position aside the coolant heater outlet tube assembly.
- Remove the bolt.
8. Remove the coolant pump.
- Remove the stud.
- Remove the four bolts.
- Remove the four nuts.
9. Clean and inspect the gasket sealing surfaces.
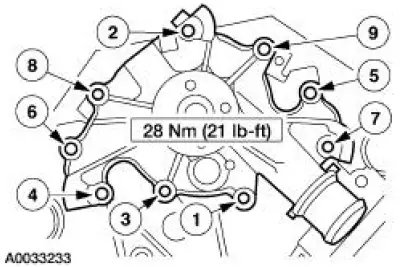
10. To install, reverse the removal procedure.
- Install a new gasket.
- Tighten the coolant pump stud, bolts and nuts in the sequence shown.
11. Fill and bleed the cooling system. For additional information, refer to Cooling System Draining, Filling and Bleeding in this section.
 Bypass Tube - Mach I
Material
Item
Specification
Motorcraft Premium Gold
Engine Coolant
VC-7-A (in Oregon VC-7-B)
(yellow color)
WSS-M97B51-
A1
Removal and Installation
1. Remove the air intake ...
 Water Pump - 4.6L(2V) and 4.6L(4V)
Material
Item
Specification
Motorcraft Premium Gold
Engine Coolant
VC-7-A (in Oregon VC-7-B)
(yellow color)
WSS-M97B51-
A1
Removal and Installation
Mach I
1. Remove the air ...
Other materials:
Arm - Lower
Removal
CAUTION: Suspension fasteners are critical parts because they affect
performance of vital
components and systems and their failure can result in major service expense. A
new part with
the same part number or an equivalent part must be installed, if i ...
Brake Caliper Support Bracket
Removal
1. Raise and support the vehicle.
2. Remove the tire and wheel assembly.
3. CAUTION: Do not allow the rear disc brake caliper (2552) to
hang from the rear
wheel brake hose (2A442)
Remove the rear disc brake caliper bolts and position the ...
External Controls (Description and Operation)
The transmission shift cable transfers the transmission operating mode from
the gearshift lever to the
automatic transmission (7003). The indicated position of the transmission floor
mounted selector lever
is transferred to the transmission through the cable ...
