Ford Mustang (1999-2004) Service Manual: Crankshaft Main Bearing Journal - Clearance
Special Tool(s)
|
|
Plastigage 303-D031 (D81L-6002-B) or equivalent |
NOTE: Crankshaft main bearing journals must be within specifications before checking journal clearance.
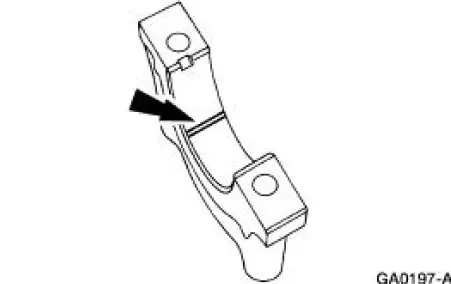
1. Remove the crankshaft main bearing caps and crankshaft main bearing.
2. Lay a piece of Plastigage across the face of each crankshaft main bearing surface.
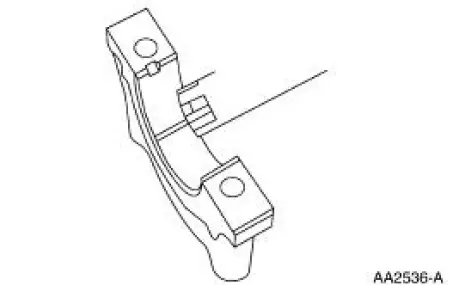
3. NOTE: Do not turn the crankshaft while carrying out this procedure.
Install and remove the crankshaft main bearing cap.
4. Verify the crankshaft journal clearance.
- Refer to the appropriate section in Group 303 for the procedure.
- If out of specification, install new components as necessary. Refer to the appropriate section in Group 303 for the procedure.
 Camshaft Runout
Special Tool(s)
Dial Indicator Gauge with
Holding Fixture
100-002 (TOOL-4201-C) or
equivalent
1. NOTE: Camshaft journals must be within specifications before
checking runout.
Use ...
 Crankshaft End Play
Special Tool(s)
Dial Indicator Gauge with
Holding Fixture
100-002 (TOOL-4201-C) or
equivalent
1. Measure the crankshaft end play. Use a Dial Indicator Gauge with Holding
Fixture t ...
Other materials:
Manual climate control
A. Defrost: Distributes air through the windshield defroster vents
and demister vents. You can use this setting to defog and clear the
windshield of a thin covering of ice.
B. Rear defrost: Turns the heated windows and mirrors off and on.
See Heated windows ...
Fuel Vapor Control Tube Assembly Valve
Removal and Installation
1. Remove the fuel tank. For additional information, refer to
Section.
2. Remove the retainers.
3. NOTE: The fuel vapor vent valve, fuel vapor control valve and the
in-line fuel tank pressure
sensor are repaired as a fuel va ...
Axle Housing
Removal and Installation
1. CAUTION: The vehicle must be on level ground and at curb height.
Mark the rear shock absorbers relative to their protective sleeve.
During installation, raise the suspension to this reference mark
before tightening the
s ...
