Ford Mustang (1999-2004) Service Manual: Crankshaft Pulley
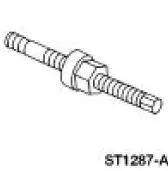
Special Tool(s)
 |
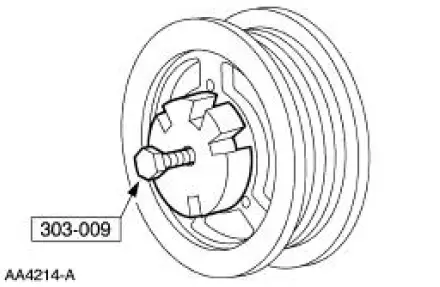
Remover, Crankshaft Vibration Damper 303-009 (T58P-6316-D) |
 |
Installer, Crankshaft Vibration Damper 303-102 (T74P-6316-B) |
Material
| Item | Specification |
| Silicone Gasket and Sealant F7AZ-19554-EA or equivalent | WSE-M4G323-A4 |
Removal
1. Remove the drive belt. For additional information, refer to Section.
2. Raise and support the vehicle. For additional information, refer to Section.
3. Remove the bolt.
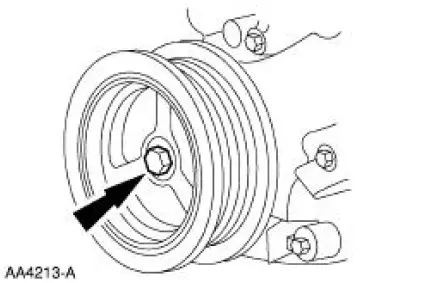
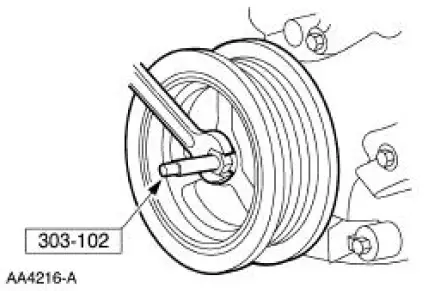
4. Using the special tool, remove the crankshaft pulley (6312).
Installation
1. NOTE: The crankshaft pulley must be installed within four minutes of applying the sealant.
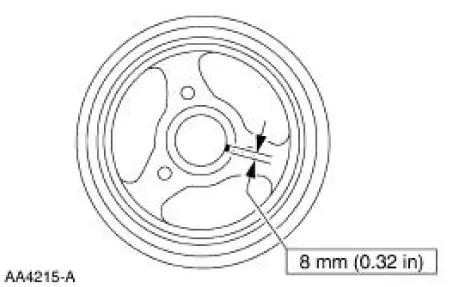
Apply sealant to the woodruff key slot on the crankshaft pulley.
2. Using the special tool, install the crankshaft pulley.
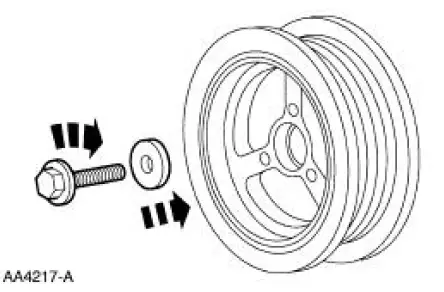
3. Install the washer and the bolt. Tighten the bolt in four stages.
- Stage 1: Tighten the bolt to 90 Nm (66 lb-ft).
- Stage 2: Loosen the bolt one full turn.
- Stage 3: Tighten the bolt to 50 Nm (37 lb-ft).
- Stage 4: Tighten the bolt an additional 90 degrees.
4. Lower the vehicle.
5. Install the drive belt. For additional information, refer to Section.
 Valve Cover LH
Material
Item
Specification
Silicone Gasket and Sealant
F7AZ-19554-EA or equivalent
WSE-M4G323-A4
Removal and Installation
1. Position the oil level tube (6754) out of the way.
2 ...
 Crankshaft Front Oil Seal
Special Tool(s)
Crankshaft Seal
Installer/Aligner
303-335 (T88T-6701-A)
Front Cover Seal Remover
303-107 (T74P-6700-A)
Crankshaft Seal Installer
303-635
...
Other materials:
Sensor Indicator - Rear
Special Tool(s)
Pinion Bearing Cone Remover
205-D002 (D79P-4621A)
Axle Bearing/Seal Plate
205-090 (T75L-1165-B)
Sensing Ring Replacer
206-041 (T89P-20202-A)
Removal
1. Remove the rear axle shaft bearing.
2. Using the special ...
Electronic Engine Controls - Cobra
Most of the Cobra engine electronic controls are similar to that of
the non-supercharged 4.6L (2V)
engine. These components are as follows:
Crankshaft position (CKP) sensor
Throttle position (TP) sensor
Idle air control (IAC) valve
Mass air ...
Mass Air Flow (MAF) Sensor - 3.8L
Removal
CAUTION: The mass air flow (MAF) sensor hot wire sensing
element and housing are
calibrated as a unit and must be repaired as a complete assembly. Do not
damage the sensing
element (internal to housing) or possible failure to the mass air f ...
