Ford Mustang (1999-2004) Service Manual: Valve Cover LH
Material
| Item | Specification |
| Silicone Gasket and Sealant F7AZ-19554-EA or equivalent | WSE-M4G323-A4 |
Removal and Installation
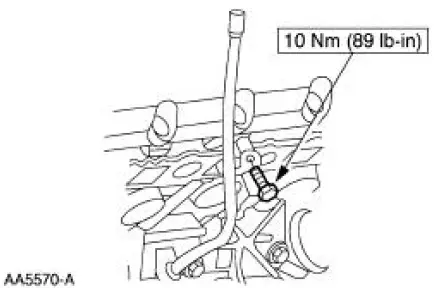
1. Position the oil level tube (6754) out of the way.
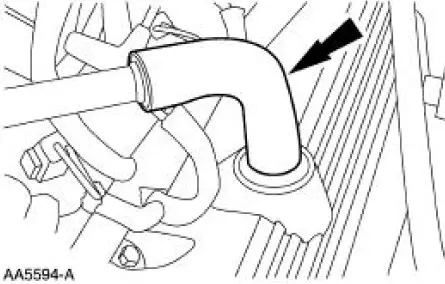
2. Disconnect the breather tube.
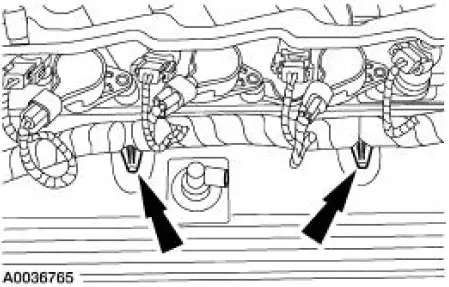
3. Separate the engine wiring harness in the locations shown.
4. Disconnect the engine wiring harness retainer and position it aside.

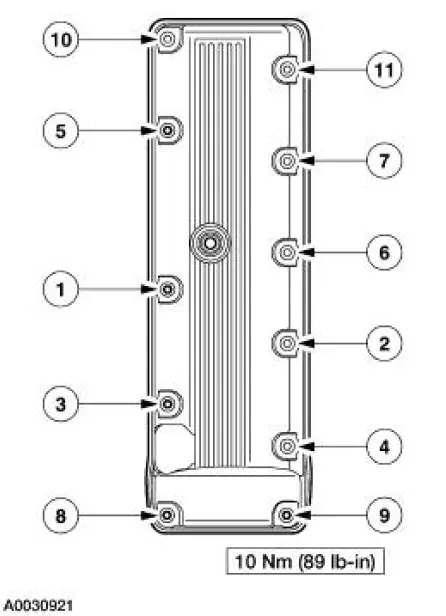
5. Remove the bolts, studs and the valve cover in the sequence shown.
- Inspect and clean the sealing surfaces.
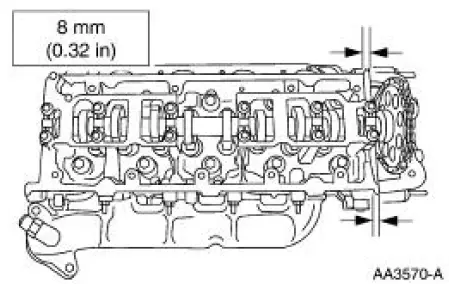
6. NOTE: Apply an eight millimeter bead of silicone gasket and sealant at the intersection of the engine front cover and the cylinder head.
To install, reverse the removal procedure.
 Valve Cover RH
Material
Item
Specification
Silicone Gasket and Sealant
F7AZ-19554-EA or equivalent
WSE-M4G323-A4
Removal and Installation
1. Remove the air cleaner outlet tube. For additional inf ...
 Crankshaft Pulley
Special Tool(s)
Remover, Crankshaft Vibration
Damper
303-009 (T58P-6316-D)
Installer, Crankshaft Vibration
Damper
303-102 (T74P-6316-B)
Material
Item
Specifica ...
Other materials:
Removal
1. Remove the roller followers. For additional information, refer to Roller
Followers in this section.
2. Remove the LH timing chain for the LH side and both timing chains for the RH
side. For
additional information, refer to Timing Drive Components in this ...
Summer tires (if equipped)
Summer tires provide superior performance on wet and dry roads. Summer
tires do not have the Mud and Snow (M+S or M/S) tire traction rating on the
tire side wall. Since summer tires do not have the same traction performance
as All-season or Snow tires, Ford do ...
Canister Vent Solenoid Closing Procedure
Special Tool(s)
Worldwide Diagnostic System
(WDS)
418-F224,
New Generation STAR (NGS)
Tester
418-F052, or equivalent scan
tool
CAUTION: The canister vent solenoid must not be energized for more than
nine minutes
at one time. Once the ...
