Ford Mustang (1999-2004) Service Manual: Evaporator Core Housing
Material
| Item | Specification |
| PAG Compressor Oil (R-134a Systems) F7AZ-19589-DA (Motorcraft YN-12-C) | WSH-M1C231- B |
| MERPOL NA | ESE-M99B144- B |
Removal
NOTE: The evaporator core is not separately serviceable, it is serviced only with the evaporator core housing assembly.
1. Disconnect the battery ground cable.
2. Recover the refrigerant. For additional information, refer to Section.
3. Drain the cooling system. 4. Remove the instrument panel. For additional information, refer to Section.
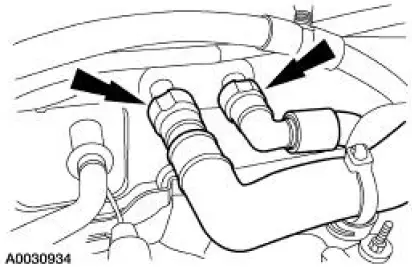
5. Disconnect the heater hose couplings from the heater core. For additional information, refer to Section.
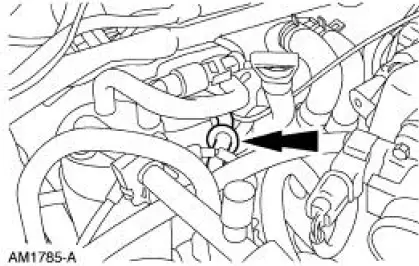
6. Disconnect the vacuum connector.
7. Remove the suction accumulator/drier. For additional information, refer to Section.
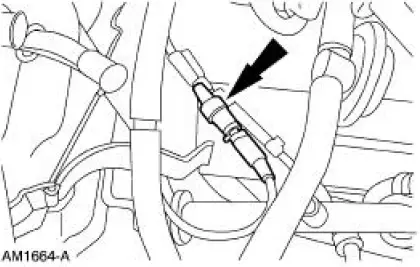
8. Disconnect the A/C liquid line.
- Discard the O-ring seals.
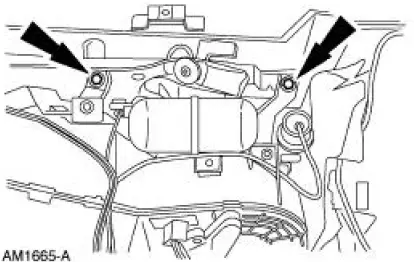
9. Remove the evaporator core housing nuts.
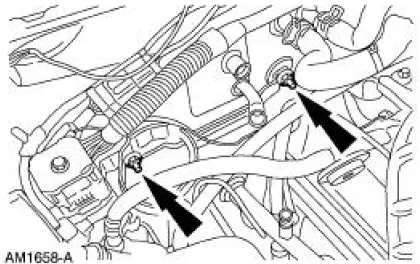
10. Remove the nut.
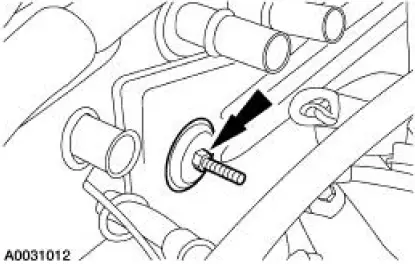
11. Remove the screw.
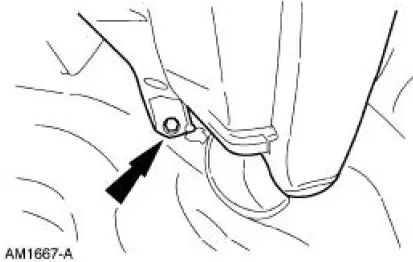
12. Remove the interior evaporator core housing bolts.
13. Remove the evaporator core housing.
Installation
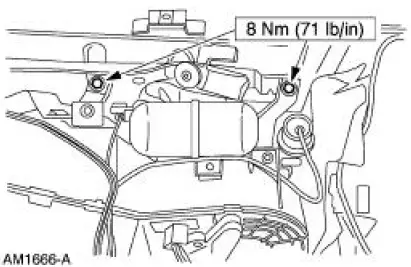
1. To install, reverse the removal procedure.
- Lubricate the coolant hoses with coolant hose lubricant or plain water only, if needed.
- Install new O-ring seals lubricated with PAG oil.
 Blower Motor
Removal
1. Disconnect the jumper wire.
2. Disconnect the main harness.
3. Remove the screws.
4. Separate the cover from the motor.
5. Separate the motor from the housing.
6. Disconnect the j ...
 Heater Core
Removal
NOTE: If a heater core leak is suspected, the heater core must be
pressure leak tested before it is
removed from the vehicle. For additional information, refer to Section.
1. Remove the evap ...
Other materials:
USB port
WARNING: Driving while distracted can result in loss of vehicle
control, crash and injury. We strongly recommend that you use
extreme caution when using any device that may take your focus off
the road. Your primary responsibility is the safe operation of your ...
Pinpoint Test G: LFC 16/DTC B1925 - Passenger Air Bag Circuit Shorted to
Battery or Ignition
Normal Operation
The restraints control module (RCM) checks for passenger air bag circuit
shorts to battery or ignition
by monitoring the voltage of circuits 607 (LB/OG) and 616 (PK/BK) at pins 6
and 7. If the RCM detects
a short to battery or ignition ...
Ignition Lock Cylinder - Non-Functional
Removal and Installation
1. NOTE: Make sure the front wheels are in the straight-ahead
position.
Disconnect the battery ground cable (14301) and wait at least one minute
to allow the depletion
of the restraint system backup power supply. For addit ...
