Ford Mustang (1999-2004) Service Manual: Generator - 3.8L
Removal and Installation
1. Disconnect the battery (10655). For additional information, refer to Section.
2. Relieve the accessory drive belt (8620) tension and remove the belt from the generator pulley.
Leave the belt in place for reinstallation. For additional information, refer to Section.
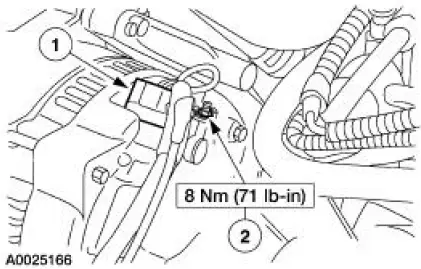
3. CAUTION: This is a new style connector that has a press-to-release tab. Pulling on the tab could result in damage to the connector or harness.
Disconnect the generator (10300).
1. Disconnect the generator electrical connectors.
2. Remove the battery positive cable nut.
4. Remove the generator.
- Remove the upper and lower generator bolts.
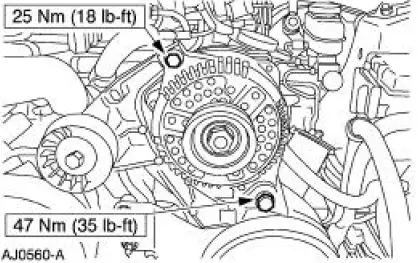
5. To install, reverse the removal procedure.
 Generator and Regulator
General Specifications
Torque Specifications
Generator
The charging system consists of the:
generator (GEN)
internal voltage regulator
The generator has an internal voltage regulato ...
 Generator - 4.6L 2V
Removal and Installation
1. Disconnect the battery (10655). For additional information, refer
to Section.
2. Relieve the accessory drive belt (8620) tension and remove the belt
from the gen ...
Other materials:
Engine - Mach I 4.6L (4V)
General Specifications
Engine Specifications
a - Newly Installed-Refers to the condition of the "NEW" drive belt
before the engine has made no more
than one rotation and before the belt has had a chance to stretch or seat
into the pu ...
Key Programming - Additional Key With One Programmed
Key
Special Tool(s)
Worldwide Diagnostic System
(WDS)
418-F224,
New Generation STAR (NGS)
Tester
418-F052, or equivalent
diagnostic tool
NOTE: This procedure is used when a customer needs to have an additional key
programmed into the
veh ...
Jump-starting the vehicle
WARNING: The gases around the battery can explode if exposed
to flames, sparks, or lit cigarettes. An explosion could result in
injury or vehicle damage.
WARNING: Batteries contain sulfuric acid which can burn skin,
eyes and clothing, if contacted.
Do not atte ...
