Ford Mustang (1999-2004) Service Manual: Ignition Coil-On-Plug
Material
| Item | Specification |
| Silicone Brake Caliper Grease and Dielectric Compound D7AZ-19A331-A or equivalent | ESE-M1C171- A |
Removal and Installation
1. Disconnect the battery ground cable. For additional information, refer to Section.
2. Remove the air cleaner outlet pipe. For additional information, refer to Section.
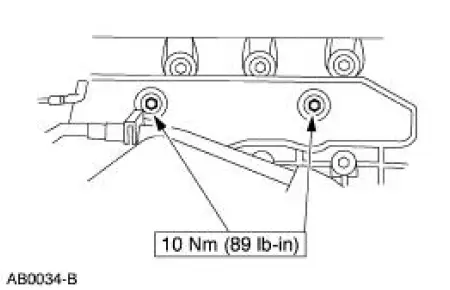
3. Remove the RH ignition coil cover bolts and the cover.
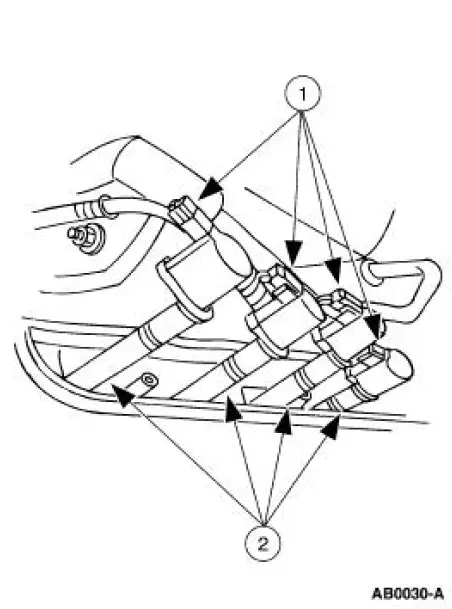
4. Remove the ignition coils.
1. Disconnect the electrical connectors.
2. Remove the ignition coils.
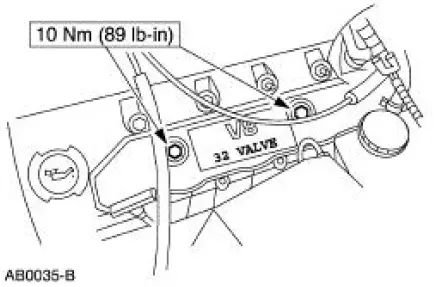
5. Remove the LH ignition coil cover bolts and the cover.
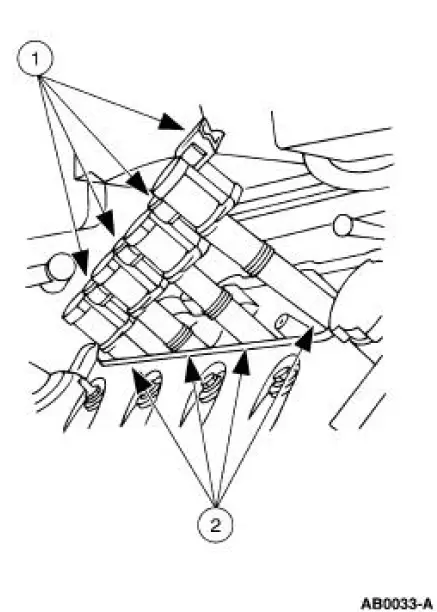
6. Remove the ignition coils.
1. Disconnect the connectors.
2. Remove the ignition coils.
7. NOTE: Verify that the ignition coil spring is correctly located inside the ignition coil boot and that there is no damage to the tip of the boot.
To install, reverse the removal procedure.
- Apply a light coat of dielectric grease to the inside of the ignition coil boots.
 Engine Ignition (Description and Operation)
Eight separate ignition coils:
are controlled by the powertrain control module (PCM).
are mounted directly above each spark plug.
are controlled by the powertrain control module for correct fi ...
 Spark Plugs
Removal and Installation
1. Remove the ignition coil-on-plug. For additional information, refer to
Ignition Coil-On-Plug in this
section.
2. NOTE: Use compressed air to remove any foreign materi ...
Other materials:
Condenser to Evaporator Line
Material
Item
Specification
PAG Refrigerant Compressor
Oil (R-134a Systems)
F7AZ-19589-DA (Motorcraft YN-
12-C)
WSH-M1C231-
B
Removal and Installation
NOTE: Installation of a new suction accumulator is not required when
repairing the ...
Safety Belt System (Description and Operation)
WARNING: All safety belt assemblies include retractors, buckles, front
seat belt buckle
support assemblies (slide bar, if so equipped), shoulder belt height adjuster
(if equipped), child
safety seat tether bracket assemblies (if equipped) and attaching hardw ...
Vacuum Hose Repair - Mini-Tube
Special Tool(s)
Vacuum Pump Kit
416-D002 (D95L-7559-A) or
equivalent
1. Measure the length of the damaged area of the mini-tube vacuum hose.
2. Cut a piece of standard 1/8 inch inner diameter vacuum hose approximately 25
mm (1 inch
longer t ...
