Ford Mustang (1999-2004) Service Manual: Installation
1. NOTE: If the oil pan is not secured within four minutes, the sealant must be removed and the sealing area cleaned with metal surface cleaner. Allow to dry until there is no sign of wetness, or four minutes, whichever is longer. Failure to follow this procedure can cause future oil leakage.
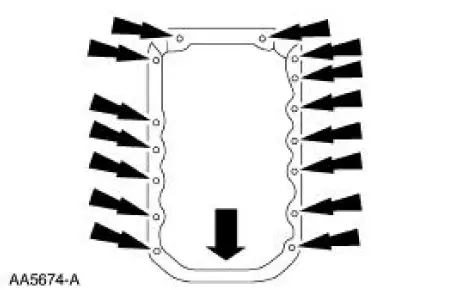
Clean and apply sealant to the oil pan sealing areas shown and install the oil pan rear seal.
1. Apply silicone gasket and sealant to the rear main bearing cap.
2. Install the oil pan rear seal.
3. Clean the oil pan mating surfaces with metal surface cleaner an apply silicone gasket and sealant to the oil pan mating surface.
2. Position the oil pan and start the bolts.
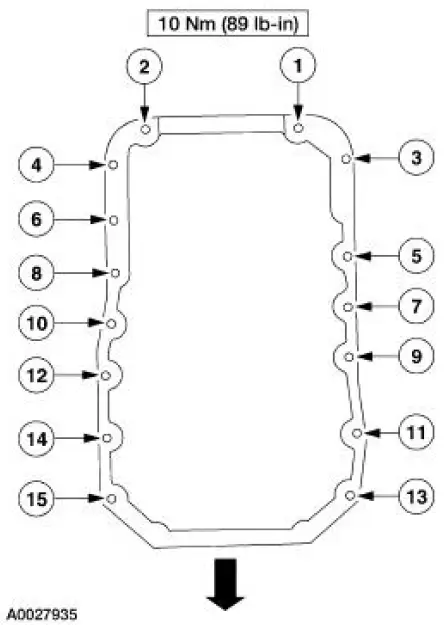
3. Tighten the bolts in two stages in the sequence shown.
- Stage 1: Tighten to 5 Nm (44 lb-in).
- Stage 2: Tighten to 10 Nm (89 lb-in).
4. Install the transmission lower bolts.
5. Install the oil pan drain plug.
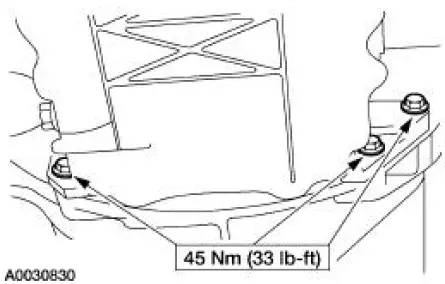
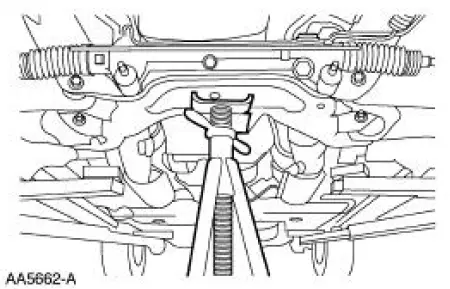
6. Raise the front subframe into position.
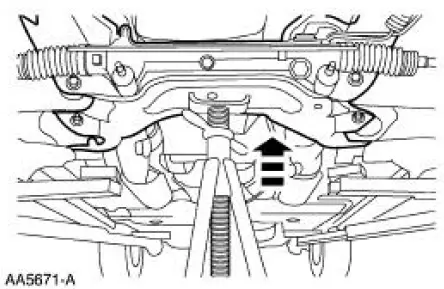
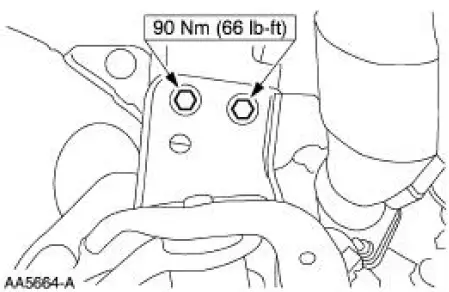
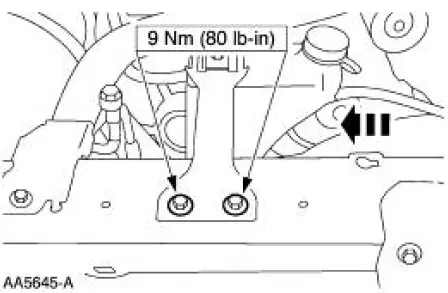
7. Tighten the two bolts.

8. Install the two bolts.
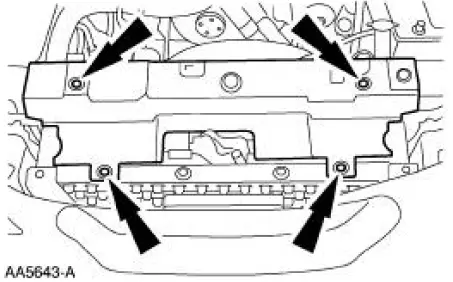
9. Install the four subframe lower bolts.
10. Remove the safety stand.
11. Install the bracket.
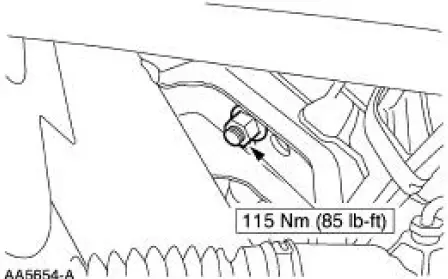
12. Install the starter motor.
13. Lower the vehicle.
14. Lower the engine.
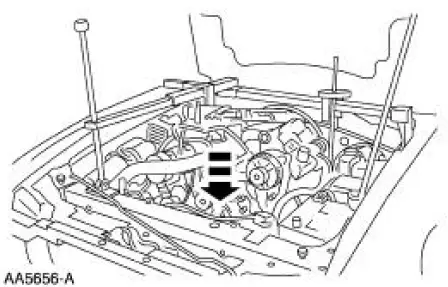
15. Raise and support the vehicle.
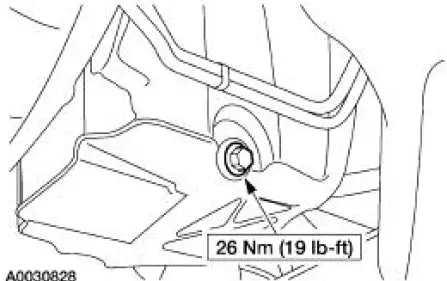
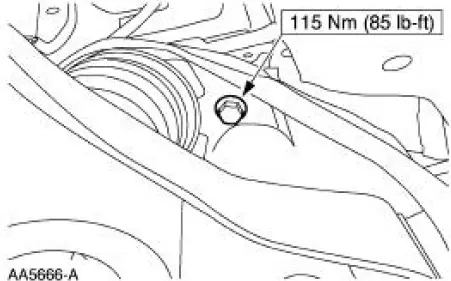
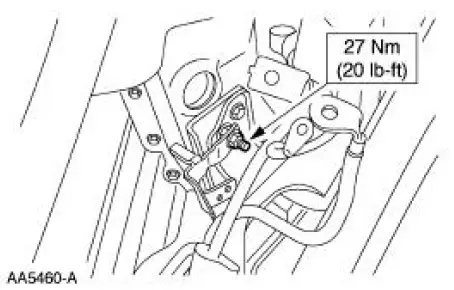
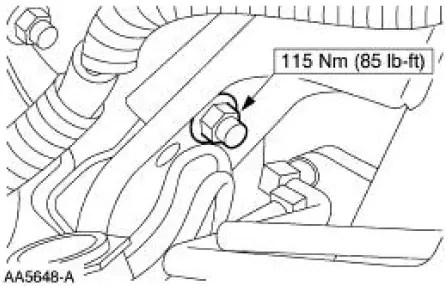
16. Install the RH engine mount nut.
17. Install the LH engine mount nut.
18. Lower the vehicle.
19. Remove the special tools.
20. Install the coolant recovery reservoir.
21. Install the radiator sight shield.
22. Install the air cleaner outlet pipe.
23. Connect the battery ground cable.
24. Fill the engine with clean engine oil.
25. CAUTION: Correct coolant bleeding is critical for correct engine cooling.
Fill and bleed the engine cooling system.
 Removal
1. Disconnect the battery ground cable.
2. Remove the air cleaner outlet pipe.
3. Remove the radiator sight shield.
4. Remove the coolant recovery reservoir.
1. Disconnect the hose.
2. R ...
 Oil Pan Baffle
Removal and Installation
1. Remove the oil pump screen cover and tube (6622). For additional
information, refer to Oil
Pump Screen and Pickup Tube in this section.
2. Remove the oil pan baffle ( ...
Other materials:
Cleaning the engine
Engines are more efficient when they are clean because grease and dirt
buildup keep the engine warmer than normal.
When washing:
• Take care when using a power washer to clean the engine. The
high-pressure fluid could penetrate the sealed parts and cause
da ...
Anti-Lock Control - Traction Control (Diagnosis and Testing)
Refer to Wiring Diagrams Cell 42, Anti-Lock Brake System for schematic and
connector information.
Special Tool(s)
Worldwide Diagnostic System
(WDS)
418-F224,
New Generation STAR (NGS)
Tester
418-F052, or equivalent scan
tool
73 Di ...
Resistor
Removal
1. Disconnect the connector.
2. Remove the screws.
3. Remove the resistor.
Installation
1. To install, reverse the removal procedure. ...
