Ford Mustang (1999-2004) Service Manual: Lock Cylinder - Door
Removal
1. NOTE: Individual lock cylinders are repaired by discarding the inoperative cylinder and building a new lock cylinder using the appropriate lock repair package. The lock repair package includes a detailed instruction sheet to build the new lock cylinder to the current key code of the vehicle.
Remove the door trim panel (23942). For additional information, refer to Section.
2. Using a screwdriver, release the lock cylinder actuating rod.
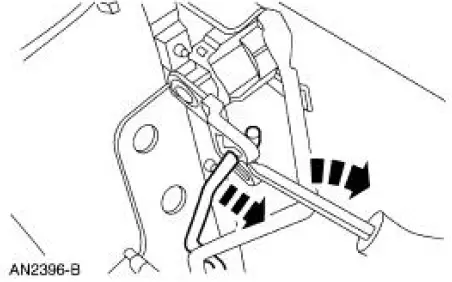
3. Remove the door lock cylinder retainer.
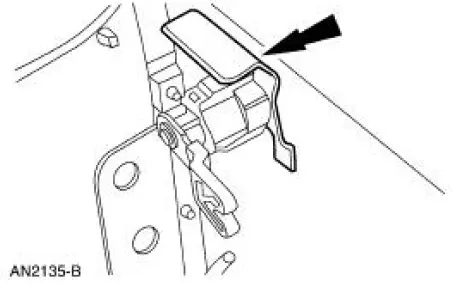
4. Remove the door lock cylinder (21990).
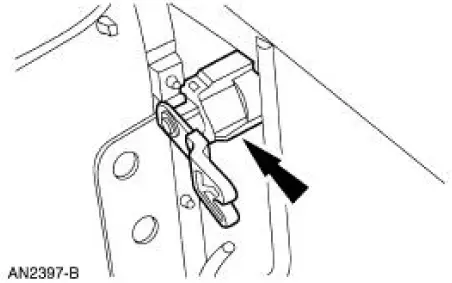
5. If necessary, transfer the lock cylinder arm to the new door lock cylinder (21990).
Installation
1. To install, reverse the removal procedure.
 Ignition Lock Cylinder - Non-Functional
Removal and Installation
1. NOTE: Make sure the front wheels are in the straight-ahead
position.
Disconnect the battery ground cable (14301) and wait at least one minute
to allow the deplet ...
 Lock Cylinder - Luggage Compartment Lid
Removal
1. NOTE: Individual lock cylinders are repaired by discarding the
inoperative cylinder and building
a new lock cylinder using the appropriate lock repair package. The lock
repair pac ...
Other materials:
Inspection and Verification
CAUTION: Do not hold the steering wheel (3600) at the stops for an
extended amount of
time. Damage to the power steering pump (3A674) will result.
NOTE: Make the following preliminary checks before repairing the
steering system:
1. Verify the customer conce ...
Engine Cooling (Diagnosis and Testing)
Special Tool(s)
Pressure Tester
014-R1072 or equivalent
73III Automotive Meter
105-R0057 or equivalent
Worldwide Diagnostic System
(WDS)
418-F224,
New Generation STAR (NGS)
Tester
418-F052, or equivalent scan ...
Pinpoint Test H: LFC 32/DTC B1932 - Driver Air Bag Circuit Resistance High
Normal Operation
The restraints control module (RCM) monitors the resistance for the
driver air bag ignitor by measuring
the resistance between pins 3 and 4. If the RCM detects high resistance
between these pins, it will
store a diagnostic trouble code ...
