Ford Mustang (1999-2004) Service Manual: Muffler - 3.8L
Removal and Installation
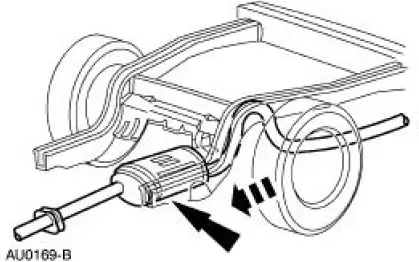
1. Raise and support the vehicle. For additional information, refer to Section.
2. Support the rear axle with a suitable jack.
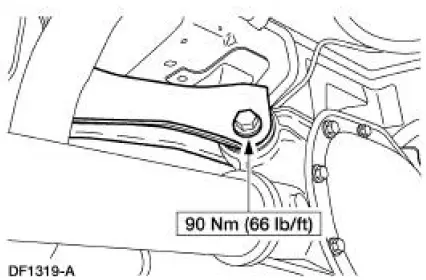
3. Remove the upper arm-to-differential bolt.
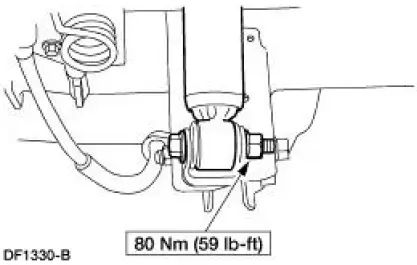
4. Remove the nut and bolt and disconnect the rear shock absorbers (18124) from the axle housing.
- Discard the nut.
5. Lower the rear axle.
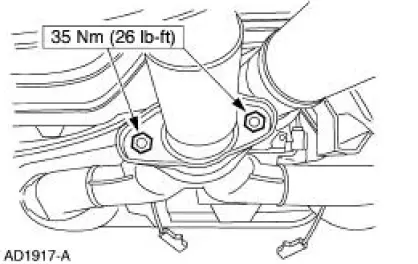
6. Remove the dual converter assembly flange nuts.
7. Remove the exhaust pipe assembly (5232) from the rear exhaust hanger insulator (5260).
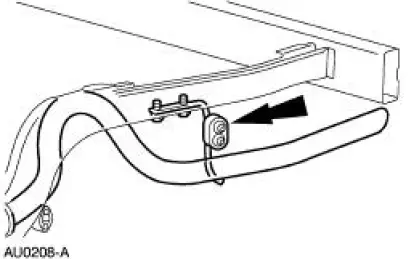
8. Remove the exhaust hanger insulators.
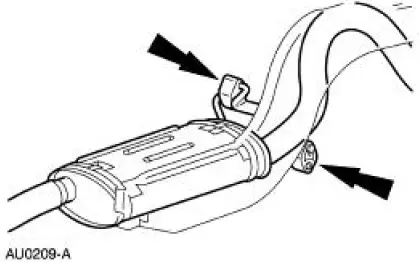
9. Remove the muffler (5230).
10. CAUTION: Do not use oil or grease-based lubricants on insulators as they deteriorate the rubber.
NOTE: A soap-and-water solution will ease installation of the exhaust hanger insulators.
To install, reverse the removal procedure.
 Exhaust System (Diagnosis and Testing)
Symptom Chart
Condition
Possible Sources
Action
Noisy or
leaking
exhaust
Broken or loose
clamps, hangers or
isolators.
Punctures in the muffler
( ...
 Muffler - 4.6L (2V)
Removal and Installation
1. Use a jack to support and lower the rear axle.
2. Remove the upper arm-to-differential bolt.
3. Remove the nut and bolt, and disconnect the rear shock absorbers (18124) ...
Other materials:
Push Rod
Removal
CAUTION: Mark the components removed for correct location.
1. Remove the rocker arms (6564). For additional information, refer to
Rocker Arm in this section.
2. Remove the push rods (6565).
3. Inspect the components. For additional information, ...
Material
Item
Specification
Threadlock and
Sealer
E0AZ-19554-AA
WSK-M2G351-A5 (type
II)
Shoulder Bolt Kit
F5ZZ-76539A04-A
-
NOTE: Before starting the adjustment process, inspect the top for damage,
make sure that the door
window glass ...
Evaporative Emissions (Description and Operation)
Component Location
The evaporative emission system:
is equipped with an on-board refueling vapor recovery (ORVR) system.
prevents hydrocarbon emissions from reaching the atmosphere.
stores fuel vapors in the evaporative emission (EVAP) canis ...
