Ford Mustang (1999-2004) Service Manual: Noise, Vibration and Harshness (NVH) (Diagnosis and Testing)
Special Tool(s)
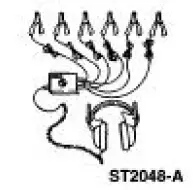 |
ChassisEAR 107-R2102 or equivalent |
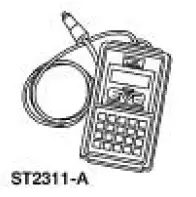 |
Electronic Vibration Analyzer 100-F027 (014-00344) or equivalent |
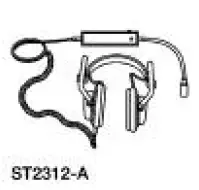 |
EngineEAR 107-R2100 or equivalent |
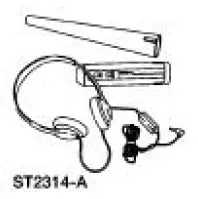 |
Ultrasonic Leak Detector 134-R0135 or equivalent |
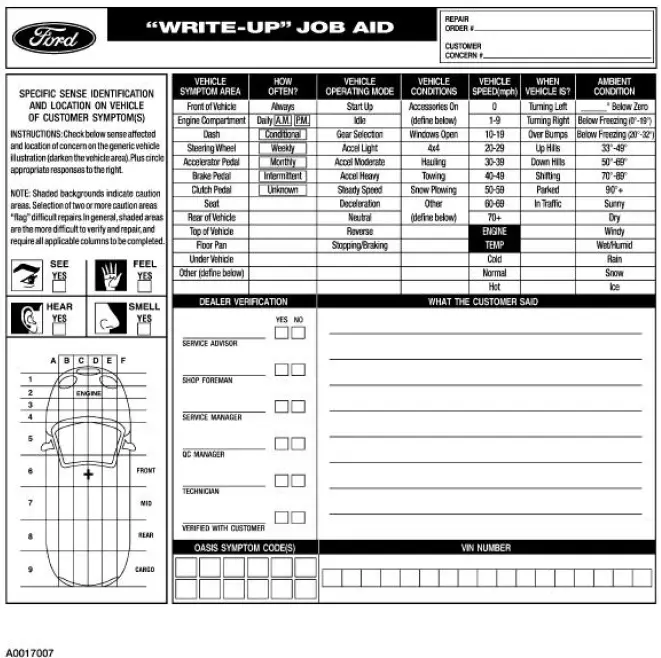
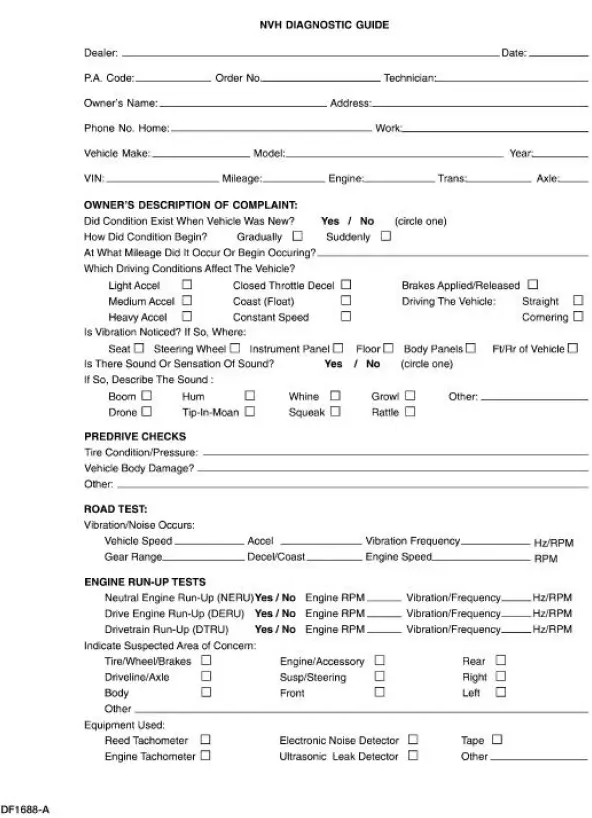
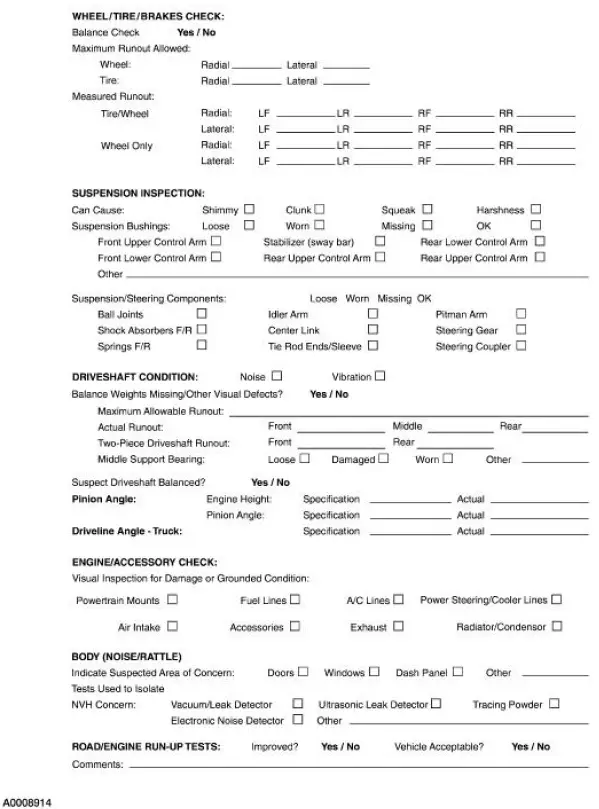
To assist the service advisor and the technician, a Write-up Job Aid and an NVH Diagnostic Guide are included with this material. The Write-up Job Aid serves as a place to record all important symptom information. The NVH Diagnostic Guide serves as a place to record information reported on the Writeup Job Aid as well as data from the testing to be carried out.
To begin a successful diagnosis, fill out the NVH Diagnostic Guide, record the reported findings, then proceed to each of the numbered process steps to complete the diagnosis.
Customer Interview
The diagnostic process starts with the customer interview. The service advisor must obtain as much information as possible about the problem and take a test drive with the customer. There are many ways a customer will describe NVH concerns and this will help minimize confusion arising from descriptive language differences. It is important that the concern is correctly interpreted and the customer descriptions are recorded. During the interview, ask the following questions:
- When was it first noticed?
- Did it appear suddenly or gradually?
- Did any abnormal occurrence coincide with or proceed its appearance?
Use the information gained from the customer to accurately begin the diagnostic process.
Pre-Drive Check
It is important to do a pre-drive check before road testing the vehicle. A pre-drive check verifies that the vehicle is relatively safe to drive and eliminates any obvious faults on the vehicle.
The pre-drive check consists of a brief visual inspection. During this brief inspection, take note of anything that will compromise safety during the road test and make those repairs/adjustments before taking the vehicle on the road.
Preparing for the Road Test
Observe the following when preparing for the road test:
- Review the information recorded on the NVH Diagnostic Guide. It is important to know the specific concern the customer has with the vehicle.
- Do not be misled by the reported location of the noise/vibration. The cause can actually be some distance away.
- Remember that the vibrating source component (originator) may only generate a small vibration. This small vibration can in turn cause a larger vibration/noise to emanate from another receiving component (reactor), due to contact with other components (transfer path).
- Conduct the road test on a quiet street where it is safe to duplicate the vibration/noise. The ideal testing route is an open, low-traffic area where it is possible to operate the vehicle at the speed in which the condition occurs.
- If possible, lower the radio antenna in order to minimize turbulence. Identify anything that could potentially make noise or be a source of wind noise. Inspect the vehicle for add-on items that create vibration/noise. Turn off the radio and the heating and cooling system blower.
- The engine speed is an important factor in arriving at a final conclusion. Therefore, connect an accurate tachometer to the engine, even if the vehicle has a tachometer. Use a tachometer that has clearly defined increments of less than 50 rpm. This ensures an exact engine speed reading.
Verify the Customer Concern
Verify the customer concern by carrying out a road test, an engine run-up test, or both.
The decision to carry out a road test, an engine run-up test, or both depends on the type of NVH concern. A road test may be necessary if the symptom relates to the suspension system or is sensitive to torque. A drive engine run-up (DERU) or a neutral engine run-up (NERU) test identifies noises and vibrations relating to engine and drivetrain rpm. Remember, a condition will not always be identifiable by carrying out these tests, however, they will eliminate many possibilities if carried out correctly.
 Index Card
Place an index card or a piece of paper between the weatherstrip and the
sealing surface, then close
the door. Slowly withdraw the index card or paper after the door is closed and
check the amount o ...
 Road Test
NOTE: It may be necessary to have the customer ride along or drive the
vehicle to point out the
concern. During the road test, take into consideration the customer's driving
habits and the driving
c ...
Other materials:
Ford Extended Service Plan
FORD ESP EXTENDED SERVICE PLANS
PROTECT YOURSELF FROM THE RISING COST OF VEHICLE REPAIRS
WITH A FORD EXTENDED SERVICE PLAN.
SERVICE PLANS (U.S. only)
More than 32 Million Ford and Lincoln owners have discovered the
powerful protection Ford ESP. It is the only ...
Switch
Removal
1. Remove the climate control assembly. For additional information, refer to
Control Assembly in
this section.
2. NOTE: All three switches are removed the same.
Remove the knob.
3. Remove the screw.
4. Rotate the switch and remove it from the cont ...
Spring Lock Couplings
Special Tool(s)
Disconnect Tool, Spring Lock
Coupling (3/8 inch yellow)
310-D004 (D87L-9280-A) or
equivalent
Disconnect Tool, Spring Lock
Coupling (1/2 inch green)
310-D005 (D87L-9280-B) or
equivalent
Material
Item
...
