Ford Mustang (1999-2004) Service Manual: Stabilizer Bar - Cobra
Removal
CAUTION: Suspension fasteners are critical parts because they affect performance of vital components and systems and their failure can result in major service expense. A new part with the same part number must be installed if installation becomes necessary. If substitution is necessary, the part must be of the same finish and property class. Torque values must be used as specified during reassembly to make sure of correct retention of these parts.
1. Remove the rear coil springs (5560). For additional information, refer to Spring-Cobra in this section.
2. Raise the subframe into position and remove the front bolts.
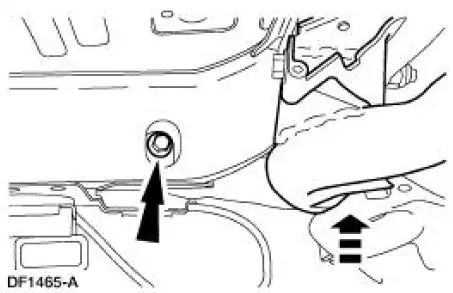
3. Lower the subframe out of the vehicle.
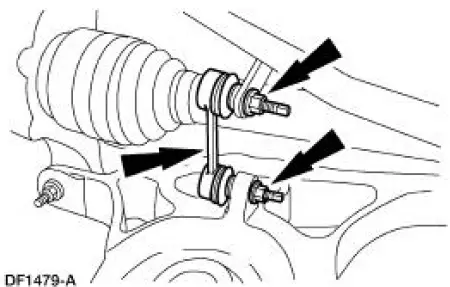
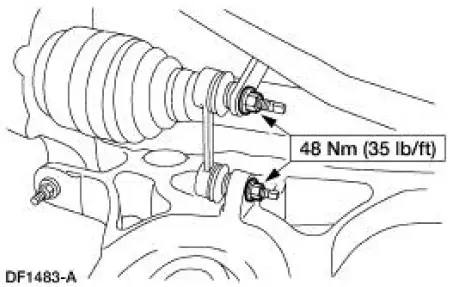
4. NOTE: To remove the stabilizer bar link nuts, first loosen the nut, then use the hex holding feature to prevent the stabilizer bar link ball joint from turning while removing the nut.
Remove the nuts and the stabilizer bar links (5C488). Discard the nuts.
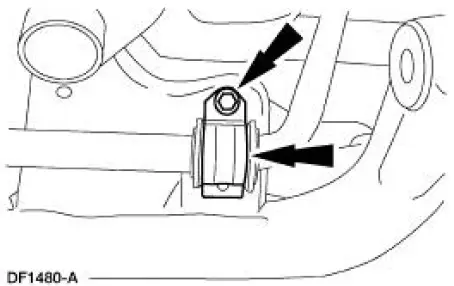
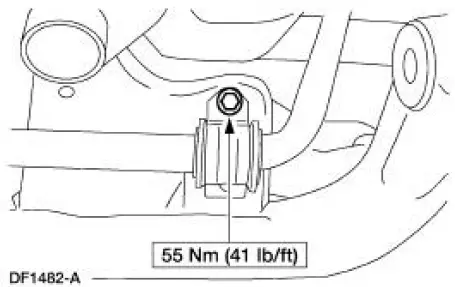
5. Remove the bolts and the stabilizer bar brackets (4A047). Discard the bolts.
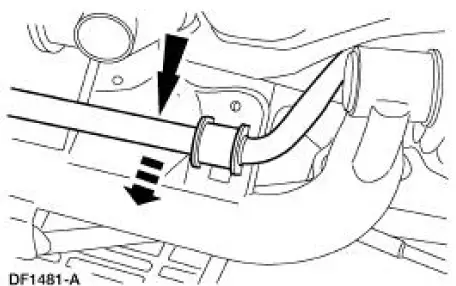
6. Remove the stabilizer bar (5A772) with the stabilizer bar bushings (5493).
Installation
1. NOTE: The stabilizer bar bracket bolts and the nuts on the stabilizer bar links are of a torque prevailing design. New bolts and nuts must be used during installation.
NOTE: To install the stabilizer bar link nuts, first install the nuts until snug using the hex holding feature to prevent the stabilizer bar link ball joint from turning. Final tighten the nuts using a socket and a torque wrench.
To install, reverse the removal procedure.
2. Check wheel alignment. Adjust as necessary.
 Stabilizer Bar
Removal
CAUTION: Suspension fasteners are critical parts because they affect
performance of vital
components and systems and their failure can result in major service expense. A
new part with
the sa ...
 Link - Stabilizer Bar
Removal
CAUTION: Suspension fasteners are critical parts because they affect
performance of vital
components and systems and their failure can result in major service expense. A
new part with
the sa ...
Other materials:
Clutch And Clutch Field Coil
Special Tool(s)
2-Jaw Puller
205-D026 (D80L-1002-L) or
equivalent
Installer, A/C Compressor Coil
412-065 (T89P-19623-EH)
Holding Fixture, Compressor
Clutch (3.8L vehicles)
412-098 (T94P-19703-AH)
Holding ...
Manual
WARNING: Brake fluid contains polyglycol ethers and polyglycols.
Avoid contact with
eyes. Wash hands thoroughly after handling. If brake fluid contacts
eyes, flush eyes with
running water for 15 minutes. Get medical attention if irritation
persist ...
Manual transmission
Using the Clutch
Manual transmission vehicles have a starter interlock that prevents
starting the engine unless the clutch pedal is fully pressed.
To start the vehicle:
1. Make sure the parking brake is fully set.
2. Press the clutch pedal to the
floor, then ...
