Ford Mustang (2005-2014) Owners Manual: Technical specifications
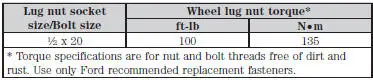
Wheel Lug Nut Torque Specifications
WARNING: When a wheel is installed, always remove any corrosion, dirt or foreign materials present on the mounting surfaces of the wheel or the surface of the wheel hub, brake drum or brake disc that contacts the wheel. Make sure that any fasteners that attach the rotor to the hub are secured so they do not interfere with the mounting surfaces of the wheel. Installing wheels without correct metal-to-metal contact at the wheel mounting surfaces can cause the wheel nuts to loosen and the wheel to come off while your vehicle is in motion, resulting in loss of control.
Retighten the lug nuts to the specified torque within 100 miles (160 kilometers) after any wheel disturbance (such as rotation, flat tire, wheel removal).
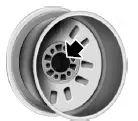
Note: Inspect the wheel pilot hole and mounting surface prior to installation. Remove any visible corrosion or loose particles.
 Temporary mobility kit
Note: The temporary mobility kit sealant compound in the canister is
to
be used for one tire only. See your Ford authorized dealer for additional
replacement sealant canisters.
The kit is located in ...

Other materials:
Installation
All vehicles
1. Position the engine front cover gasket on the engine front cover.
2. NOTE: If the engine front cover is not secured within four minutes, the
sealant must be removed
and the sealing area cleaned with metal surface cleaner. Allow to dry until ...
Spark Plug Wire
Special Tool(s)
Remover, Spark Plug Wire
303-106 (T74P-6666A)
Material
Item
Specification
Silicone Brake Caliper Grease
and Dielectric Compound
D7AZ-19A331-A or equivalent
ESE-M1C171-
A
Removal and Installation
CAUTION: ...
Engine Ignition (Description and Operation)
Eight separate ignition coils (12029):
are mounted directly above each spark plug (12405).
are controlled by the powertrain control module (PCM) for correct
firing sequence.
The spark plug:
changes the high voltage pulse into a spark which igni ...
