Ford Mustang (1999-2004) Service Manual: Air Conditioning (A/C) Compressor - 3.8L
Material
| Item | Specification |
| PAG Refrigerant Compressor Oil (R-134a Systems) F7AZ-19589-DA (Motorcraft YN- 12-C) | WSH-M1C231- B |
Removal and Installation
CAUTION: If installing a new air conditioning compressor due to an internal failure of the old unit, you must carry out the following procedures to remove contamination from the air conditioning system.
- If A/C flushing equipment is available, carry out the flushing of the air conditioning system prior to installing a new air conditioning compressor. For additional information, refer to Section.
- If A/C flushing equipment is not available, carry out filtering of the air conditioning system after a new air conditioning compressor has been installed. For additional information, refer to Section.
- Install a new evaporator core orifice (19D990), as directed by the A/C flushing or filtering procedure.
- Install a new suction accumulator (19C836), as directed by the A/C flushing or filtering procedure.
NOTE: Installation of a new suction accumulator is not required when repairing the air conditioning system except when there is physical evidence of system contamination from a failed A/C compressor or damage to the suction accumulator.
1. If flushing of the air conditioning system has not been performed, recover the refrigerant. For additional information, refer to Section.
2. Disconnect the battery. For additional information, refer to Section.
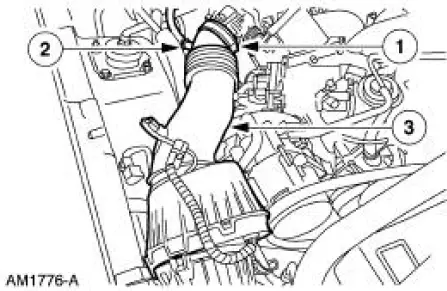
3. Unlatch the air breather.
4. Disconnect the mass airflow (MAF) sensor electrical connector.
5. Remove the air cleaner outlet tube (9B659).
1. Loosen the clamp.
2. Disconnect the crankcase ventilation tube (6758).
3. Remove the air cleaner outlet tube assembly.
6. Remove the drive belt (8620) from the A/C compressor pulley.
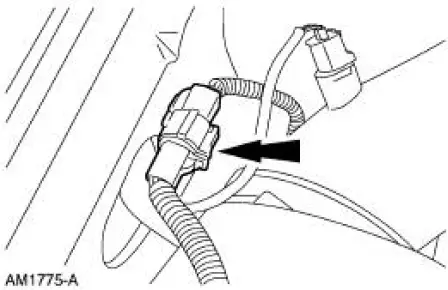
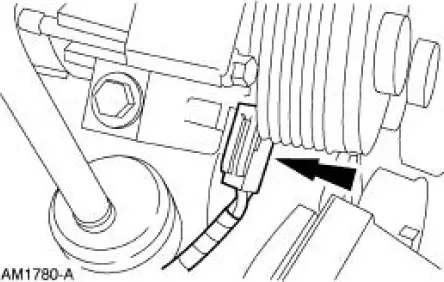
7. Disconnect the electrical compressor clutch connector.
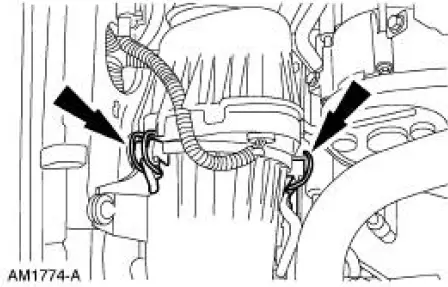
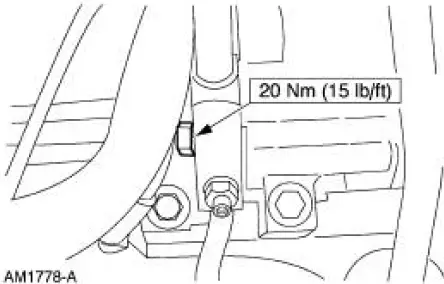
8. Remove the bolt and disconnect the A/C manifold and tube (19D734).
- Discard the O-ring seals.
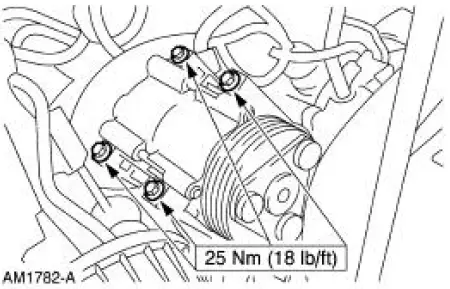
9. Remove the bolts and the A/C compressor.
10. To install, reverse the removal procedure.
- Install new O-ring seals lubricated in clean PAG oil.
- If filtering of the refrigerant system is not to be performed, lubricate the refrigerant system with the correct amount of clean PAG oil. For additional information, refer to Section.
11. If filtering of the air conditioning system is not to be performed, evacuate, leak test and charge the refrigerant system. For additional information, refer to Section.
 Spring Lock Coupling
The spring lock coupling is a refrigerant line coupling held together by a
garter spring inside a circular
cage.
When the coupling is connected together, the flared end of the female
f ...
 Air Conditioning (A/C) Compressor - 4.6L
Material
Item
Specification
PAG Refrigerant Compressor
Oil (R-134a Systems)
F7AZ-19589-DA (Motorcraft YN-
12-C)
WSH-M1C231-
B
Removal and Installation
CAUTION: If installing ...
Other materials:
Valve Stem to Valve Guide Clearance
Special Tool(s)
Dial Indicator Gauge with
Holding Fixture
100-002 (TOOL-4201-C) or
equivalent
Clearance Gauge, Valve Guide
303-004 (TOOL-6505-E) or
equivalent
NOTE: Valve stem diameter must be within specifications before
checkin ...
General information
WARNING: Extended idling at high engine speeds can produce
very high temperatures in the engine and exhaust system,
creating the risk of fire or other damage.
WARNING: Do not park, idle, or drive your vehicle on dry grass
or other dry ground cover. The emissio ...
Crankshaft Front Oil Seal
Special Tool(s)
Crankshaft Seal
Installer/Aligner
303-335 (T88T-6701-A)
Front Cover Seal Remover
303-107 (T74P-6700-A)
Crankshaft Seal Installer
303-635
Crankshaft Damper Replacer
303-102 (T74P-6316-B)
...
