Ford Mustang (1999-2004) Service Manual: Lamp Assembly - Fog Lamp (GT)
Removal
1. Raise and support the vehicle.
2. Remove the screw.
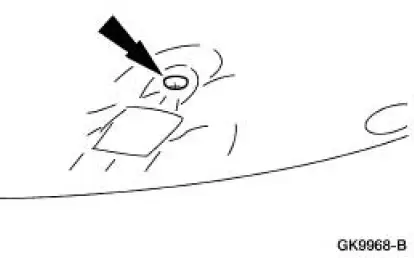
3. Partially lower the vehicle and remove the fog lamp assembly.
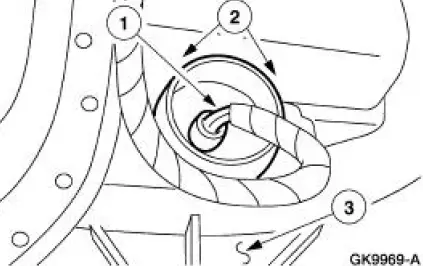
1. Disconnect the electrical connector.
2. Remove the two screws.
3. Remove the fog lamp assembly and replace the bulb if necessary.
Installation
1. NOTE: Be sure the fascia clip is correctly installed on the bottom side of the fog lamp assembly bracket.
To install, reverse the removal procedure.
Lamp Assembly -Fog Lamp (Cobra)
Removal and Installation
1. Raise and support the vehicle. For additional information, refer to Section.
2. Remove the fog lamp assembly.
1. Disconnect the electrical connector.
2. Remove the four screws.
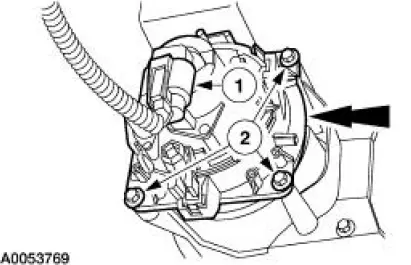
3. To install, reverse the removal procedure.
 Lamp Assembly - Headlamp
Removal
1. NOTE: Make sure that the headlamp switch and the ignition switch are
in the OFF position.
Raise the headlamp retainers.
2. Remove the headlamp assembly.
Disconnect the electrical ...
 Lamp Assembly - Rear
Removal
1. Position the luggage compartment trim aside.
Remove the two retainers.
2. Remove the four rear lamp nuts.
3. Remove the rear lamp assembly, disconnect the electrical connectors an ...
Other materials:
Switch - Traction Control
Removal and Installation
1. NOTE: If the vehicle is equipped with an automatic
transmission, position the shift lever in the 1
position before detaching the floor console finish panel.
Lifting from both sides, detach the floor console finish panel.
...
Principles of Operation
There are four main principles involved with the basic theory of
operation:
heat transfer
latent heat of vaporization
relative humidity
effects of pressure
Heat Transfer
If two substances of different temperature are placed near each other,
t ...
Navigation controls
Type 1
WARNING: Driving while distracted can result in loss of vehicle
control, crash and injury. We strongly recommend that you use
extreme caution when using any device that may take your focus off
the road. Your primary responsibility is the safe operation ...
