Ford Mustang (1999-2004) Service Manual: Master Cylinder Priming - In-Vehicle or Bench
WARNING: Brake fluid contains polyglycol ethers and polyglycols. Avoid contact with eyes. Wash hands thoroughly after handling. If brake fluid contacts eyes, flush eyes with running water for 15 minutes. Get medical attention if irritation persists. If taken internally, drink water and induce vomiting. Get medical attention immediately.
CAUTION: Do not allow the brake master cylinder reservoir to run dry during the bleeding operation. Keep the brake master cylinder reservoir filled with the specified brake fluid. Never reuse the brake fluid that has been drained from the hydraulic system.
CAUTION: Brake fluid is harmful to painted and plastic surfaces. If brake fluid is spilled onto a painted or plastic surface, immediately wash it with water.
NOTE: When any part of the hydraulic system has been disconnected for repair or installation of new components, air can enter the system and cause spongy brake pedal (2455) action. This requires bleeding of the hydraulic system after it has been correctly connected. The hydraulic system can be bled manually or with pressure bleeding equipment.
NOTE: When a new brake master cylinder (2140) has been installed or the system has been emptied, or partially emptied, it should be primed to prevent air from entering the system.
1. For in-vehicle priming, disconnect the brake lines.
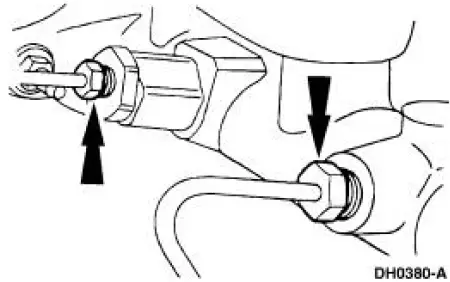
2. For bench priming, mount the brake master cylinder (2140) in a vise.
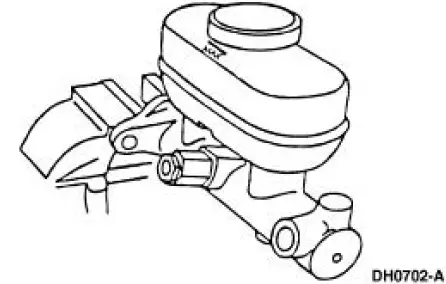
3. Install short brake tubes with the ends submerged in the brake master cylinder reservoir (2K478), and fill the brake master cylinder reservoir with High Performance DOT 3 Brake Fluid C6AZ-19542-AB or equivalent DOT 3 fluid meeting Ford specification ESA-M6C25-A.
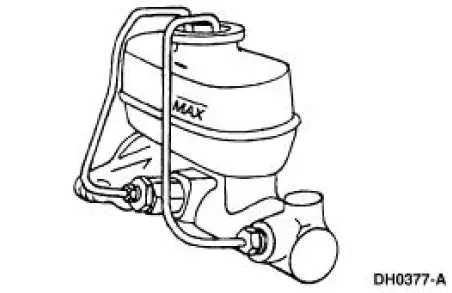
4. Have an assistant pump the brake pedal (2455), or slowly depress the primary piston until clear fluid flows from both brake tubes, without air bubbles.
5. If the brake master cylinder has been primed at the bench, install it in the vehicle.
6. Remove the short brake tubes, and install the brake outlet tubes.
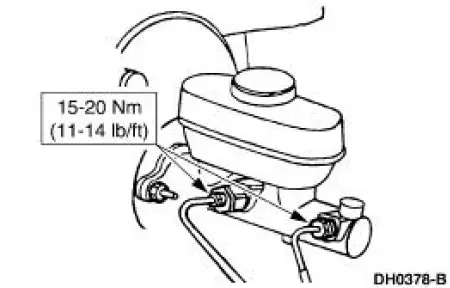
7. Bleed each brake tube at the brake master cylinder as follows:
1. Have an assistant pump the brake pedal, and then hold firm pressure on the brake pedal.
2. Loosen the rear most brake tube fittings until a stream of brake fluid comes out. While the assistant maintains pressure on the brake pedal, tighten the brake tube fitting.
3. Repeat this operation until clear, bubble-free fluid comes out.
4. Refill the brake master cylinder reservoir as necessary. Repeat the bleeding operation at the front brake tube.
 Bleeding - Components
Special Tool(s)
Worldwide Diagnostic System
(WDS)
418-F224, New Generation STAR (NGS)
Tester
418-F052, or equivalent scan
tool
NGS Flash Cable
418-F120 (007-00531) or
Eq ...
 Master Cylinder Priming - 4.6L
1. CAUTION: Use only bleed screws on the engine side of the
brake master cylinder
(2140). The hydro-boost bleed screw, located near the dash on the
hydro-booster
casting, is for the booster ...
Other materials:
Engine - Mach I 4.6L (4V)
General Specifications
Engine Specifications
a - Newly Installed-Refers to the condition of the "NEW" drive belt
before the engine has made no more
than one rotation and before the belt has had a chance to stretch or seat
into the pu ...
Disassembly
1. NOTE: The index mark on the output shaft must be aligned with the
index mark on the output
shaft ring gear during the assembly procedure.
Remove the ring gear snap ring.
2. Separate the ring gear and output shaft.
3. Remove the three output shaft seal ...
Windshield washers
Note: Do not operate the wipers on a dry windshield. This may scratch
the glass, damage the wiper blades or cause the wiper motor to burn out.
Always use the windshield washer before wiping a dry windshield.
Note: Do not operate the washer when the washer re ...
