Ford Mustang (2005-2014) Owners Manual: Transmission fluid check
Checking Automatic Transmission Fluid
Note: Transmission fluid should be checked and, if required, added by an authorized dealer.
The automatic transmission does not have a transmission fluid dipstick.
See your Scheduled Maintenance Information for scheduled intervals for fluid checks and changes. Your transmission does not consume fluid.
However, the fluid level should be checked if the transmission is not working properly, (i.e., if the transmission slips or shifts slowly) or if you notice some sign of fluid leakage.
Do not use supplemental transmission fluid additives, treatments or cleaning agents. The use of these materials may affect transmission operation and result in damage to internal transmission components.
Checking and Adding Manual Transmission Fluid (if equipped)

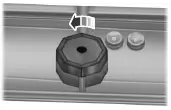
1. Clean the filler plug. It is located
on the passenger side of the
transmission.
2. Remove the filler plug and inspect
the fluid level.
3. For vehicles equipped with a V6 engine, the correct manual
transmission fill level is at the lower edge of the filler hole. For vehicles
equipped with a V8 engine, the correct manual transmission fill level is
1/2 in (1.3 cm) below the edge of the filler hole.
4. Add enough fluid through the filler opening to bring the fluid up to
the recommended levels.
5. Install and tighten the fill plug securely.
Use only fluid that meets Ford specifications. See the technical
specifications chart in the Capacities and Specifications chapter.
 Engine coolant check
Checking the Engine Coolant
The concentration and level of engine coolant should be checked at the
intervals listed in Scheduled Maintenance Information.
Note: Make sure that the level is at the FULL ...
 Brake and clutch fluid check
Brake and clutch (if equipped) systems are supplied from the same
reservoir.
Fluid levels between the MIN and MAX lines are within the normal
operating range; there is no need to add fluid. If the fl ...
Other materials:
Changing the vehicle battery
WARNING: Batteries normally produce explosive gases which
can cause personal injury. Therefore, do not allow flames, sparks
or lighted substances to come near the battery. When working near the
battery, always shield your face and protect your eyes. Always pro ...
Transmission (REMOVAL)
Special Tool(s)
Retainer, Torque Converter
307-346 (T97T-7902-A)
CAUTION: Whenever a transmission has been disassembled to install new
parts the
transmission fluid cooler tubes must be cleaned and backflushed. Use a suitable
torque
converter/ ...
Window Glass - Quarter
Removal
1. Remove the quarter trim panel. For additional information, refer
to Section.
2. Remove the roof side trim moulding. For additional information, refer
to Section.
3. Remove the exterior quarter glass weatherstrip.
4. Remove the nuts.
...
