
Ford Mustang (1999-2004) Service Manual: Subwoofer Amplifier - Convertible
Removal and Installation
1. NOTE: The convertible top needs to be in the up position to remove the subwoofer amplifiers.
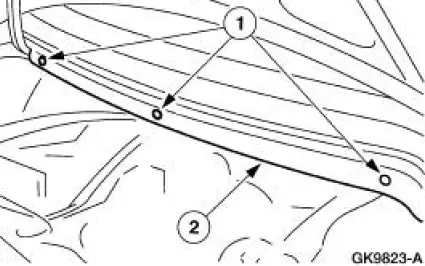
From inside the luggage compartment, remove the forward panel.
1. Remove the pin-type retainers.
2. Remove the forward panel.
2. NOTE: LH and RH subwoofer amplifiers are similar.
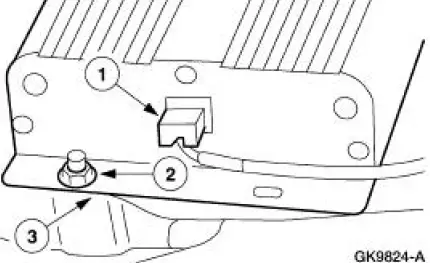
Remove the subwoofer amplifiers.
1. Disconnect the electrical connectors.
2. Remove the nuts.
3. Remove the subwoofer amplifiers.
3. To install, reverse the removal procedure.
Subwoofer Amplifier -Coupe
Removal and Installation
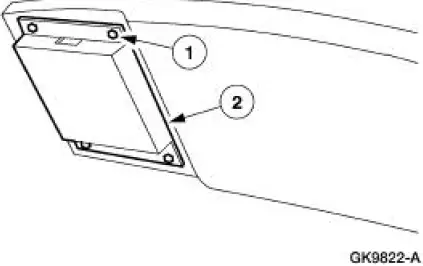
1. Remove the subwoofer amplifier.
1. Remove the screws.
2. Remove the subwoofer amplifier.
2. To install, reverse the removal procedure.
 Audio Unit (Removal and Installation)
Removal and Installation
1. Remove the instrument panel center finish panel. For additional
information, refer to Section
2. Remove the audio unit.
1. Remove the screws.
2. Disconnect ...
 Subwoofer Amplifier - Mach 1000
Removal and Installation
1. Remove the subwoofer assembly.
1. Remove the two attaching nuts.
2. Remove the screw.
3. Disconnect the electrical connectors.
2. Remove the subwoofer ...
Other materials:
Column
Removal and Installation
All vehicles
1. Disconnect the battery ground cable and wait at least one minute to allow
the depletion of the
restraint system backup power supply.
2. WARNING: To avoid the risk of serious personal injury, follow all
warnings,
c ...
Assembly
1. Lubricate the differential side gear thrust washers and the differential
side gear journals, and
assemble the washers to the gears.
Use SAE 80W-90 Premium Rear Axle Lubricant XY-80W90-QL or equivalent
meeting
Ford specification WSP-M2C197-A.
2. Lub ...
Charging System (Description and Operation)
The charging system is a negative ground system consisting of the
following:
generator
internal voltage regulator
charging system warning indicator
storage battery
necessary wiring and cables
The generator is belt-driven by the engine ...
