Ford Mustang (1999-2004) Service Manual: Accelerator Cable Bracket - 4.6L (2V)
Removal and Installation
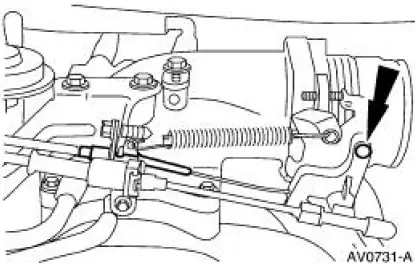
1. Disconnect the speed control cable from the throttle body and the bracket. For additional information, refer to Section.
2. Disconnect the accelerator cable from the throttle body by rotating the throttle body full open and aligning the cable with the release slot.
3. Compress the accelerator cable locking tabs and disconnect the accelerator cable from the accelerator cable bracket.
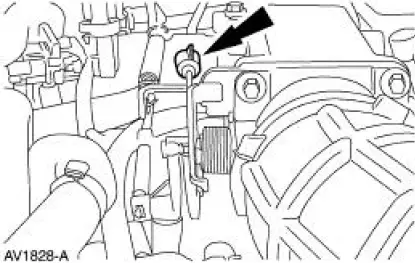
4. Remove the spring.

5. Remove the bolts and the accelerator cable bracket.
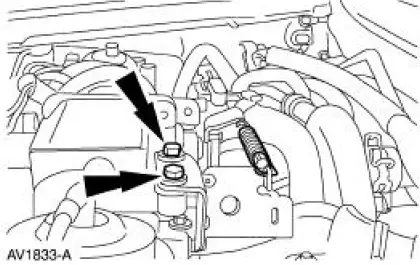
6. To install, reverse the removal procedure.
 Accelerator Cable Bracket - 3.8L
Removal and Installation
1. Disconnect the speed control cable from the throttle body and the bracket.
For additional
information, refer to Section.
2. Disconnect the accelerator cable from the thro ...
 Accelerator Cable Bracket - Supercharged Engine
Removal and Installation
1. Disconnect the accelerator cable and speed control cable.
2. Depress the tabs and disconnect the accelerator cable and speed control
cable from the
accelerator cable bra ...
Other materials:
Air Bag Supplemental Restraint System (SRS) (Description and Operation)
The air bag supplemental restraint system (SRS) is designed to provide
increased collision protection
for front seat occupants in addition to that provided by the three-point safety
belt system. Safety belt
use is necessary to obtain the best occupant protec ...
Removal
CAUTION: Suspension fasteners are critical parts because they affect
performance of vital
components and systems and their failure can result in major service expense. A
new part with
the same part number must be installed if installation becomes necessary. ...
Gear (Disassembly and Assembly)
Special Tool(s)
Head Mounting Fixture
303-D041 (D83L-500-B1) or
Equivalent
Inner Tie Rod Socket Tool
211-D025 (D90P-3290-A) or
Equivalent
Steering Gear Holding Fixture
211-D011 (D87P-3504-B) or
Equivalent
Material
...
