Ford Mustang (1999-2004) Service Manual: Bulb - Headlamp
Removal
WARNING: The halogen bulb contains gas under pressure. The bulb may shatter if the glass envelope is scratched or if the bulb is dropped. Handle the bulb only by its base. Grasp the bulb only by its base. Avoid touching the glass envelope.
NOTE: The headlamp bulb should not be removed from the headlamp until just before a replacement bulb is installed. Removing the bulb for an extended period of time may effect headlamp bulb performance. Contaminants may enter the headlamp where they can settle on the lens and reflector.
Never turn on the headlamps with the bulb removed.
1. Remove the headlamp assembly. For additional information, refer to Lamp Assembly- Headlamp .
2. Rotate the headlamp bulb retainer counterclockwise.
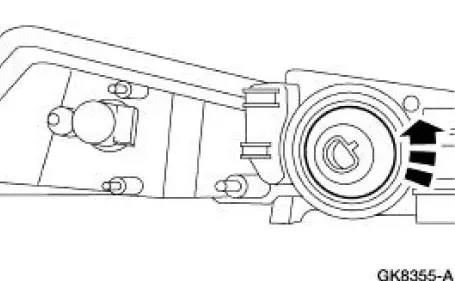
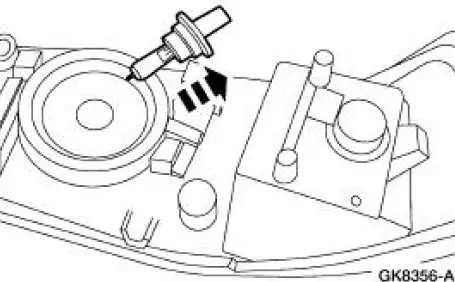
3. Remove the headlamp bulb and retainer.
- Grasp the headlamp bulb by its base and remove the bulb.
Installation
1. WARNING: The halogen bulb contains gas under pressure. The bulb may shatter if the glass envelope is scratched or if the bulb is dropped. Handle the bulb only by its base. Grasp the bulb only by its base. Avoid touching the glass envelope.
To install, reverse the removal procedure.
 Headlamp Adjustment
Headlamp Aiming
1. The headlamp aiming procedure depends on the type of beam pattern the
headlamp is
equipped with. Vehicles may come equipped with visual optical right (VOR),
visual optical lef ...
 Lamp Assembly - Headlamp
Removal
1. NOTE: Make sure that the headlamp switch and the ignition switch are
in the OFF position.
Raise the headlamp retainers.
2. Remove the headlamp assembly.
Disconnect the electrical ...
Other materials:
Brake Booster - Vacuum (Removal and Installation)
Removal
1. Disconnect the battery ground cable (14301).
2. Remove the air cleaner housing.
3. Remove the brake master cylinder nuts.
4. Position the brake master cylinder (2140) aside.
5. With the engine off, depress the brake pedal (2455) several t ...
Refrigerant Identification Testing
Special Tool(s)
Refrigerant Identifier with Air-
Radicator
198-00003 or equivalent
1. NOTE: An A/C refrigerant analyzer must be used to identify gas
samples taken directly from the
refrigeration system or storage containers prior to recoveri ...
Lighting control
A. Off
B. Parking lamps, instrument panel
lamps, license plate lamps and tail
lamps
C. Headlamps
High Beams
• Push the lever toward the
instrument panel to switch
on the high beams.
• Pull the lever toward you to
switch of the high beams.
Headlamp Flashe ...
