Ford Mustang (1999-2004) Service Manual: Exhaust Manifold LH
Special Tool(s)
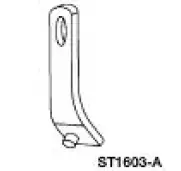 |
Lifting Bracket, Engine 303-D088 (D93P-6001-A2) |
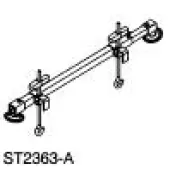 |
Support Bar, Engine 303-290-A |
Removal and Installation
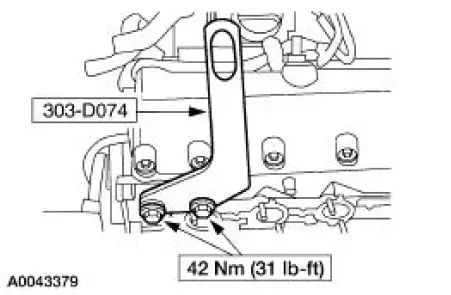
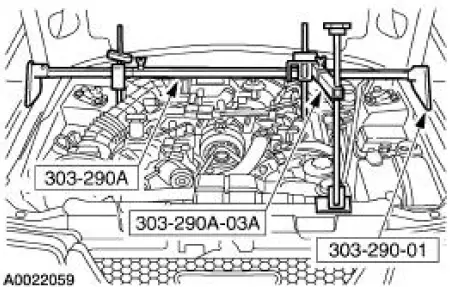
1. Install the special tool.
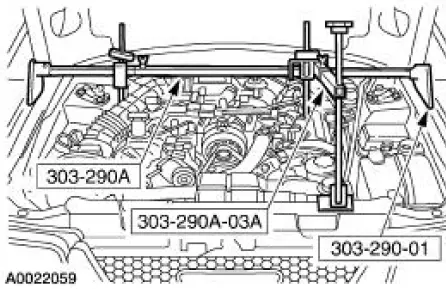
2. Install the special tools.
3. Raise and support the vehicle. For additional information, refer to Section.
4. Remove the LH and RH side engine mount nuts.

5. Lower the vehicle.
6. Using the special tools, raise the engine.
7. Raise the vehicle.
8. Separate the exhaust at the exhaust manifold. For additional information, refer to Section.
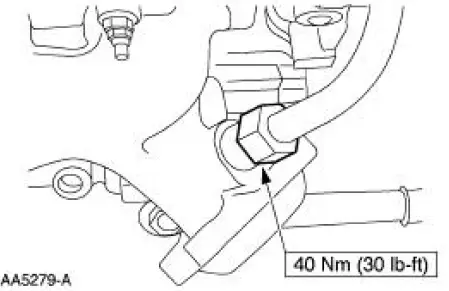
9. Disconnect the exhaust gas recirculation (EGR) tube at the exhaust manifold.
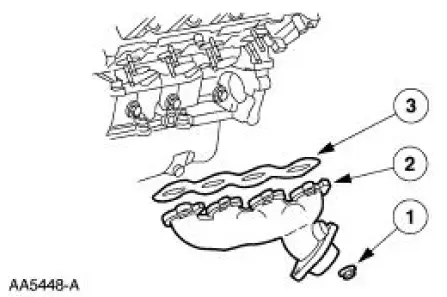
10. Remove the exhaust manifold.
1. Remove the exhaust manifold nuts.
2. Remove the exhaust manifold.
3. Remove the exhaust manifold gasket.
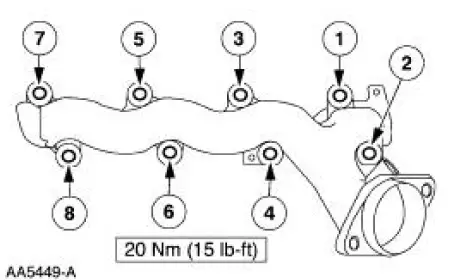
11. To install, reverse the removal procedure.
1. Tighten the exhaust manifold nuts in the sequence shown.
 Exhaust Manifold RH
Special Tool(s)
Lifting Bracket, Engine
303-D088 (D93P-6001-A2)
Support Bar, Engine
303-290-A
Removal and Installation
1. Install the special tool.
2. Install the speci ...
 Oil Filter Adapter
Material
Item
Specification
Super Premium SAE 5W-20
Motor Oil
XO-5W20 QSP or equivalent
WSS-M2C153-
H
Premium Engine Coolant
VC-4A (In Canada CXC-10; In
Oregon VC-5) or ...
Other materials:
Removal
WARNING: Do not smoke or carry lighted tobacco or open flame of any
type when
working on or near any fuel related components. Highly flammable mixtures are
always present
and may be ignited. Failure to follow these instructions may result in personal
injury ...
Cooling Fan Motor and Shroud
Removal and Installation
1. Disconnect the battery ground cable.
2. Remove the degas bottle or coolant expansion tank. For additional
information, refer to Degas
Bottle-4.6L(2V) and 4.6L(4V) in this section.
3. Disconnect the cooling fan electrical connecto ...
Information messages
Note: Depending on the vehicle options equipped with your vehicle, not
all of the messages will display or be available. Certain messages may be
abbreviated or shortened depending upon which cluster type you have.
Press the RESET button for Type 1 displays or ...
