Ford Mustang (1999-2004) Service Manual: Moulding - Roof Side
Removal and Installation
1. Remove the weatherstrip.
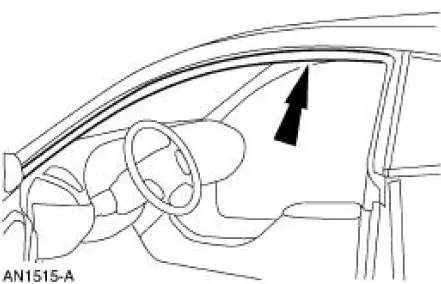
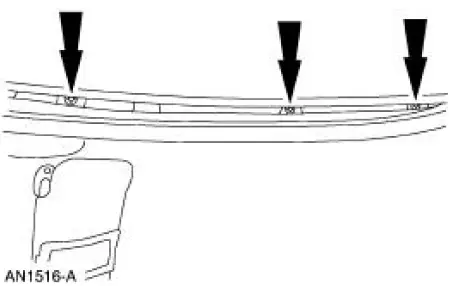
2. Remove the exterior roof side moulding screws.
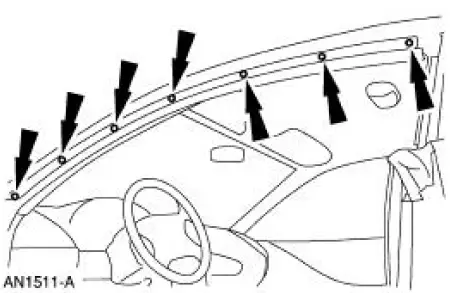
3. Remove the interior roof side moulding screws.
4. Remove the roof side moulding screw.
5. Release the clips.
1. Lift up to release the two clips.
2. NOTE: Grasp the roof side moulding and lift up to release the money clip.
Remove the money clip.
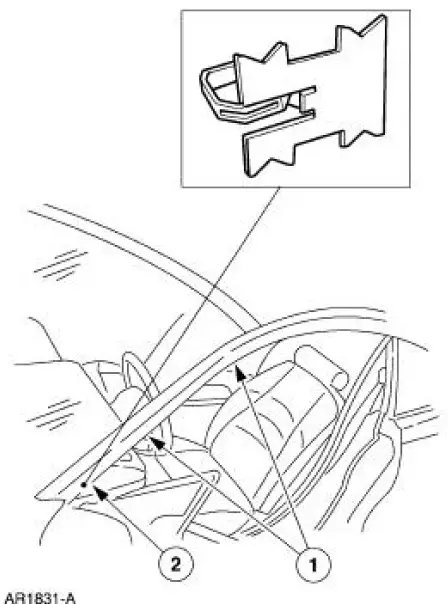
6. Remove the upper quarter trim panel. For additional information, refer to Section.
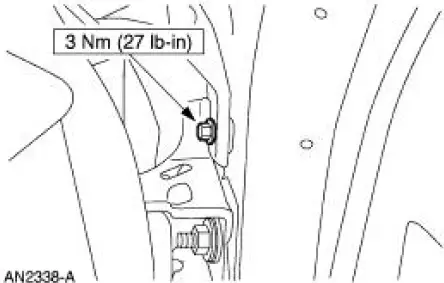
7. Remove the nuts and the roof side moulding.
8. To install, reverse the removal procedure.
 Exterior Trim and Ornamentation
Torque Specifications
Exterior Trim and Ornamentation
The exterior trim and ornamentation consists of the following
components:
body side scoop
hood scoop (if equipped)
front spoiler ...
 Moulding - Rocker Panel
Removal
1. Remove the front rocker panel moulding screw.
2. Remove the strip.
3. Remove the rear rocker panel moulding screw.
4. Remove the pin-type retainers and the rocker panel moulding.
...
Other materials:
Muffler - 4.6L (2V)
Removal and Installation
1. Use a jack to support and lower the rear axle.
2. Remove the upper arm-to-differential bolt.
3. Remove the nut and bolt, and disconnect the rear shock absorbers (18124)
from the axle
housing.
Discard the nut.
4. Lower the r ...
Rear Suspension (Description and Operation)
Item
Part Number
Description
1
18125
Rear shock absorber
2
-
Rear axle driveline vibration damper
3
5A649
Rear lower suspension arm and bushing (common
LH and RH)
4
5560
Rear spring
5
4731
...
Deactivation
WARNING: Always wear safety glasses when repairing an air bag
supplemental restraint
system (SRS) vehicle and when handling an air bag module. This will
reduce the risk of injury
in the event of an accidental deployment.
WARNING: Carry a live air ...
