Ford Mustang (1999-2004) Service Manual: Muffler - 4.6L (4V)
Removal and Installation
1. Raise and support the vehicle. For additional information, refer to Section.
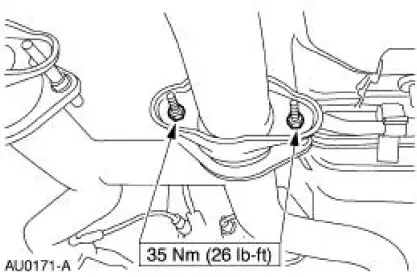
2. NOTE: RH side shown, LH side similar.
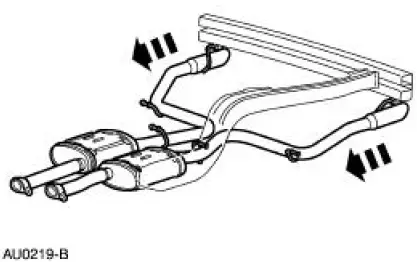
Remove the dual converter assembly nuts.
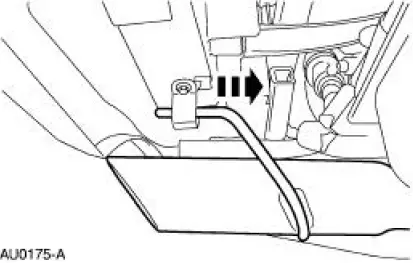
3. Remove the RH exhaust hanger insulator (5260).
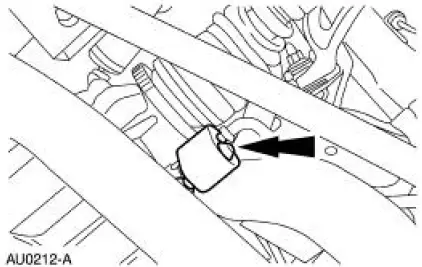
4. Remove the LH exhaust hanger insulator (5260).
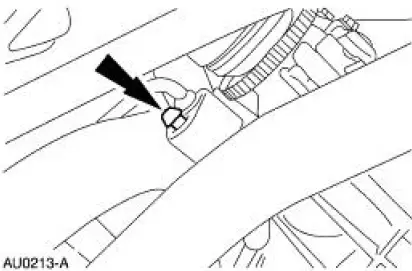
5. Remove the RH intermediate exhaust pipe hanger insulator.
6. Remove the LH exhaust pipe hanger insulator.
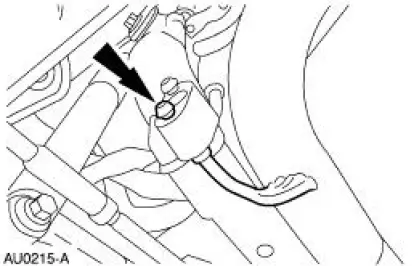
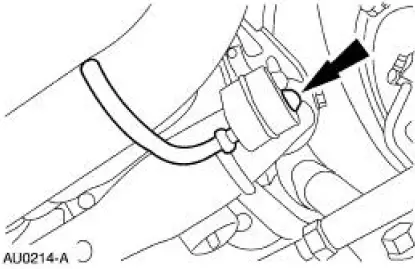
7. Remove the RH exhaust pipe hanger insulator.

8. Remove the LH exhaust pipe hanger insulator.
9. Remove the RH and LH mufflers.
10. CAUTION: Do not use oil or grease-based lubricants on the insulators as they deteriorate the rubber.
NOTE: A soap-and-water solution will ease installation of the exhaust hanger insulators.
To install, reverse the removal procedure.
 Muffler - 4.6L (2V)
Removal and Installation
1. Use a jack to support and lower the rear axle.
2. Remove the upper arm-to-differential bolt.
3. Remove the nut and bolt, and disconnect the rear shock absorbers (18124) ...
 Dual Converter Y-Pipe - 3.8L
Removal
NOTE: The RH and LH catalytic converters are serviceable separately.
1. Raise and support the vehicle. For additional information, refer to
Section.
2. CAUTION: When repairing the exhaust sys ...
Other materials:
Driving through water
WARNING: Drive through water in an emergency only, and not
as part of normal driving.
WARNING: Engine damage can occur if water enters the air
filter.
Note: Driving through deep water may allow water into the transmission
or air intake and can cause internal v ...
Pinpoint Tests
PINPOINT TEST A: THE ENGINE DOES NOT CRANK AND THE
RELAY DOES CLICK
Test Step
Result / Action to Take
A1 CHECK THE VOLTAGE TO THE STARTER RELAY
YesGO to A2 .
No
REPAIR circuit 1050 (LG/VT) for an open. TEST the
system for normal operation. ...
Brake Caliper Anchor Plate - Cobra
Removal
1. Remove the pads. For additional information, refer to Brake
Pads-Cobra in this section.
2. Remove the anchor plate bolts.
Installation
1. Follow the removal procedure in reverse order.
...
