Ford Mustang (1999-2004) Service Manual: Accessory Drive Belt Tensioner - 4.6L (2V) and (4V)
Removal and Installation
Mach I
1. Remove the air intake scoop. For additional information, refer to Section.
Cobra
2. Remove the supercharger drive belt cover.
3. Rotate the supercharger belt tensioner clockwise and remove the supercharger belt.
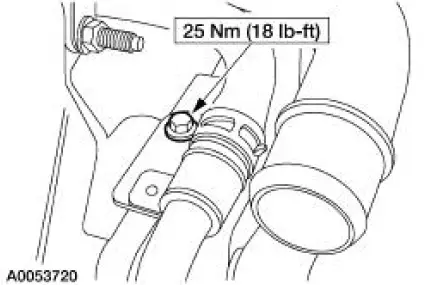
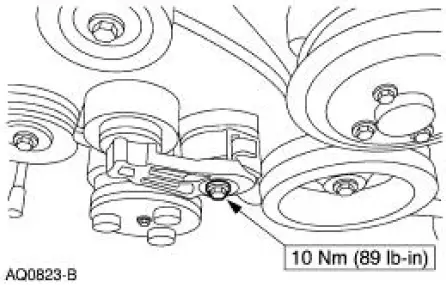
4. Remove the cooling hose and tube assembly mounting bolt.
5. Remove the belt idler support bracket assembly.
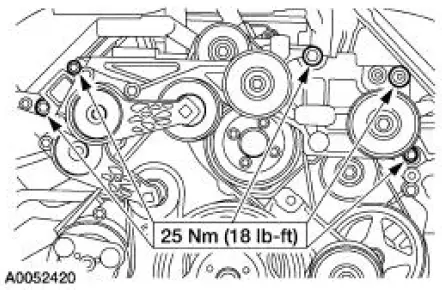
6. Remove the accessory drive belt. For additional information, refer to Accessory Drive Belt- 4.6L (2V) and (4V) in this section.
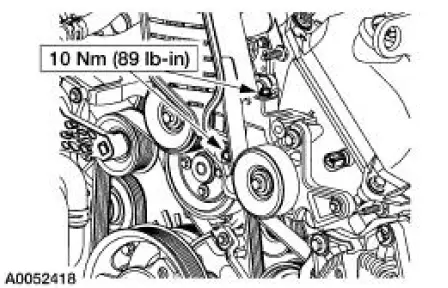
7. Remove the accessory drive belt tensioner.

All engines
8. Remove the accessory drive belt. For additional information, refer to Accessory Drive Belt Tensioner-4.6L (2V) and (4V) in this section.
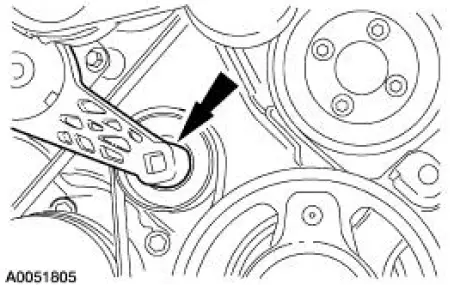
9. Remove the belt tensioner.
- Remove the bolt and the tensioner.
10. To install, reverse the removal procedure. Refer to Accessory Drive and Accessory Drive- Cobra for accessory drive belt routing.
 Accessory Drive Belt Tensioner - 3.8L
Removal and Installation
1. Remove the drive belt. For additional information, refer to Accessory
Drive Belt-3.8L in this
section.
2. Remove the belt tensioner.
Remove the bolt.
3. To install, ...
 Supercharger Belt Tensioner
Removal and Installation
1. Remove the supercharger drive belt cover.
2. Rotate the supercharger belt tensioner clockwise and remove the
supercharger belt.
3. Remove the bolts and the supercharger ...
Other materials:
Installation
1. CAUTION: Install the brake pads in full axle sets. Do not
install new brake pads on
only one side of vehicle.
Install the new slipper and brake pads.
2. Position the caliper on the anchor plate and install the bolts.
3. Install the wheel and tire ...
Manual seats
WARNING: Do not adjust the driver’s seat or seatback while the
vehicle is moving.
WARNING: Rock the seat backwards and forwards after
releasing the lever to make sure that it is fully engaged.
Moving the seats backward and
forward
Recline adjustment
WARNIN ...
Transmission (Removal)
1. Remove the gearshift lever knob.
2. Remove the console panel gearshift plate. Disconnect the cigar lighter
electrical connector, then
lift the gearshift lever boot over the gearshift lever.
3. Remove the bolts and the upper gearshift lever.
4. Remove ...
