Ford Mustang (1999-2004) Service Manual: Actuator Cable - Speed Control-Cobra
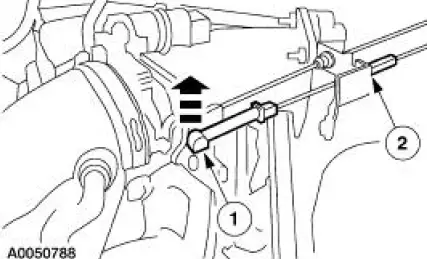
1. Remove the speed control actuator cable end from the throttle body.
1. Lift the speed control cable from the throttle nailhead.
2. Release the speed control cable from the throttle bracket.
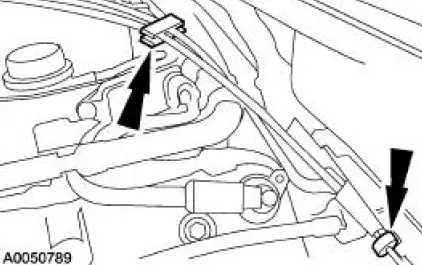
2. Remove the speed control cable from the retaining clips.
3. Remove the LH front wheel and tire assembly. For additional information, refer to Section
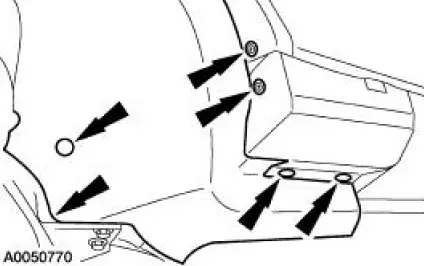
4. Position aside the LH front splash shield.
- Remove the pin-type retainers.
- Remove the screws.
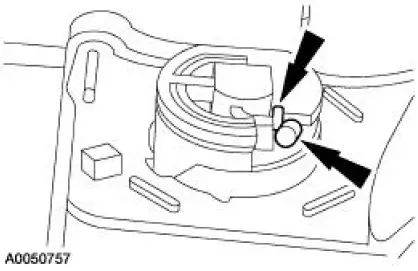
5. Depress the locking tab and rotate the speed control actuator cable cap to remove.
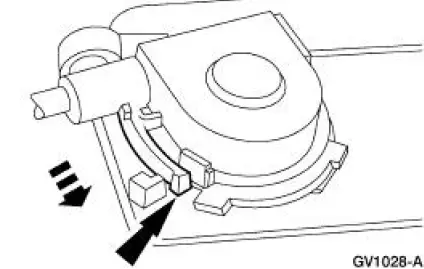
6. Gently push in the retaining spring while disconnecting the speed control actuator cable from the speed control actuator pulley.
Installation
1. To install, reverse the removal procedure.
 Actuator Cable - Speed Control
1. Remove the speed control actuator cable end from the throttle body.
1. Lift the speed control cable from the throttle nailhead.
2. Release the speed control cable from the throttle bracket.
...
 Actuator - Speed Control Servo
1. CAUTION: Electronic modules are sensitive to static electrical
charges. If exposed
to these charges, damage may result.
Disconnect the battery ground cable.
2. Remove the LH wheel and tire; re ...
Other materials:
Personal Safety System
The Personal Safety System provides an improved overall level of frontal
crash protection to front seat occupants and is designed to help further
reduce the risk of airbag-related injuries. The system is able to analyze
different occupant conditions and crash ...
Cylinder Head - Distortion
Special Tool(s)
Straight Edge
303-D039 (D83L-4201-A) or
equivalent
1. Use a straight edge and a feeler gauge to inspect the cylinder head for
flatness. If the cylinder
head is distorted, install a new cylinder head.
Cylinder Bore -Cleaning ...
Toe Adjustment - Rear
1. Loosen the nuts.
To prevent damage to the ball joints, hold the tie-rod ends while
loosening the nuts.
2. Rotate the toe link to the correct toe setting.
3. Tighten the nuts.
To prevent damage to the ball joints, hold the tie-rod ends wh ...
