Ford Mustang (2005-2014) Owners Manual: Changing a bulb
Lamp Assembly Condensation
Exterior lamps are vented to accommodate normal changes in pressure.
Condensation can be a natural by-product of this design. When moist air enters the lamp assembly through the vents, there is a possibility that condensation can occur when the temperature is cold. When normal condensation occurs, a thin film of mist can form on the interior of the lens. The thin mist eventually clears and exits through the vents during normal operation. Clearing time may take as long as 48 hours under dry weather conditions.
These are examples of acceptable condensation:
• Presence of thin mist (no streaks, drip marks or droplets).
• Fine mist covers less than 50% of the lens.
These are examples of unacceptable moisture (usually caused by a lamp water leak):
• Water puddle inside the lamp.
• Large water droplets, drip marks or streaks present on the interior of
the lens.
Take your vehicle to a dealer for service if any of the above conditions of unacceptable moisture are present.
Replacing HID Headlamp Bulbs
The headlamps on your vehicle use a high intensity discharge source.
These lamps operate at a high voltage. When the bulb is burned out, the bulb and starter capsule assembly must be replaced by your authorized dealer.
Replacing Front Parking Lamp/Turn Signal Bulbs
1. Make sure the headlamp control is in the off position and open the
hood.
2. Remove the hex head screws attaching the beauty shield at the top,
forward edge of the engine compartment just aft of the headlamps.
3. Remove the beauty shield to gain access to the front parking lamp and
turn signal assembly.
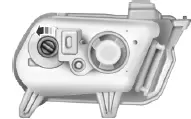
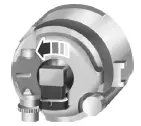
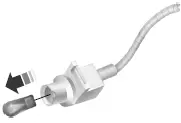
4. Rotate the socket
counterclockwise and remove from
the lamp assembly.
5. Carefully pull the bulb straight out of socket.
Install the new bulb in reverse order.
Replacing Front Sidemarker Bulb
1. Make sure the headlamp control is in the off position.
2. Remove the hex head screws
attaching the underbody forward
aeroshield.
3. Remove the underbody forward
aeroshield to gain access to the
front sidemarker assembly.
4. Rotate the socket counterclockwise and remove from the lamp
assembly.
5. Carefully pull the bulb straight out of socket.
Replacing Fog Lamp Bulbs (V6) (if equipped)
1. Make sure the headlamp control is in the off position and open the hood.
2. Remove the hex head screws
attaching the underbody forward
aeroshield.
3. Remove the underbody forward
aeroshield to gain access to the fog
lamp assembly.
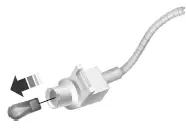
4. Disconnect the electrical
connector from the bulb by pulling
it straight off.
5. Rotate the bulb counterclockwise and remove from the lamp assembly.
Install the new bulb in reverse order.
Replacing Fog Lamp Bulbs (GT)
Your vehicle is equipped with LED fog lamp bulbs. It is designed to last the life of the vehicle. If replacement is required, it is recommended that you see your authorized dealer.
Replacing Tail Lamp/Brake/Rear Turn Signal Lamps
Your vehicle is equipped with LED tail lamp, brake and rear turn signal lamps. It is designed to last the life of the vehicle. If replacement is required, it is recommended that you see your authorized dealer.
Replacing Backup Bulbs
Your vehicle is equipped with LED backup lamps. They are designed to last the life of the vehicle. If replacement is required, it is recommended that you see your authorized dealer.
Replacing Rear Sidemarker Lamp Bulbs
1. Make sure the headlamp switch is in the off position and locate the
sidemarker on the rear bumper fascia.
2. Insert a flathead screwdriver between the rear of the sidemarker lens
and the bumper fascia.
3. Push the screwdriver to the front of the vehicle and then slide it
towards you to pop out the lamp assembly.
4. Carefully pull the bulb straight out of socket.
Install the new bulb in reverse order.
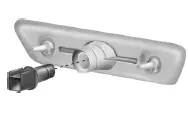
Replacing License Plate Lamp Bulbs
1. Make sure the headlamp switch is in the off position.
2. Remove the 2 screws and the lens
from the license plate lamp assembly.
3. Carefully pull the bulb straight out
from the lamp assembly.
Install the new bulb(s) in reverse order.
 Adjusting the headlamps
The headlamps on your vehicle are properly aimed at the assembly plant.
If your vehicle has been in an accident, an authorized dealer should
check the alignment of your headlamps.
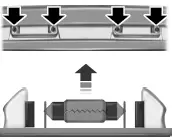
Vertical Aim Adjust ...
 Bulb specification chart
Replacement bulbs are specified in the chart below. Headlamp bulbs
must be marked with an authorized D.O.T. for North America and an E
for Europe to ensure lamp performance, light brightness and patte ...
Other materials:
Release Cable - Clutch
Removal
CAUTION: Whenever the clutch release lever cable (7K553) is
disconnected for any
reason, such as transmission removal, clutch pedal components or clutch
release lever cable
replacement, it is imperative the correct method for installing the clut ...
Parking brake
WARNING: If the parking brake is fully released, but the brake
warning lamp remains illuminated, the brakes may not be
working properly. See your authorized dealer as soon as possible.
WARNING: Always set the parking brake fully and make sure
that the transmis ...
Stability Control
PRINCIPLES OF OPERATION
WARNING: Vehicle modifications involving braking system,
aftermarket roof racks, suspension, steering system, tire
construction and wheel or tire size may change the handling
characteristics of your vehicle and may adversely affect the ...
