Ford Mustang (1999-2004) Service Manual: Compressor Manifold and Tube Assembly - 3.8L
Material
| Item | Specification |
| PAG Refrigerant Compressor Oil (R-134a Systems) F7AZ-19589-DA (Motorcraft YN- 12-C) | WSH-M1C231- B |
Removal and Installation
NOTE: Installation of a new suction accumulator is not required when repairing the air conditioning system except when there is physical evidence of contamination from a failed A/C compressor or damage to the suction accumulator.
1. Recover the refrigerant. For additional information, refer to Section.
2. Unlatch the air breather.
3. Disconnect the mass air flow (MAF) sensor electrical connector.
4. Remove the air cleaner outlet tube.
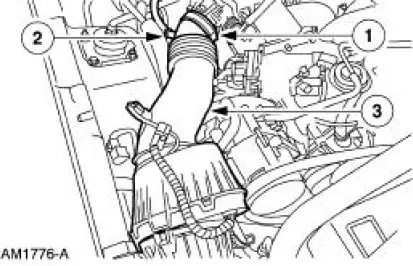
1. Loosen the clamp.
2. Disconnect the crankcase ventilation tube.
3. Remove the air cleaner outlet tube.
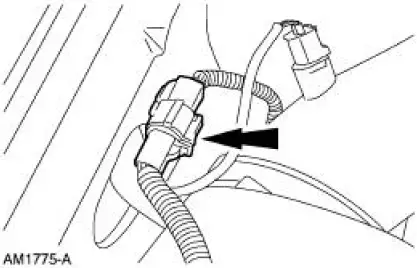
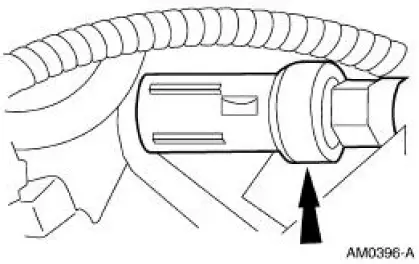
5. Disconnect the refrigerant containment switch (RCS) electrical connector.
6. Remove the RCS.
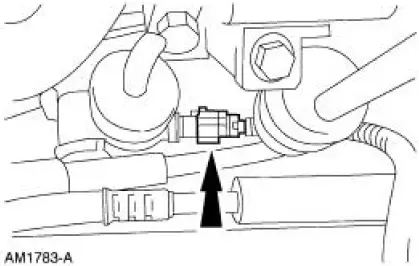
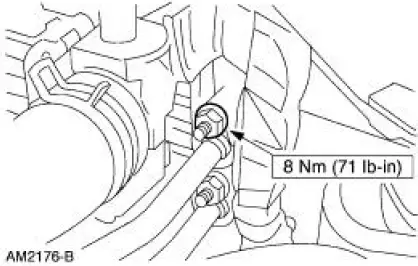
7. Remove the nut and disconnect A/C fitting.
- Discard the O-ring seal.
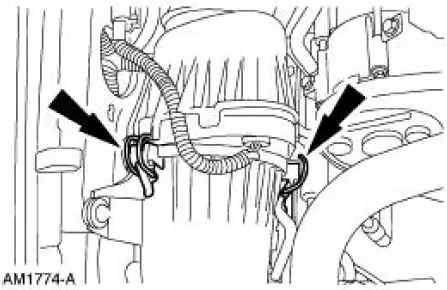
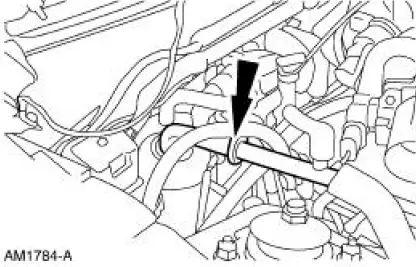
8. Disconnect the spring lock coupling.
- Discard the O-ring seals.
9. Remove the bolt.
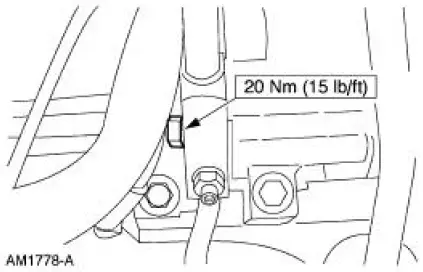
10. Remove the manifold and tube assembly.
- Discard the O-ring seals.
11. To install, reverse the removal procedure.
- Install new O-ring seals lubricated in clean PAG oil.
- Lubricate the refrigerant system with the correct amount of clean PAG oil. For additional information, refer to Section.
12. Evacuate, leak test and charge the refrigerant system. For additional information, refer to Section.
 Condenser Core
Material
Item
Specification
PAG Refrigerant Compressor
Oil (R-134a Systems)
F7AZ-19589-DA (Motorcraft YN-
12-C)
WSH-M1C231-
B
Removal and Installation
NOTE: If an A/C condens ...
 Compressor Manifold and Tube Assembly - 4.6L
Material
Item
Specification
PAG Refrigerant Compressor
Oil (R-134a Systems)
F7AZ-19589-DA (Motorcraft YN-
12-C)
WSH-M1C231-
B
Removal and Installation
NOTE: Installation of a ...
Other materials:
Removal
1. Disconnect the battery ground cable (14301).
2. Remove the air cleaner outlet tube (9B659).
3. Remove the radiator sight shield (8C291).
4. Remove the coolant recovery reservoir (8A080).
1. Disconnect the hose.
2. Remove the bolts.
3. Remo ...
Seats (Diagnosis and Testing)
Refer to Wiring Diagrams Cell 120 , Power Seats for schematic and
connector information.
Refer to Wiring Diagrams Cell 122 , Power Lumbar Seats for schematic and
connector information.
Special Tool(s)
73 III Automotive Meter
105-R0057
In ...
Removal
1. Disconnect the battery ground cable. For additional information, refer
to Section.
2. Drain the engine cooling system. For additional information, refer to
Section .
3. Remove the crankshaft pulley. For additional information, refer to
Crankshaft ...
