Ford Mustang (1999-2004) Service Manual: Exhaust Manifold LH
Special Tool(s)
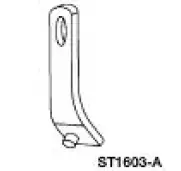 |
Lifting Bracket, Engine 303-D088 (D93P-6001-A2) |
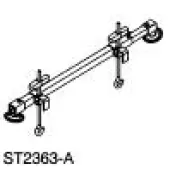 |
Support Bar, Engine 303-290-A |
Removal and Installation
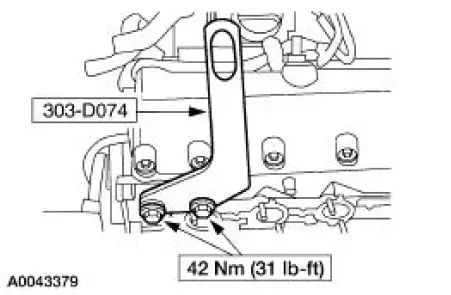
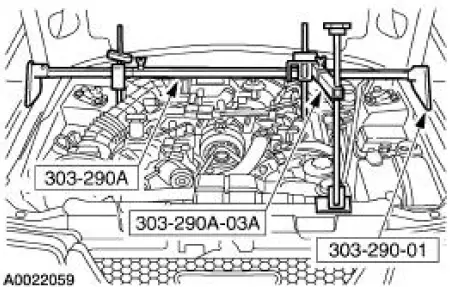
1. Install the special tool.
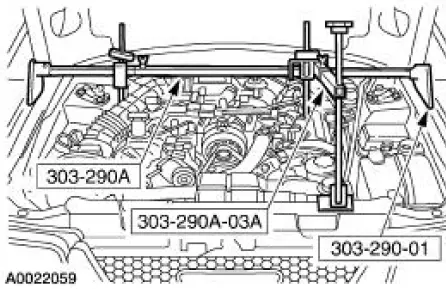
2. Install the special tools.
3. Raise and support the vehicle. For additional information, refer to Section.
4. Remove the LH and RH side engine mount nuts.

5. Lower the vehicle.
6. Using the special tools, raise the engine.
7. Raise the vehicle.
8. Separate the exhaust at the exhaust manifold. For additional information, refer to Section.
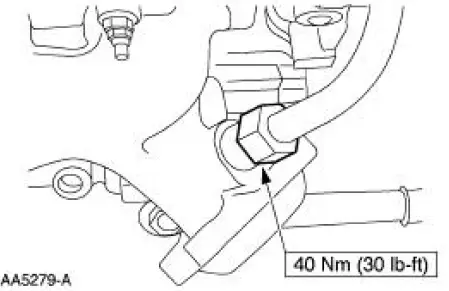
9. Disconnect the exhaust gas recirculation (EGR) tube at the exhaust manifold.
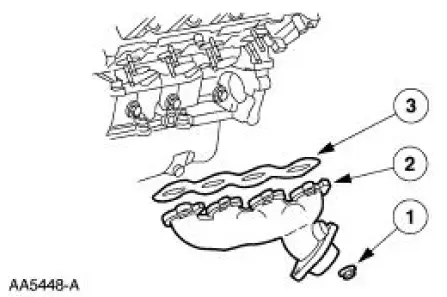
10. Remove the exhaust manifold.
1. Remove the exhaust manifold nuts.
2. Remove the exhaust manifold.
3. Remove the exhaust manifold gasket.
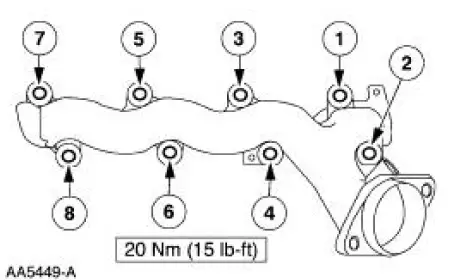
11. To install, reverse the removal procedure.
1. Tighten the exhaust manifold nuts in the sequence shown.
 Exhaust Manifold RH
Special Tool(s)
Lifting Bracket, Engine
303-D088 (D93P-6001-A2)
Support Bar, Engine
303-290-A
Removal and Installation
1. Install the special tool.
2. Install the speci ...
 Oil Filter Adapter
Material
Item
Specification
Super Premium SAE 5W-20
Motor Oil
XO-5W20 QSP or equivalent
WSS-M2C153-
H
Premium Engine Coolant
VC-4A (In Canada CXC-10; In
Oregon VC-5) or ...
Other materials:
Flexplate
Removal and Installation
1. Remove the transmission. For additional information, refer to Section.
2. Remove the six bolts retaining the flexplate to crankshaft, and remove the
flexplate.
3. To install, reverse the removal procedure.
Tighten the bolts in ...
Engine (Disassembly)
Special Tool(s)
Impact Slide Hammer
100-001 (T50T-100-A)
Remover, Crankshaft Vibration
Damper
303-009 (T58P-6316-D)
Holding Tool, Crankshaft
303-448 (T93P-6303-A)
Guides, Connecting Rod
303-442 (T93P- ...
Spring Codes
The spring code portion of the vehicle certification (VC) label identifies
both the front and rear springs.
The first letter/number indicates the front spring code. The second
letter/number indicates the rear
spring code.
Front springs - base part numbe ...
