
Ford Mustang (1999-2004) Service Manual: Front Seat Backrest
Removal and Installation
All vehicles
1. Remove the seat. For additional information, refer to Seat-Front Power in this section.
2. Remove the front seat backrest latch. For additional information, refer to Latch-Front Seat Backrest in this section.
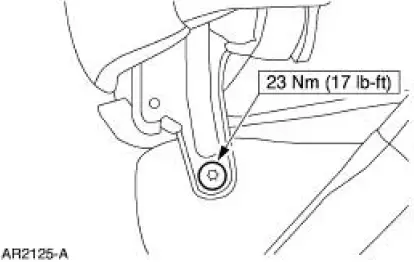
3. Remove the pivot bolt and seat backrest.
Vehicles with standard power lumbar
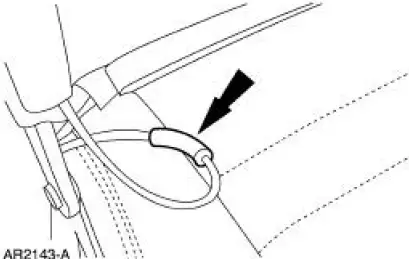
4. NOTE: When installing the seat backrest pivot bolt, make sure the hose is in front of the pivot bolt.
Disconnect the power lumbar air supply hose.
Vehicles with power bolster and lumbar
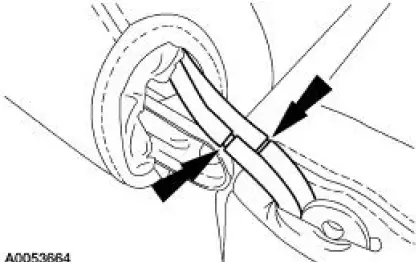
5. NOTE: When installing the seat backrest pivot bolt, make sure the hoses are in front of the pivot bolt.
Disconnect the power lumbar and bolster hoses.
All vehicles
6. To install, reverse the removal procedure.
 Lumbar Control Switch
Removal and Installation
All vehicles
1. Remove the front seat. For additional information, refer to Seat-Front
Power in this section.
Vehicles with standard power lumbar
2. Pull to remove the l ...
 Lumbar Assembly
Removal and Installation
All vehicles
1. Remove the front seat. For additional information, refer to Seat-Front
Power in this section.
2. Release the J-clip.
3. Remove the seat backrest latch ...
Other materials:
Four Wheel Anti-Lock Brake System (4WABS) Hydraulic Control Unit (HCU)
NOTE: This procedure only needs to be performed if the 4-wheel
anti-lock brake (4WABS) hydraulic
control unit (HCU) has been installed new or if the HCU lines have been
opened.
1. Clean all dirt from and remove the brake master cylinder filler cap
...
Spring Lock Coupling
The spring lock coupling is a refrigerant line coupling held together by a
garter spring inside a circular
cage.
When the coupling is connected together, the flared end of the female
fitting slips behind the
garter spring inside the cage of th ...
Actuator Cable - Speed Control
1. Remove the speed control actuator cable end from the throttle body.
1. Lift the speed control cable from the throttle nailhead.
2. Release the speed control cable from the throttle bracket.
2. Remove the speed control cable from the retaining cli ...
