Ford Mustang (1999-2004) Service Manual: Installation
1. Overlay the new rear window glass assembly over the old rear window glass assembly and transpose the markings with a grease pencil.
2. Center the V-notch on the new rear window glass assembly to the center mark on the top of the number four bow.
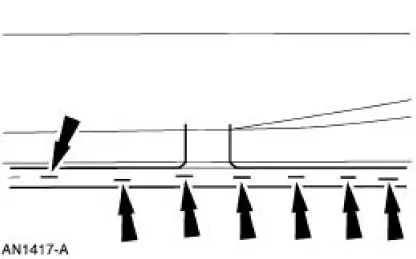
3. Align the rear window glass assembly to the top groove of the number four bow and staple the entire length.
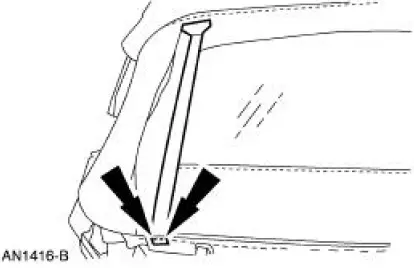
4. Starting at the center of the lower rear tacking strip, align the top edge of the rear belt to the reference line and staple.
5. Repeat the procedure for both rear tacking strip sides.
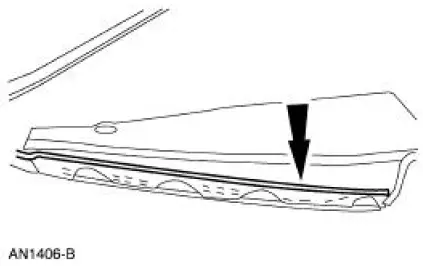
6. Position and staple the water diverter.

7. If necessary, align the elastic straps with the edge of the rear window glass assembly and staple in place.
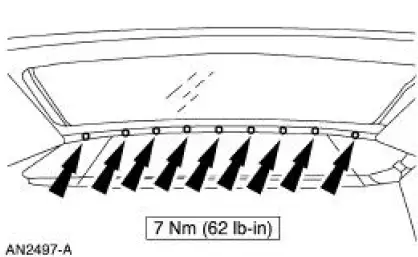
8. Align the center line mark on the cover assembly to the V-notch on the rear window glass assembly and staple the entire length.
9. Align the top edge of the quarter tacking strip to the reference line on the convertible top cover and staple.
10. Install the tacking strips over the body studs.
11. Tighten the tacking strip nuts.
12. Install the well sling.
13. If necessary, connect the rear defroster connectors.
 Removal
1. Remove the rear defrost connectors if necessary.
2. Remove the nuts retaining the well sling and convertible top tacking
strips.
3. Remove the three tacking strips.
4. Mark the top of the ...

Other materials:
Timing Chain
Removal
1. Remove the timing cover. For additional information, refer to Engine
Front Cover in this section.
2. Remove the camshaft position sensor drive gear.
1. Remove the bolt.
2. Remove the camshaft position sensor drive gear.
3. Rotate the ...
Removal
CAUTION: Since the engine is not free-wheeling, if the crankshaft or
the camshafts are
moved in any manner during removal and installation, the crankshaft and the
camshafts must
be re-synchronized.
1. Remove the engine front cover. For additional informatio ...
Mirror - Motor
Removal
1. Push in the upper edge of the mirror glass to the maximum travel.
2. Grasp the bottom of the mirror glass, pull outward and remove the mirror
glass.
3. Remove the mirror motor screws.
4. Disconnect the mirror motor electrical connector.
5. ...
