Ford Mustang (1999-2004) Service Manual: Muffler - 3.8L
Removal and Installation
1. Raise and support the vehicle. For additional information, refer to Section.
2. Support the rear axle with a suitable jack.
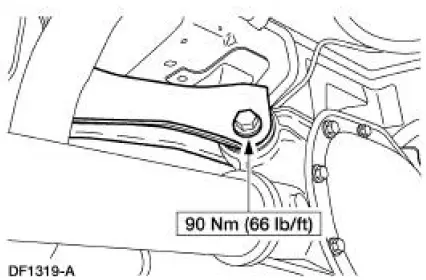
3. Remove the upper arm-to-differential bolt.
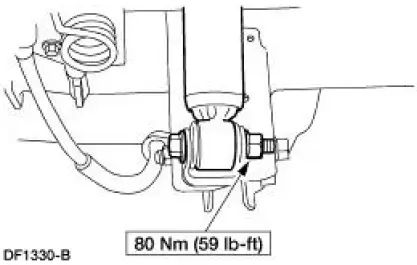
4. Remove the nut and bolt and disconnect the rear shock absorbers (18124) from the axle housing.
- Discard the nut.
5. Lower the rear axle.
6. Remove the dual converter assembly flange nuts.
7. Remove the exhaust pipe assembly (5232) from the rear exhaust hanger insulator (5260).
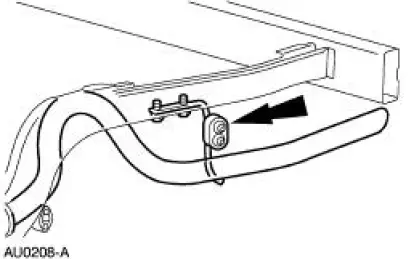
8. Remove the exhaust hanger insulators.
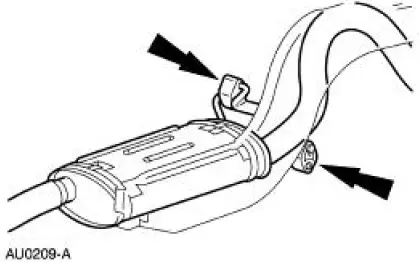
9. Remove the muffler (5230).
10. CAUTION: Do not use oil or grease-based lubricants on insulators as they deteriorate the rubber.
NOTE: A soap-and-water solution will ease installation of the exhaust hanger insulators.
To install, reverse the removal procedure.
 Exhaust System (Diagnosis and Testing)
Symptom Chart
Condition
Possible Sources
Action
Noisy or
leaking
exhaust
Broken or loose
clamps, hangers or
isolators.
Punctures in the muffler
( ...
 Muffler - 4.6L (2V)
Removal and Installation
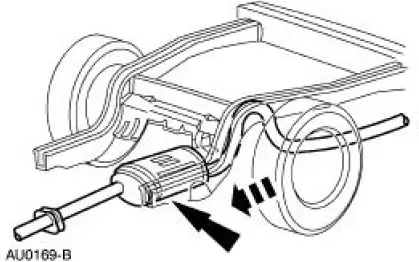
1. Use a jack to support and lower the rear axle.
2. Remove the upper arm-to-differential bolt.
3. Remove the nut and bolt, and disconnect the rear shock absorbers (18124) ...
Other materials:
General information on radio frequencies
This device complies with part 15 of the FCC Rules and with Industry
Canada license-exempt RSS standard(s). Operation is subject to the
following two conditions: (1) This device may not cause harmful
interference, and (2) This device must accept any interferen ...
Inspection and Verification
1. Verify the customer concern by operating the engine to duplicate the
condition.
2. Visually inspect for obvious signs of mechanical damage. Refer to the
following chart.
Visual Inspection Chart
Mechanical
Engine coolant leaks
...
Front Seat Backrest
Removal and Installation
All vehicles
1. Remove the seat. For additional information, refer to Seat-Front Power
in this section.
2. Remove the front seat backrest latch. For additional information, refer
to Latch-Front Seat
Backrest in this section.
...
