
Ford Mustang (1999-2004) Service Manual: Muffler - 4.6L (2V)
Removal and Installation
1. Use a jack to support and lower the rear axle.
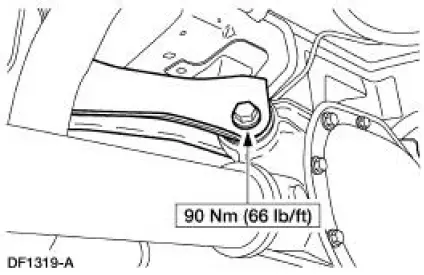
2. Remove the upper arm-to-differential bolt.
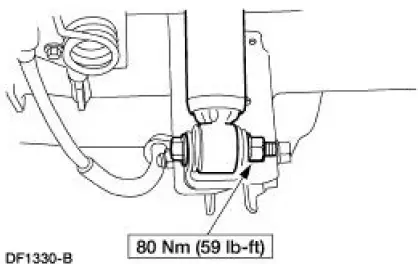
3. Remove the nut and bolt, and disconnect the rear shock absorbers (18124) from the axle housing.
- Discard the nut.
4. Lower the rear axle.
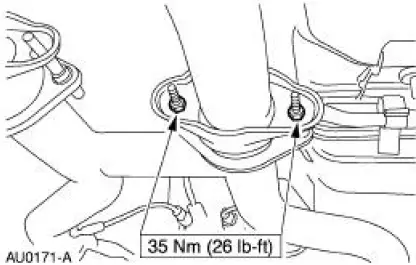
5. Remove the dual converter assembly nuts. (RH shown, LH similar.)
6. Remove the RH intermediate exhaust hanger insulator.
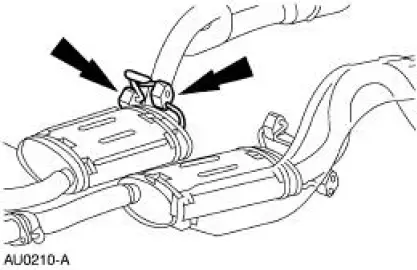
7. Remove the RH muffler (5230) from the rear exhaust hanger insulator (5260).
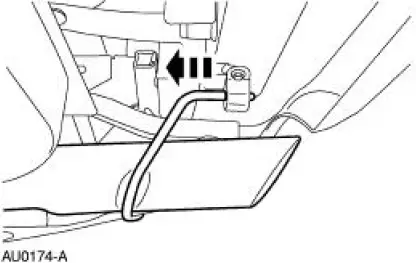
8. Remove the LH muffler (5230) from the rear exhaust hanger insulator (5260).
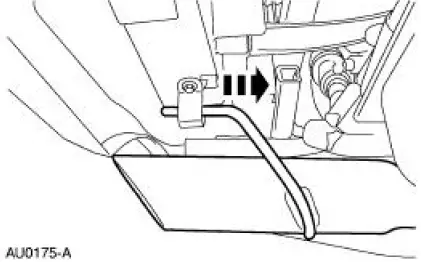
9. Remove the LH intermediate exhaust hanger insulator.
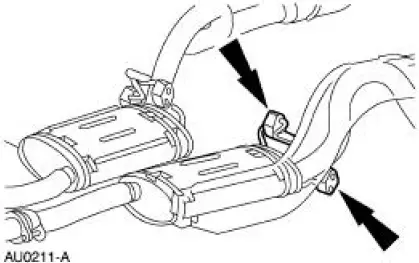
10. Remove the LH and RH mufflers.
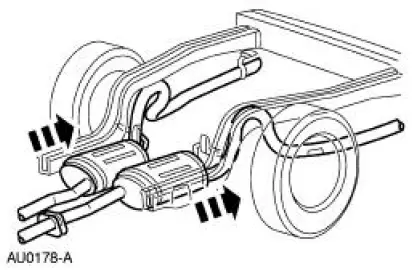
11. CAUTION: Do not use oil or grease-based lubricants on the insulators as they deteriorate the rubber.
NOTE: A soap-and-water solution will ease installation of the exhaust hanger insulators.
To install, reverse the removal procedure.
 Muffler - 3.8L
Removal and Installation
1. Raise and support the vehicle. For additional information, refer to
Section.
2. Support the rear axle with a suitable jack.
3. Remove the upper arm-to-differential bolt. ...
 Muffler - 4.6L (4V)
Removal and Installation
1. Raise and support the vehicle. For additional information, refer to
Section.
2. NOTE: RH side shown, LH side similar.
Remove the dual converter assembly nuts.
3. Remove ...
Other materials:
Valve Seals
Special Tool(s)
Valve Spring Compressor
303-452 (T93P-6565-AR)
Valve Stem Seal Replacer
303-383 (T91P-6571-A)
Compressor, Valve Spring
(Exhaust)
303-567 (T97P- 6565-AH)
Material
Item
Specification
Supe ...
Power seats
WARNING: Never adjust the driver’s seat or seat back when the
vehicle is moving.
WARNING: Before returning the seat back to its original
position, make sure that cargo or any objects are not trapped
behind the seat back.
The power seat control is located
on ...
Air Intake Scoop
Removal and Installation
1. Disconnect the air intake scoop outlet from the air cleaner.
2. Disconnect the air intake scoop water drain hoses.
3. Remove the air intake scoop from the air intake scoop bracket.
Remove the two air intake scoop bolts.
L ...
